How to put a custom texture into an existing non-default wearable?
 raphaelmartines
Posts: 59
raphaelmartines
Posts: 59
Hello,
I want to change a black texture into a camouflage one. But how can I do this? There is only 1 file in the content folder.
See the image attached.
Thank you for your help!
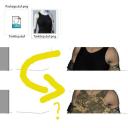
Untitled-1.jpg
500 x 500 - 85K
Daz 3D is part of 
Connect
DAZ Productions, Inc.
7533 S Center View Ct #4664
West Jordan, UT 84084
Licensing Agreement | Terms of Service | Privacy Policy | EULA
© 2025 Daz Productions Inc. All Rights Reserved.
Comments
Hi and wellcome to the forum.
It isn't that complicated, I see you know how to work with an image editor and there is nothing else needed to do that.
1. load the Tanktop into the DazStudio scene
2. select the Tanktop and go to the Surfaces pane and change it tho Edit Mode
3. select the Diffuse channel click on the box in front of this channel and select "Browse to File Location", your file browser should open and show some folder path with .../Runtime/Textures/...
4. in the file browser you should see the default texture file propably a JPG, you can now open with your image editor
5. edit the texture by adding the camouflage image pattern on top, you just need to fill the space in the texture that is actualy used by the tanktop
6. save the camouflage JPG texture in the same folder with another name
7. come back to DazStudio and in the Surfaces pane click again on the front box of the Diffuse channel, this time choose Browse.. and select to load the edited camouflage texture
8. the camouflage texture should now show up on the tanktop in the viewport
9. select the tanktop open the Content Library pane, browse to the desired library folder and save a Material Preset to use it without the need of changing the texture in Surface pane again
I was guessing there already is a black texture applied to the tanktop but maybe no texture is used at all. There is this thing called UV layout that determins the location of the 2D image on the 3D mesh. You may want to start with a "texture template" that is provided with the tanktop. If no texture template is available you can use this script mcjTemplate that generates you one.
There are basically two ways that you could do it.
The quickest and easiest way would be to use a seamless, tileable camouflage texture map in the Diffuse channel if using 3Delight, or the or Base colour channel if using Iray, found under the Surfaces tab with the tanktop selected in the viewport. You would then possibly need to adjust the vertical and horizontal tiling until you achieved your desired results.
The second option is to use a texture template for the tanktop, if one is available, and apply your camouflage material to that in an image-editing program like photoshop. You would then use the new texture map in either the diffuse or base colour channels as described above. If there is no texture template available for the item, you could use another existing texture map for the garment and edit that in your image editor, saving the result as a new file. If you have neither, then you would need to create your own template using UV mapping software.
Syrus_Dante
SixDs
Thank you so much. I followed the two options. It worked very well!!!