Project: GPU Expansion Enclosure
 areg5
Posts: 617
areg5
Posts: 617
When I was thinking of building a dual Xeon workstation, one of the comments was “why don’t you just build a box for the GPU’s? Admittedly I didn’t know such a thing existed or could exist. But I did some research, and the Cubix Expander does just that, at a price of around $3700.

It looked like a pretty simple setup from the images I saw, but it seemed really overpriced. So I found one for around $250…

...but it was a small metal box with virtually no ventilation and a small power supply. The set up for these boxes seemed pretty simple, so I decided to build on myself.
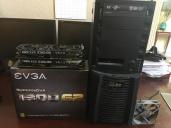
Fact of the matter is that I have a lot of spare parts in my garage: numrerous cases, psu’s, substantial video cards, fans, wires etc. I decided to use a full tower I had lying around. These are the parts I already had:

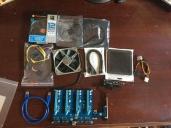
I needed more, though. This is what I bought. The total for all of this stuff was probably under $100:

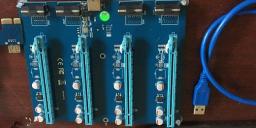
The key element is this:

It took me a while to find one since I didn’t know what it was called. This is a PCI-E 1X to 4Port PCI-E 16X Slot Riser External Expansion Adapter Card Cable, and I got one on Ebay for $35. Actually, these are well known in the world of Bitcoin mining, which I know nothing about. The larger board goes into the enclosure. The PCIe card goes into the host computer. They are connected by a USB 3.0 cable.
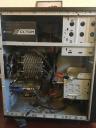
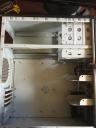
The case had a lot of outdated hardware in it, most of which I wouldn’t use:

So I took out everything:

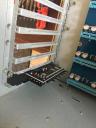
The first thing I had to do was mount the riser. I tried drilling into the case and securing it but it was slightly off. So I settled for laying it in there, and it’s held in place by the cards.

Then I set up the fans. I got this fan controller I think on Amazon, and you can control a lot of fans with it.

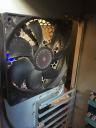
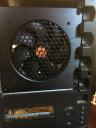
The case actually had a decent fan in the rear that I kept for exhaust. I then mounted two big fans in the front:
 rear fan
  upper front fan
  lower front and door fans
  door fan
:
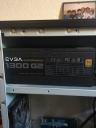
Then I installed the PSU. There is a way to jump ot so it runs without being attached to a motherboard (the paper clip test), but luckily EVGA included a nice cap for the MB plug that does the same thing.

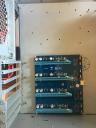
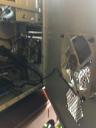
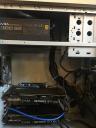
Then I installed the video cards. This is the finished build:


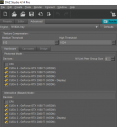
Unfortunately, the USB cable that came with the riser is only about a foot long, so I ordered an extension. But I was able to test it. I did have to reinstall the Nvidia driver:

The result: A scene that I rendered in 14.5 minutes with three 2080 Ti’s now renders in just over 10 minutes. It may not seem like a dramatic difference, but if I was doing a scene that took an hour before, it should render now in about 45 minutes. As for the Sickleyield Benchmark, it did that in 20 seconds.
As for the future, the 1080 Ti’s will get replaced by 3090’s. And that is how I spent New Year's Day!


Daz 3D is part of 
Connect
DAZ Productions, Inc.
7533 S Center View Ct #4664
West Jordan, UT 84084
Licensing Agreement | Terms of Service | Privacy Policy | EULA
© 2025 Daz Productions Inc. All Rights Reserved.
Comments
Epic. That's awesome. Good work there! Sounds like an excellent way to spend New Years to me!
Might have to try this myself for my two 2080s once/if the 30 series ever becomes available outside of scalpers.
ha nice job!
Yesterday, I built mum a new media centre, and today I installed a new 3090 in my machine, with the existing 980ti now becoming my display card; previously i used a 970 for that.
Good luck with that! I got a 3090 a few weeks ago on Ebay for around 1800. which wasn't marked up too much. But those are still routinely going for over 2000.
Thanks! The 3090 is a great card. I have one in my set up rig and that with a 1080 Ti is as fast as the three 2080 Ti's. I too have a 980 Ti, currnetly the only one of my many cards that is not being used. But I figure the VRAM is to small to bother putting it into the enclosure.
I have so many questions... The first one is...
Since the power supply has no motherboard to connect to... how do you wire up the case's on / off button?
Or does the PCI-E 1X to 4Port PCI-E 16X Slot Riser External Expansion Adapter Card Cable have this functionality on it?
Like you, I have a bunch of hardware laying around I could use and I have been looking at the 3090, but really don't have the room in my current case. Being able to shift the GPU from one PC to another would be very handy.
heh. The power supply issue is actually very easy. A quick online search shows how to do it. You basically bend a piece of paper clip into a U shape and you can jump it. This particular psu actually came with this little cap they call a tester I think that I hadn't noticed before that does it.
I don't use any of the case controls. I power on and off at the psu. Really the only external control is the knob for the fan controller.
the riser has those old style four prong connectors for power. It came with 2 sata power to four prong adapters, and I had a few of those laying around.
really, the main issue with the parts for the build is the riser. I found a few of them, and ordered a few of them. They're not expensive which is good. They all come from China, which is not so good. Anywhere you order will then give you a 6 week delivery date.
As for the 3090, it's a great card but it is big. My rigs are all full tower setups to accommodate these big cards. I have been able to run a three card rig for a while. The issue is always cooling. Two of my 2080 ti's are hybrids. The pcie bay is very crowded with multiple cards, and there is no way to avoid having at least two of the cards almost touch. I usually wedge a bit of paper or rubber between them, and I have this vertical support post. I also had a card mounted vertically for a while.
Yeah, they make adaptors for PSUs for when you build custom loops, basically just the 24 pin clip with a wire bridging the two pins, just like the paperclip trick you mentioned @areg5
My current rig is less than a year old, has a GeForce RTX 2080 in it, and still has a couple of years warranty on it. So I am not enthusastic about modding it or replacing it.
However, the external option is really appealing in that future rigs could continue to use the GPU. And I am sure if I do a bit of research, I might be able to find an adapter to use it with a laptop too.
turns out the external gpu case for a laptop has been around for a while. My issue with the ones I found was that it would only hold one card. The basic idea I used is more in line with the Bitcoin rigs. I've seen images of server chassis filled with gpus. Mine is like a compromise between those two. I'm fairly certain I can squeeze in a third card, and I would likely put one of my hybrids in there, remove the exhaust fan and put the hybrid cooler there.
Well, I got the USB 3.0 extension cord to connect the enclosure to the render server. Bit of an issue: I connected it, and the enclosure cards weren't seen. Tried reloading the driver which didn't work. Then I figured it might be a bad cord... and it was! Luckily, they sent me two of them and the second one works great. I did a bit of housekeeping and secured the Riser to the chassis with screws, and added a post so the upper dard doesn't sag. I moved the lower card to the lowest slot. I batch rendered all day yesterday. The temps in the enclosure are really good. One of the cards gets into the low 70's, the other stays in the 60's.