Mirror/Clone across X Axis
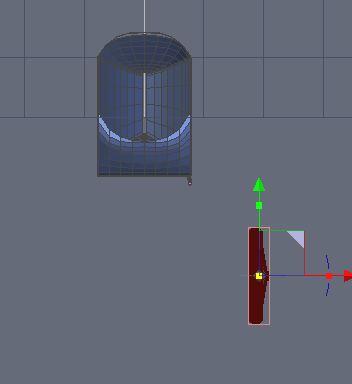
I have a wheel which I wish to mirror across the X axis so it is exactly the same distance on the other side of 0,0,0.
The symmetry tool doesn't seem to have any options to specify a distance.
How would I go about this ?


Wheel_Mirror.JPG
352 x 384 - 15K


Comments
Your original object's 3D coordinates are listed in the properties box on the "position" line. Note the X value.
Then X-mirror your object and type in the X value of the original object, but reverse the sign.
That will give you 2 mirrored objects centered on the Y axis.
Just tried it, works perfectly, Thanks for the tip.
Easy when you know how !
Hello,
By default, the "Symmetry" tool works on the bounded box of the selected object.(when moving the cursor in the main view_port over the object, the blue symmetry plane just flips to each side/main plane of that selected object).
To have a distance between the symmetry, you need to change the options.
After selecting your object and enabling the symmetry tool, look at the top right properties window. You will see 2 icons, the left icon (which is the bounded box symmetry) is selected by default. If you click on the right hand side icon, that enables the "Center of symmetry". Once that is enable, move your mouse cursor back into the main view_port, the blue symmetry plane will now show with the rulers(distance snapping) activated and will move away from the selected object (the direction/axis it moves along will depend on current view angle). The distance to center of symmetry is shown in the right hand side properties and changes as you move you mouse in main view_port window. If you need the center of symmetry to be set at a specific point, hold down the "shift" key which enables snapping, you can then snap the symmetry center to any snapping point.
Thanks for the explanation steve, never realized you could do this kind of thing. I just tried it and its a bit complicated to get it to work.
I am finding it quickest to copy the X value of the original item, then mirror on as per normal with the bounding box option, then paste the X coords with a negative value into the cloned item. Keeps things pretty simple.
I'll keep you suggestion in mind if I have some tricky mirror to do.
But the simplest method is to ensure that the to be processed edge/vert's and the mesh centre line of the other two axis align exactly on the X-0 Y-0 Z-0 so that when you pass your pointer over the edge to position the blue plane, there is no need to take note of the xyz stats' nor input them negatively, (but keep a beady eye on them), because all are at or should be, zero and hence after applying symmetry ready to average weld. :)
This is one of hexagon's famously frustrating hair pullers. :)
The "center of symmetry" option would be an outstanding option except that its knees are broken by the lack of precision. There's no way of assuring an X-value of 0 while mirroring across the Y-axis. Hexagon, much as I love it, is about the only 3D app on the planet that lacks this no-brainer ability. It works okay as an eyeball-estimation tool, but once the mirrored item is placed you still end up having to tweak its location by inputting the X value.
Maybe it'll get fixed in Ver. 3... :)
Yeh, I tried it and found it not very controllable and couldn't seem to tab to the X value to input 0 while the plane was floating around on screen. It would be nice if it snapped to X0 automatically.
Certainly entering a -X value after the mirror is pretty easy though.
Of course it will. :roll:
Ah! a whole wheel, I thought it was just half a wheel. :-S
This doesn't work. I cannot get it to do squat. I need the cabin on the right to be an exact reverse copy of the one on the left.
The main thing to remember is to change the Plus/Minus value in the Properties tab.
https://www.youtube.com/watch?v=IuLw2d8USfo&feature=youtu.be