"Noise bump" using shader builder or mixer?
 V3Digitimes
Posts: 3,216
Hello,
I'm not a total beginner in 3D, but a total beginner for DAZ materials creation.
I have a problem understanding DAZ shaders.
I'm trying to add a "noise type" bump to one of my materials.
It was very easy to to on poser, I just had to grab a link from "noise mathematical node" to "the bump node" and adjust the parameters. I thought it was going easy too on DAZ. But it is not.
During the last few hours, I discovered the existence of "shader mixers" and "shader builders". So I watched daz official tutorials about mixers (presentation and number 1 out of 2)... But I still cannot find the answer. What I have done is creating a noise image on photoshop and used it as a texture map for my material's bump, but I'm not satisfied with this solution.
So, does anyone know how to create a bump relying on a mathematical "noise"? Or does anyone have a link to a tutorial (free or not) which will explain me how to do it?
Thanks in advance for your help,
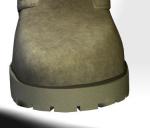
PS : if it can help you to see what I'm looking for, here is the result I would like to have on DAZ (the next image comes from poser). It is concerning the material for the sole, I would like to have this kind of bump :


Comments
Do you know how to set up Shader Mixer for displacement? I think that is covered in the two tutorials (there is a bug in DS4.0 that can create some confusion.)
The Shader Mixer Noise-brick (under textures) might not be the best source for this, try "Spots" or "Fractal Sum" (also under textures). Or maybe both one for bump and the other for displacement. Holler if you need a recipe to get going.
Cheers! Oom
Thank you for your answer.
I know absolutely nothing on the shader builder or mixer, since I always used "basic" materials.
Now I'm going to re-watch the tutorials, but this time I see better what I'm looking for! I think I'll manage to do it now.
What didn't you like about the results you got using the noise jpg in the bump channel; in DS the bump needs to be set much higher than in poser. You may also need to adjust the tiling to get a better result. Thats using the default shaders.
In DS black is negative and white positive, I think it might work differently in poser.
I was in a bit of a hurry last time. Here is one that I find useful. It is the Displacement root brick out on the right (that 800pixel limit is no fun),
The Mix brick is not necessary you can do about the same things with the max and min settings I just like the control it gives.
The first render is the shader "as is".
The second I changed the Mix bricks layer setting to 1, it inverts the bump.
The third is the Spot brick straight in to the DS Default Displacement brick.
Hope this will help some. Play with the settings and have fun.
Cheers! Oom
Ouch!!!!
I am terribly sorry it took me six month to answer!
Better late than never :
I wanted to tell you immediately a HUGE THANK YOU, for taking time to answer and for this so clear answer... Then I forgot...During 6 month... What a shame!
Your answer is really clear and well presented for people like me. It is so helpful!
Thanks to this little example you gave I learned a lot and see much more clear in how shaders work now, before your post I was lost, now, it's more clear even if it remains difficult.
Thanks again!
hi,
Isn't something like that could be use to texture skin ?