Micro-Geometry Cloth Shaders for Iray

Cloth textures are troublesome things, as they simultaneously operate at two different scales. The macro level might include stitches, patterned prints, and cut-out sections, while the micro level reflects the actual geometry of the fibers which make up the weave. The macro level seldom allows for tiling, since it deals with unique features. If you try to include the micro level in those untiled textures, they are either blurred out of existence, or the textures become so large that they consume unreasonable amounts of memory and disk space. Luckily, there is no actual requirement that all elements of a texture use the same tiling strategy, and aggressive tiling of micro-textures allows us to directly simulate millions of stitches without any loss of detail or memory penalty.
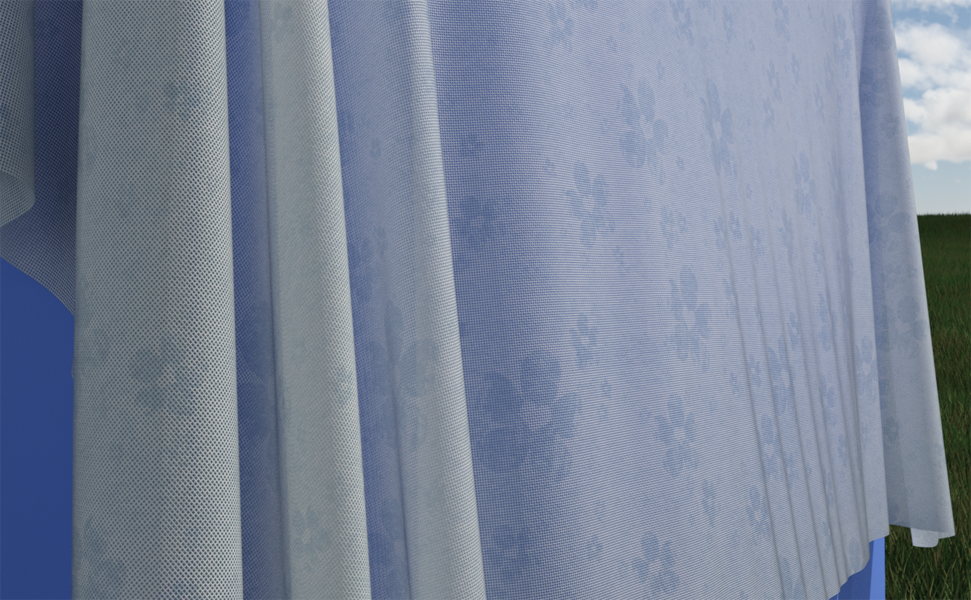
The Micro-Geometry Cloth Shaders (or MGCS, for short) use multiple tiling levels to directly address the macro/micro dilemma. They directly model the stitch structure with bump maps for the threads and transparency, translucency, and darkening options for the holes between the threads. The result is that your close-ups reflect the full cloth details, and distance renders gain emergent glossy and translucence properties. (For example, basic glossy settings can yield “dual lobe specular” effects and satin “sheen”, and your sheer drapes will both transmit light and catch shadows realistically.)
A variety of shaders provide different densities of woven and knit cloth, and can easily be applied to existing models. When applied “on top of” a Daz Default, Iray uber, or omUberSurface shader, they will inherit basic macro-level diffuse, bump, displacement, and (maybe) glossy properties for the original shader, and be ready to render.
You may, however, wish to make slight adjustments to the MGCS-specific settings:
-
The Micro-Geometry Horizontal/Vertical Tiles settings allow you to adjust the scale of the micro-geometry to reflect the scale of your UVs or the fineness of the fabric.
-
By adjusting the strength of the Micro-Geometry Bump setting, you can tweak the “prominence” of the stitches. The default level of 5 provides the effect of fully rounded threads, while levels of 1-3 will simulate more subtle “flattened” threads.
-
The strength setting in Micro-Geometry Hole Density allows you to simultaneously reduce the effect of all other “Holes” sliders, but you will typically want to leave it at the default value of 1 and use those sliders directly.
-
By replacing the image maps in Micro-Geometry Bump and Micro-Geometry Hole Density, you can simulate different sorts of weaves. You will usually wish to change these in parallel: the bump map provides the heights of the threads, whereas the holes map indicates the areas in which there are no threads.
-
The Micro-Geometry Hole Transparency setting reflects the degree to which light travels through the holes without obstruction. If the cloth has clean threads without “fuzziness”, this would typically be 1.
-
The Micro-Geometry Hole Translucency setting reflects the degree to which “fuzz” between the holes allows blurred light to shine through the holes. Unless the cloth is very thick, you’d typically see some degree (i.e. 0.25) of translucency. Transparency will reduce the effects of the translucency slider.
-
The Micro-Geometry Hole Darkness slider causes the (non-transparent, non-translucent portions of the) holes to be darkened to reflect the fact that there is nothing to reflect light. It provides an alternative to the above settings if you don’t want to be bothered with light shining through, and can usually be left at its default of 1.
-
If Transparency, Translucency, and Darkness are all set to zero, the holes will be rendered as flat areas with the same color as the threads. This tends not to look like realistic cloth, but can be used for some interesting textured plastic or vinyl effects.
License Terms
This product is copyrighted, and may not be redistributed in packaged form without permission. However, you may freely use it in both commercial and non-commercial renders. Credit is not required but is encouraged.
Further, you may incorporate individual shaders (including the tiled “bump” and “hole” images) into your own (commercial on non-commercial) distributions so long as you include a pointer to the original distribution.
Version History
-
Version 1: Initial release, with 4 plain woven, 2 knit, and 1 sheer shader.


Daz 3D is part of 
Connect
DAZ Productions, Inc.
7533 S Center View Ct #4664
West Jordan, UT 84084
Licensing Agreement | Terms of Service | Privacy Policy | EULA
© 2025 Daz Productions Inc. All Rights Reserved.
Comments
Thank you, thank you, thank you.
Thank you again.
Wow! This looks amazing.
Very cool! Thank you very much!:)
Super! Thanks a lot!
Thank you for these.
for me it just makes things invisible in render
Same for me. I haven't found any slider setting that changes that. The clothing I applied the shader preset to, turns invisible.
I'm sorry that folks are having problems with the shaders. I'm doing everything I can to try to replicate the problem, but haven't had any luck yet.
I'd like to take a survey to help track things down:
1) Have you successfully used the shaders, or have you had the same "Emperor's New Shader" disappearing garment problem?
2) What wardrobe item have you had success/failure with?
3) What OS, graphics card, and DAZ Studio version are you using?
I apologize for asking for extra work from y'all, but I really want to provide the best possible 3D resources, and these failures are disconcerting.
1) I tried a 10 meter primitive sphere in a scene by itself with HDRI lighting and got a visible texture, so it worked there.
2) I tried the shader on The Maxi Dress for Genesis 3 Female(s). It was fit to Mika 7. The scene uses BOSS Pro Lights and render setting is Scene Only. When I applied the shader, the Texture Shader preview shows the dress, but in Iray preview and in Iray render, the dress turned invisible.
I deleted the Maxi Dress and fit Hinata Dress to Mika 7. When I applied the shader, the Texture Shader preview shows the dress, but in Iray preview and in Iray render, the dress turned invisible. I deleted the BOSS Pro lights and rendered with just the default ruins HDRI (same one used in sphere render) and the dress is still invisible. Then I saved the scene, closed Daz Studio, reopened Daz Studio, reoladed the file and rendered. Now the Hinata Dress renders. It is very shiny and somewhat translucent. I guess that is the effect of the micro geometry holes showing up.
3) Windows 10 64 bit Creators, GTX 980ti, DS 4.10.0.123 latest released version
I have had similar problems with esha's Procedural Gem shaders sometimes appearing and sometimes becoming invisible.
i did the testing with a new primitive/plane in iray rendering sun/sky only newest daz win7 :
invisible in render
Thanks, @barbult and @ruphuss, for the feedback. It's given me some good stuff to think about and try. Unfortunately, the result is the same. I've tried multiple lighting combinations, models, etc. and still can't make it fail.
However, I have a theory about what might be going on, though it'll probably sound like a cop-out. It seems possible that you have a bad or outdated graphics card driver that isn't quite compatible with the latest Iray versions. This would explain why the one scene works differently after the software is restarted, and could explain why it's more problematic when you use a lighting rig with large numbers of complex lights. The easiest way to test this would be to try running Iray in CPU-only mode. It'll run ten times slower, of course, but it won't be subject to the same driver issues. The more hardcore way to test it, of course, would be to preemptively install the latest graphics drivers. Even if it doesn't help, it's probably still a good thing to do.
I hope this helps.
I am running the latest driver 391.24.
Ah well, @barbult, I guess it was too easy a solution to be true. I'm all out of theories for now, but I'll keep thinking about it.
I'd still love to hear from other folks about whether the shaders work on their systems, so I can narrow down how widespread the problem is and maybe figure out how to replicate it.
This is a wonderful idea!
Here is a success. This is Edward 8 with the shirt from Long Coat. I applied the Loose Knit. It shows up fine in Iray preview and in the render. Lighting is an HDRI. You can see that the micro geometry did not mess up the tiling of the main texture, as advertised.
Thanks for sharing, @barbult. Looks good, and it's definitely a relief that it worked for you with at least one lighting setup. And thanks yet again for working to help me figure things out.
I found some unexpected troubles. When I applied the micro geometry shader preset to a garment with a different shader already applied, it reset the Horizontal and Vertical Tiles to 1, deleted the Top Coat channels and Metallic Flakes channels entirely. (It also went invisible, but we are used to that now. It is still a mystery. I don't think it has to do with lighting. If I save and reload the scene, the invisible becomes visible.)
Thank you for this.
tl;dr: I had to pick and choose features in order to overcome limitations in the Shader Mixer.
@barbult: Two of these behaviors are to be expected, and the third isn't surprising.They all arise from limitations of the DS Shader Mixer.
Note: if any DAZ engineer or knowledgable user can tell me how to overcome the limitations described above, I would be quite grateful. I'm always seeking to increase my knowledge and capabilities.
This is great! Thank you :)