iRay Rendering - i7 8700k & GTX1080TI 11GB
 Dan21
Posts: 10
Dan21
Posts: 10
Hello,
I've just built a new system running an i7 8700k CPU, a GTX 18080ti 11GB GPU with 16GB of DDR4 RAM.
I've read a lot that rendering should be done without CPU ticked as it bottlenecks the GPU, would this be the case with my setup?
I'm still experiencing really long render times (10+ hours) on some scenes (whereas others are 5minutes).
I render only still, non-animated images, and the room is very well lit. I have set the quality to 2.0, with 98% coverage and turned off a time and set the frames to 15000.
I do not have firefly filtering enabled.
How could I best increase my render times?
Daz 3D is part of 
Connect
DAZ Productions, Inc.
7533 S Center View Ct #4664
West Jordan, UT 84084
Licensing Agreement | Terms of Service | Privacy Policy | EULA
© 2025 Daz Productions Inc. All Rights Reserved.
Comments
I tend not to render with CPU ticked - I find it too unreliable as on some scenes it does speed things up and on others it increases the render time. Generally with CPU+GPU I get about 20 seconds off the render time on a 5 minute render, so not really worth it.
10+ hours does seem long on your system, but it all depends on how much you have in the scene, the render settings and more importantly, what size you are rendering to. As there are a lot of render settings that could be affecting render time, I would advise going to the Render Settings pane and click Defaults. Then set your quality, converged ratio and max samples to the values that you mentioned in your post - at least that eliminates any other settings that may have been set higher than you need.
There is a benchtest thread in the Commons. From the link below, the second post down by Outrider42 contains a link to the benchtest scene and instructions on how to run it. That would give you a comparison of your system with similar ones and at least eliminate any hardware issues.
https://www.daz3d.com/forums/discussion/53771/iray-starter-scene-post-your-benchmarks/p27
>I'm still experiencing really long render times (10+ hours) on some scenes (whereas others are 5minutes).
Any more info? What was in the 10+ hour scene? What lighting?
>I have set the quality to 2.0, with 98% coverage and turned off a time and set the frames to 15000
Turn off quality, turn off convergence. It will confuse you more than help. Keep an eye on your render window to determine at what point it stops improving in quality, because I've rendered some fat scenes but 15000 iterations is so far beyond what I've ever needed to get a perfect image it's insane. On 1070 if my render takes over an hour I get upset because I messed something up. If you're importing multiple badly optimized (as many are) hair props and breaking the 11gig on your card it will revert to CPU rendering regardless of whether you ticked it or not. If you check the little Rendering Image window it will make calls to your CPU if that's the case (or check help -> troubleshooting -> log file).
Not sure why you'd turn off firefly filtering I never noticed a difference in render speed.
@Dan21
Go with @thebiggydiggy advice. Your quality and convergence settings will increase your render time by at least a factor of four and probably won't improve your visual quality. It is rare to really need more than 5000 iterations, even for a 4000x6000 scene
Oh, spring for another 16 GB RAM when you can. It will never hurt your overall operations.
I'm really not sure what the setting actually mean, I'm pretty new.
I tried turning it off though, and left this to run until it stopped itself at 15000, took an hour and a half. What should I be doing to make that quicker?
That's nice and dark. I assume the lights I'm seeing in the image are the only lighting in the scene? Apart from another low-to-the-ground light off to the bottom right?
That's not a whole lot of light, which makes sense from your perspective because it's supposed to be dark. iRay is not so pleased. Spherical lighting, that close to the ground, and not near what I'd call bright (despite it being pretty much white on your render), is going to be some brutal computation. The vertical rim bottom left of the closest light is getting pretty much 0 direct light, which means iray has to find the color information for the pixels purely from global illumination.
I used to use nearly exclusively flat planes for lighting, because while their light is unnatural (all going at one angle which tends to wreck shadows), they're cheap resource-wise. Here is a video I googled that explains in some detail.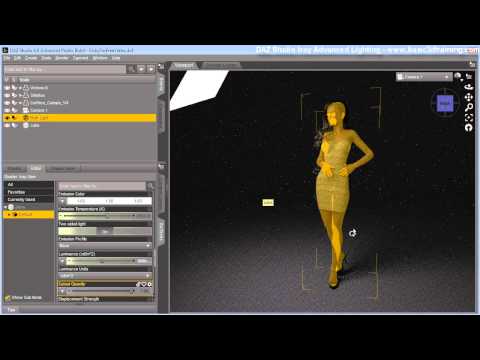
If you can strategically place these around your scene (out of sight), iray gets more ammo to fire at troublesome areas. Without knowing the exact details of the light you have I can't say what you'd have to place where, that'll be up to you to experiment with.
My go-to for scenes I want dark is to remove off-screen geometry (meaning take out walls and ceilings that aren't visible) apply a low-contrast HDRI and completely saturate the scene with light. Then take the beauty pass into photoshop and get my darkness back there. I'm not sure how you'd go about getting that darkness without noise otherwise, but maybe someone else knows more.