How do you get Older hair to fit Genesis 1
 Xade
Posts: 236
Xade
Posts: 236
I'm trying to get articulated hair to fit genesis one with the bones. I've had some luck with a few v4 hair but this hair for A3 has got me stumped. I've loaded an unparented version converted it to weight mapping then transferred with suprising results. Please help me make this hair work. I really need to learn how to get hair to behave with Genesis.

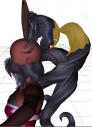
Alexis Hair 1.png
601 x 832 - 567K
Post edited by Xade on
Daz 3D is part of 
Connect
DAZ Productions, Inc.
7533 S Center View Ct #4664
West Jordan, UT 84084
Licensing Agreement | Terms of Service | Privacy Policy | EULA
© 2025 Daz Productions Inc. All Rights Reserved.
Comments
Load the hair without having G1 selected. Then move the hair into Position and use the shape Morphs and scaling to make the cap fit the head. Then, parent - not! fit - the hair to the head of G1. This way, you'll also Keep whatever bones for movement are in the hair. I don't think that the conversion works, unless you go to the bone editor and mess around with the bones and weightmap afterwards. Basically a new rigging.
I was looking for something other than that. The hair doesnt have any fitting morphs but I can adjust that in hexagon or Blender.
Many of the older hair figures were not conforming figures like clothing (cr2 in poser), instead they were props (pp2 in poser) with morphs for fitting, movement, etc. which is why they have to be parented.
this is a conforming hair, with bones for the ponytail and bangs. A very well made one, which is why I want to try and update it for Genesis 1 but if I can't do it I can't do it. Id love to update it for G1 while keeping all the bones and weight painting. But I guess I'll have to treat it as a prop hair. At least it follows the head movement and I can easily select the bones.
Does anyone know how I can manually convert it to G1? it would be a nice learning challenge for me.
Ok so the hair is for A3 which is the problem, there is no A3 autofit clone for genesis to transfer without purchasing an additional product. You will need https://www.daz3d.com/a3-and-h3-shapes-for-genesis to get the clones. You might even want to consider the bundle for all gen3 characters.
I have all the iconic characters for genesis, 3 and 4, . I bought them on sale, since I planned on doing this 10 years ago but Daz ate all my save files. Then I lost everything in a system crash and forgot about Daz. Now im finally getting back with a brand new story and got brand new problems.
Hi, I did a quick test with the oldest confoming hair in Poser figure CR2 format that I could find in my library.
The Hair item I've used is called BatLabs Twin Tail Hair for Victoria 3 - I know a realy dusty old one but it has the extra bones for the tails - now I've tried to fit it to Genesis 2 Female.
So after the quick test that took me about 15 minutes to get the conforming hair converted to Genesis 2 while keeping the extra bones - I've decided to do a series of screenshots to demonstrate what I did.
The quick answer on how to keep the extra bones from the original conforming hair figure after the conversion to the new figure rigging is - use the Transfer Utility, select to transfer the Weight Maps and in the Extended Options check Merge Hierarchy. Tick off all other general options - transfering morphs isn't necessary at this point - the character morph shapes can be transfered later or they get autogenerated after you dial in some morphs for genesis.
You can also select all Post Transfer Options at the bottom to have the hair allready fitted (conformed), parented and smoothed.
Maybe its a good advice to also choose a Content Type with this I think Daz Studio can better guess which bones to pick from the genesis figure rig that are needed for the hair to become a conforming figure.
For conforming hair or anything that fits the head, I think you need at least the genesis spine bones from the hip to the head. With my test the Transfer Utility also took the limb bones to forearms and shins that I had deleted Shift+Del in the JointEditor afterwards.
There are a few more steps involved to get a hair item actually fit to the default Genesis 2 head shape and I would like to show what you can do with all the DazStudio tools to convert the hair item.
Here is an overview of the basic steps I used in this conversion process:
I've tried my best to have the screenshots look like a tutorial but then I think I've spent too much time with the dFormers at the beginning and once had to start over with some last scene save.
But I hope you can still follow along with the pictures and the description in this example and get what tools to use and settings to choose.
Link to the imgbb.com screenshots: Hair Conversion Fit to G2F
https://ibb.co/frFQ7d
https://ibb.co/iNaKYJ
https://ibb.co/h2dWDJ
Description
In my first screenshots you can see how I Zero'ed the default bending pose of the twin tails and I've started to add and tweak the first dFormer_1 and the Field to fix the poke through on the backside. Then I've added the Smoothing Modifier with the default collision settings and I had to select the Collision Item: Genesis 2 Female manually.
I hope this is not too confusing and can help somehow. Sometimes you just have the perfect hair style for the character allready in your library but for the wrong figure or you just want to fix the bangs not hanging in front of the eyes and with a little effort and knowing the tools in DazStudio you can do all of these fit to conversions, fixes and edits.
@ Syrus_Dante After a lot of trial and error I duplicated your results. Thank you for helping me out. Now I can adjust all the hair I have for Genesis, and possilby other things like my ears and tails. My only complaint is is that the head jumps around some when I adjust the ponytail and bangs but it reverts to normal. Turns out I forgot to set the follower. You my friend are a life saver!
However, I am having trouble with my wings. I could use my genesis wings but the feathered wings are better on the morphs. They look good while morphing them but once I release them on the flap morph I get this
I have no idea what is wrong.
This looks weird maybe something went wrong with the rigging.
You better start with a new scene load the default genesis shape and just one hair item before creating the fitting morph then use the Transfer Utility.
Once you have the hair fitted to the default genesis figure save the Figure/Prop Asset to the library. In the next step I would see how DazStudio autogenerates the morphs while you dialing in the character shape morphs.
Unfit the hair and have a look at new autogenerated morphs in the Parameters pane to see whats got transfered on the fly.
Hard to tell whats the issue with the wings. So they are not made for to fit genesis eigther - did you conform them by yourself?
Could be an issue with the rigging that the bone positions don't match the current shape. This would explain why it shows the deformations only if you use the morph slider to control the pose (actualy it should be a Property not a Morph see the P or M in front of the slider with the Parameters pane in edit mode - I guess its rotating some bones for wing movement).
Adjust Rigging to Shape should help - but in this case dont use Memorize Rigging after that because this makes the adjustments the default bone positions.
What you want are the bone adjustments to take in place when the shape morph gets dialed.
Usualy you have to unfit and zero the conforming figure, then you go to the Parameters pane and dial in only one shaping morph at a time. Then you go to the Joint Editor - Adjust Rigging to Shape there and back at Parameters pane you right-click the shaping morph and choose ERC-Freeze to save the bone adjustments to the same morph property (and only them called something like xOrigin yEnd).
Repeat this process for all shaping morphs as needed because DazStudio tries to adapt the character shape by autogenerating the morphs for the fitted/conforming figure but you have to double check them one by one after unfitting to see if the bones need adjustments - this is the case if the whole conforming item moves away from the default position with the morph.
[PS] Be careful with ERC-Freeze because the list of things it wants to save along with the morph could be everything that is not at default state in your scene. There is an easy workaround right-click the viewport Select All then use the actions Memorize Figure and then Memorize Selected Item. This should set all values to default state except the Figure Rigging adjustments in the Joint Editor that you can now ERC-Freeze to the morph.
The hair is fine, I got all the problems wrinkled out. I've even had success with shoes by using a similar technique, but editing the exported obj. But the wings refuse to behave. I have them parented so they keep all the morphs and stuff but it would be an accomplishment if I could convert those wings too. They're feathered wings. I bought them on sale a long time ago. They were top of the line when they came out and I still prefer them over epic wings due to all their awesome morphs and how they look. They really suit that character to a T. I'll use epic wings for another character. I don't want to keep using the same ones or it will get boring. So if I could get those to work well I would even credit you in the webcomic credits :)
RamWolf made a great tutorial for converting Generation 4 hair to Genesis https://www.daz3d.com/forums/discussion/1866/ramworks-tutorials-pp2-and-hr2-to-figure-painting-genesis-in-zbrush#latest
and you will find parenting NOT fitting the wings to the chest of the figure works really well
Thanks for the tutorial.
I'vebeen parenting them, but I just wanted to see if I could get them work. A modified version of Syrus_Dante's technique works very well for shoes. Export the shoes, fit them to the base genesis in Blender, replace geometry, Tweak it as needed in Blender to fit the current shape, convert to weight mapping then use the transfer tool. At least now I can use my shoes with genesis without them getting warped.
These are the shoes from Damaru Jigoku for Hiro hes wearing the rest of it too quite well. I just had to tweak some of the fit morph on the shirt. The character is a huge anime fan and that was the outfit I picked. I tired this technique out on the fae realm slippers and it worked out so great that I tried it again to make sure I knew how to do it. Just gotta remember to keep vertex order so Blender doesnt split it up.