I need advice on one of my iray renders

Kelly2k7Kelly2k7 Posts: 30
edited September 2020 in New Users

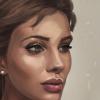
I need advice on one of my iray renders, I’m trying to create a dark skinned character but I feel like I’m missing something the skin doesn’t look realistic ( should I add pores?) and I’m also having a hard time finding the right light to use , right now I’m using second-circle tonemap.


Here a picture of my iray render and the skin I’m inspired by 

Post edited by Kelly2k7 on
Comments

  • JonnyRayJonnyRay Posts: 1,744

    How did you create the skin? Did you start from a light skin and try to darken it? I think a little of the difference might be that if the base skin you used has a glossy strenght map applied, people with dark skin tend to have slight differences in where the highlights are on their skin.

    Other than that, there is probably a lot to do with the lighting involved. The three inspirational images you shared have some very strong directional lighting with a lot of contrast. I'm not sure if you'll get there easily just using an HDRI. In my signature, I have a little tutorial on a "3 light setup" using spot lights. This which is a fairly common way that photographers light portrait style images.

  • FishtalesFishtales Posts: 6,119

    You could also try adding one of the darker skin tone settings from this chart to the diffuse channel.

    http://www.photokaboom.com/photography/learn/Photoshop_Elements/color_correction/skin_tone/1_skin_tone_samples_chart.htm

  • handel_035c4ce6handel_035c4ce6 Posts: 460
    edited November 2018

    I need advice on one of my iray renders, I’m trying to create a dark skinned character but I feel like I’m missing something the skin doesn’t look realistic ( should I add pores?) and I’m also having a hard time finding the right light to use , right now I’m using second-circle tonemap.


    Here a picture of my iray render and the skin I’m inspired by 

    Ahoy there. I am new to Daz but not new to 3D design. So I can give you some practical advice as being newbie myself.

    About the lights: Daz has 2 mode of lights (although they probably are not called in this way); The 1st mode is the defaul light which exists when you render directly from 3D view screen without adding a camera. Many renders can be done directly from there. The drawbacks - you cannot play with the camera settings AND you can not achieve cinematographic light effects. The difference - the last screen from yours seems to be done from the 3d view screen while the second screen have light effects on it.

    Also there is huge difference if you want to render a single character or a whole scene AND do your scene is outdoor or indoor. If it is outdoor the solution is easy - the latest fashion is the so called HDRI lights. I think Daz offers a free HDRI light set. If your scene is a relatively small room this is the hardest to achieve - you have to build your own lights. There are light sets for sale but you probably will have to adjust them - which means will still will have to learn the ropes. This article helped me to understand soem basic stuff about the Daz lights: https://www.versluis.com/2017/04/how-to-use-spotlights-with-nvidia-iray-in-daz-studio/


    As for the darker skin - this is the easies thing to do in daz Iray shader:

    1. Click on Surface selection tool (Alt-Shft-M) and then on some naked skin (for example Torso)

    2. Open the surfaces tab. You will see this (on the screen). Look at the white color bar under "Base color". Click on it and play with the colors. As the default Base color is white or nearly white every change will make the skin darker OR/AND will give some tint.

    3. Look at the secomnd slider bellow it. It says "Diffuse roughness". Reduce it and the skin will become darker and darker. But keep in mind this will affect other things too. For those look for V3Digitimes tutorials on youtube - they will definitelly help. I think I've seen his tutorial on google docs too although I don't know if it is legit to use it from there.


    daz.png
    555 x 439 - 36K
    Post edited by handel_035c4ce6 on
  • JonnyRay said:

    How did you create the skin? Did you start from a light skin and try to darken it? I think a little of the difference might be that if the base skin you used has a glossy strenght map applied, people with dark skin tend to have slight differences in where the highlights are on their skin.

    Other than that, there is probably a lot to do with the lighting involved. The three inspirational images you shared have some very strong directional lighting with a lot of contrast. I'm not sure if you'll get there easily just using an HDRI. In my signature, I have a little tutorial on a "3 light setup" using spot lights. This which is a fairly common way that photographers light portrait style images.

    I started with a dark skin and lightened it, Jazmine HD for Victoria 7 is what I’m using. Where can I find your tutorial on 3 light setup?

  • Fishtales said:

    You could also try adding one of the darker skin tone settings from this chart to the diffuse channel.

    http://www.photokaboom.com/photography/learn/Photoshop_Elements/color_correction/skin_tone/1_skin_tone_samples_chart.htm

    Thanks I will try this and comeback with the results 

  • I need advice on one of my iray renders, I’m trying to create a dark skinned character but I feel like I’m missing something the skin doesn’t look realistic ( should I add pores?) and I’m also having a hard time finding the right light to use , right now I’m using second-circle tonemap.


    Here a picture of my iray render and the skin I’m inspired by 

    Ahoy there. I am new to Daz but not new to 3D design. So I can give you some practical advice as being newbie myself.

    About the lights: Daz has 2 mode of lights (although they probably are not called in this way); The 1st mode is the defaul light which exists when you render directly from 3D view screen without adding a camera. Many renders can be done directly from there. The drawbacks - you cannot play with the camera settings AND you can not achieve cinematographic light effects. The difference - the last screen from yours seems to be done from the 3d view screen while the second screen have light effects on it.

    Also there is huge difference if you want to render a single character or a whole scene AND do your scene is outdoor or indoor. If it is outdoor the solution is easy - the latest fashion is the so called HDRI lights. I think Daz offers a free HDRI light set. If your scene is a relatively small room this is the hardest to achieve - you have to build your own lights. There are light sets for sale but you probably will have to adjust them - which means will still will have to learn the ropes. This article helped me to understand soem basic stuff about the Daz lights: https://www.versluis.com/2017/04/how-to-use-spotlights-with-nvidia-iray-in-daz-studio/


    As for the darker skin - this is the easies thing to do in daz Iray shader:

    1. Click on Surface selection tool (Alt-Shft-M) and then on some naked skin (for example Torso)

    2. Open the surfaces tab. You will see this (on the screen). Look at the white color bar under "Base color". Click on it and play with the colors. As the default Base color is white or nearly white every change will make the skin darker OR/AND will give some tint.

    3. Look at the secomnd slider bellow it. It says "Diffuse roughness". Reduce it and the skin will become darker and darker. But keep in mind this will affect other things too. For those look for V3Digitimes tutorials on youtube - they will definitelly help. I think I've seen his tutorial on google docs too although I don't know if it is legit to use it from there.


    will try and see if this works. I searched up V3

    I need advice on one of my iray renders, I’m trying to create a dark skinned character but I feel like I’m missing something the skin doesn’t look realistic ( should I add pores?) and I’m also having a hard time finding the right light to use , right now I’m using second-circle tonemap.


    Here a picture of my iray render and the skin I’m inspired by 

    Ahoy there. I am new to Daz but not new to 3D design. So I can give you some practical advice as being newbie myself.

    About the lights: Daz has 2 mode of lights (although they probably are not called in this way); The 1st mode is the defaul light which exists when you render directly from 3D view screen without adding a camera. Many renders can be done directly from there. The drawbacks - you cannot play with the camera settings AND you can not achieve cinematographic light effects. The difference - the last screen from yours seems to be done from the 3d view screen while the second screen have light effects on it.

    Also there is huge difference if you want to render a single character or a whole scene AND do your scene is outdoor or indoor. If it is outdoor the solution is easy - the latest fashion is the so called HDRI lights. I think Daz offers a free HDRI light set. If your scene is a relatively small room this is the hardest to achieve - you have to build your own lights. There are light sets for sale but you probably will have to adjust them - which means will still will have to learn the ropes. This article helped me to understand soem basic stuff about the Daz lights: https://www.versluis.com/2017/04/how-to-use-spotlights-with-nvidia-iray-in-daz-studio/


    As for the darker skin - this is the easies thing to do in daz Iray shader:

    1. Click on Surface selection tool (Alt-Shft-M) and then on some naked skin (for example Torso)

    2. Open the surfaces tab. You will see this (on the screen). Look at the white color bar under "Base color". Click on it and play with the colors. As the default Base color is white or nearly white every change will make the skin darker OR/AND will give some tint.

    3. Look at the secomnd slider bellow it. It says "Diffuse roughness". Reduce it and the skin will become darker and darker. But keep in mind this will affect other things too. For those look for V3Digitimes tutorials on youtube - they will definitelly help. I think I've seen his tutorial on google docs too although I don't know if it is legit to use it from there.


    Thank you I will try this and see if it works. I searched up V3Digitimes and a bunch of videos came up , is the one you are talking about uber surface introduction tutorial ?

  • handel_035c4ce6handel_035c4ce6 Posts: 460
    edited November 2018
     

    Thank you I will try this and see if it works. I searched up V3Digitimes and a bunch of videos came up , is the one you are talking about uber surface introduction tutorial ?

    The shader is called Daz Uber Shader it is free default Daz IRay shader and should come with a written tutorial. Unfortunately I don't remember where I've seen it. I googled but cannot find it. Not sure but I think it was called "Skin Shading Essentials" or something like this. The full original video itself is a commercial product and probably will not be available on youtube but still you can have a lot of materials. You should know for unknown reason Daz 4.10 uses by default the 3Dl shader and the tutorial which comes with it is subsurface-shader-base.pdf and it is useless for Iray.


    Edit: Basically IRay tends to make the skins darker therefore making a dark skin is easier then making a pale skin.

    Post edited by handel_035c4ce6 on
Sign In or Register to comment.