five ways to fix poke through without using conforming figures
Just thought I'd share two ways to fix poke through without using conforming figures. (Edit - with suggestions - now up to 5 ways). In these examples I have simply modeled an article of clothing and attached it to the same skeleton as the figure. The prop was not converted to a conforming figure.
1) Use the weight map tools - Although there are fewer steps, I find the adjustments harder to actually execute, so in my experience it takes more time.
2) Use the morph tools under the animation tab in the edit menu (not the top menu). The key is to have the entire prop as a morph zone before going to the animation tab, but once I got used to it, I found it easier. Aside - I think the principles could be used to fix figure joints in extreme poses, but I have not tried.
3) (on page 2) RE: evil - Use the weightmap brush under the animation icon in the editing tab of the vertex modeler. Note - I've had some trouble with the weightmap brush in C8.5, but I don't know if it is a general problem.
4) (on page 2) RE: tbwoq - use the "edit"-"convert" choices in the assembly room to convert the prop mesh to a primitive and back again. Then edit in the mesh using the vertex modeler in the assembly room. I've gotten an error in C8.5 but it works in C8.1 pro.
5) RE: Philemo - use the 3D paint tool to paint the underlying figure black in the alpha channel so that portion of the figure doesn't render over the mesh.
Anyway, this will be my first attempt to do a tutorial, so suggestions very welcome. I will be adding the steps as replies to this thread.
--------------
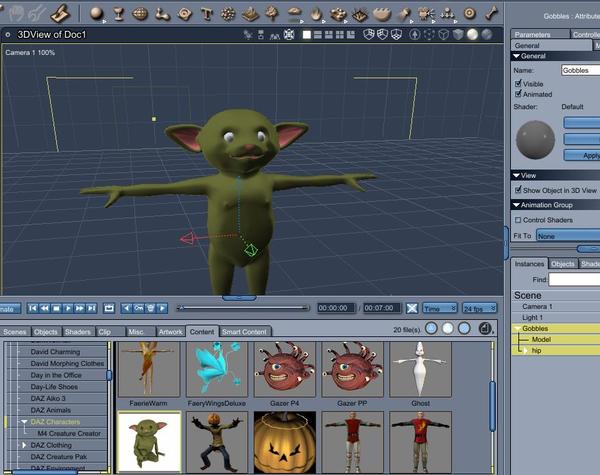
Daz has a figure called Gobbles. I plan to create a simple tunic prop and attach it to Gobbles, pose Gobbles, and show two methods to fix poke through. This isn't a tutorial on modeling, so I won't spend much time on that.
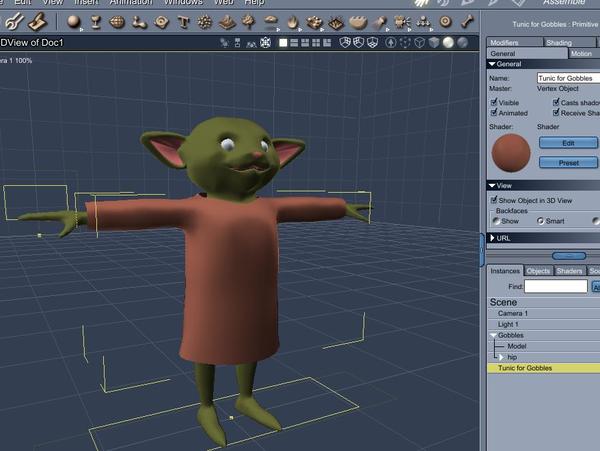
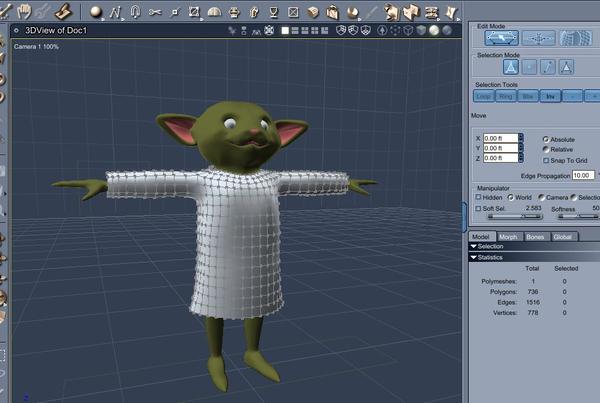
So, here is the Gobbles figure loaded into Carrara and put in the zero pose position. I modeled a simple tunic to fit Gobbles by using the vertex modeler in the assembly room. You could then uvmap the tunic, add shaders, etc. but for this tutorial I will just assign a color that is easy to contrast with Gobbles' skin color.
Edited to address suggestion for 3rd way by Evil and 4th way by tbwoq and Philemo for the 5th way.




Comments
To attach the tunic prop to Gobbles, select Gobbles's hip and the tunic prop simultaneously. Go to the animation tab on the top menu and choose attach skeleton. A warning box will appear, which is fine so accept it.
Select a couple of bones for Gobbles and use the rotate tool to move the arms and legs until you get some poke through. In this case, I've got some poke through under Gobbles's left armpit. For this stage of the tutorial, this will be addressed by editing the bone influences for each polygon. This is effective but time consuming.
Fix method 1 - fixing by editing bone influences
In the assembly room, click the hand icon in the upper left to model in the assembly room. The vertex modeling tools will appear on the left. Choose the animation tab (this is the middle icon under edit on the right hand side, not the animation tab on the top menu. It sort of looks like a human).
Select a vertex, any vertex, on your mesh.
A menu of bone influences will appear. Now select a polygon in the poke-through region that you want to fix. In this case, I generally needed to reduce the influence of the arm bones to zero. I also needed to play with the chest and abdomen bones to get the balance correct. Do this for each polygon.
With enough patience, you can eliminate the poke through and smooth the mesh. Effective but time consuming.
And a quick render shows that the poke through has been addressed.
Method 2 - morph in the posed position
Although the above method of editing bone influences is effective, I find it very tedious and time consuming. Creating morphs in the posed position is faster but takes more steps.
So, I have posed Gobbles to create poke through on the right side. This time a morph will be used to fix it. Once this method is learned, it doesn't take very long and can be very effective, IMHO.
This method starts out the same. Select the tunic, and click the vertex modeler icon in the upper left of the assembly room (the hand icon). The tunic mesh will appear, but in its default state. Make sure the animation tab is selected under the edit menu in the upper right (the person looking icon) and the mesh will go to its posed position.
Now a false start, aaargh. Under the edit menu, you will see tabs for model, morph, bones and global. Choose morph. Choices appear for morph areas and morph targets. But I haven't been able to make these work at this stage, because a morph area is required before these morphs can be made in the animation (edit) mode.
So, how can the morph tools in the animation editing mode be made effective? The answer is to return to the model tab, the one to the left of the morph tab, and create a morph area that includes the entire mesh. So, click the morph tab and the tunic mesh returns to its default pose. Select the entire mesh and create a new morph.
OK, now there is a morph area.
Return to the morph tab, the one next to the model tab. The mesh will return to the posed position and the tool menu will reappear for morphs. However, now there is a morph area in the box.
Click the drop down menu next to the box under "current area" Choose convert to morph target and a new potential morph will appear. The default name is "morph target" but you should name it something meaningful. It will be set at zero on a slider. There will be an edit icon next to it.
Click the edit icon and the mesh will turn green. Use your vertex modeling tools to select polygons, move them, and fix the poke through.
When you are happy with your adjustments, click validate. The mesh will return to its default and it will appear like it didn't work. Don't worry, your morph has been recorded but the slider has returned to zero. Just move the slider to activate the morph and hide the poke through.
Now you can render Gobbles without that unsightly underarm showing.
Hope this helps.
wow thanks for this tut! very informative, must have taken ages !!
Great tutorial so far.
I wonder if you would have better luck with the joint influences if you used the weight painting function? Might not seem so tedious if you're more of a visual person like me.
By the way, if I recall correctly, the influences can be keyframed, but I wouldn't swear to it.
Awesome, Diomede, very informative - thank you!
Method 3
But then I'd have to call it Three Ways to Fix Poke Through Without Conforming Figures! LOL
I'll try to add it here. The weight painting brush can be used by selecting the tunic prop, clicking the model-in-the-assembly-room tab (hand in upper left), clicking the animation tool in the editing menu (torso rigging looking icon in upper right), and clicking the glowing paint brush. The mesh should be in its posed position with an area colored yellowish-orange. It typically starts with the hip bone selected as default. On the right hand side, choose the bones around the poke through, or that you think might be affecting the poke through (shoulders are likely to affect poke through in the upper torso), and click the add and subtract keys. Use the brush to paint the affected area, adding or subtracting influence strength for the nearby bones. The mesh will adjust to the new weightmap settings, and you can address the poke through.
But I've been having trouble in 8.5 with the weightpainting brush. The third picture below is not how it is supposed to look. The display is supposed to show the mesh as posed, with yellowish orange coloring where the bone influences are strongest for the bone that has been selected on the right. But for some reason, the display is correct to start, then the unposed prop is popping back into the picture. It gets in the way. Still playing with it, so I'm not sure how general the problem is. For example, I haven't tried opening the Gobbles tutorial in 8.1 yet.
Edited - I changed the subject of the thread to "three ways..."
I must admit to being spoilt by Poser 2014 morph tool, it makes one mesh fit another by brushing it - crazy- hopefully daz will pull their finger out for carrara 9 and actually give us some real improvements ;)
it's never too late to learn from your competitor
Similarly, improvements to dynamic cloth would be a big help. This Gobbles example could be done with soft body physics, but it would take forever. So, I'm not changing the subject of the thread to "Four ways to..." in order to incorporate draping. Maybe C9?
I just opened my Gobbles tutorial file with Carrara 8.1, and used the weight painting brush. It seems to work fine in 8.1 without the unposed mesh popping in.
If I don't hear that it works in 8.5 for other people, I'll attach the comparison pics to a message about bugs. Anyway, this is what the third pic under method 3 should look like.
diomede64
I think you just saved me about 100 hours of life. At current Min Wages that's $785 USD.
Can I get that to you at $1 a year for several years?
Thanks!
Thanks for the tutorials and info diomede64. :)
----
Fixing clothes poke throughs is one of the most frequent questions I see in Carrara. If this topic is for non-conformed meshes and props, the easiest way I found to fix poke through is to use the convert to other modeler method.
1.In the assemble room instance list, select the posed mesh or clothes that have poke through.
2.Now, Edit->Convert to Other Modeler...->click on the Primitive Modeler, then OK.
3.Then convert back. Edit->Convert to Other Modeler...->click on Vertex Modeler, then OK.
You will now have a posed clothes mesh you can fix poke throughs using the assemble room modeling mode(upper left 'Edit Vertex Object' icon). This method is similar to using a .OBJ export/import file but with less steps.
This conversion won't subdivide the mesh but will create extra triangulation. To get rid of most of it is easy. In the vertex modeler select the entire mesh, then Model->Untriangulate Polygon. Only a few hundred triangulated polygons remained after in my testing(and can still be modeled out), but the benefits of having FULL access to the modeling features on the posed mesh are well worth it(imho).
The above method is mainly for stills and is a workaround. If you need to preserve the imported functions of the original content figures or creating animations, the best methods(imo) are using the edit on posed mesh feature with morphs(Pro only) or using magnet deformers.
Thanks Tbwoq. I didn't know about the primitive conversion approach. Looks like it would be very helpful.
Could you explain it in a little more detail? I haven't been able to duplicate it. I am getting an error when I try to convert the posed prop back from primitive to vertex. Also, note that one of the functions affected is the uvmapping. In my second set of tests, I used a Genesis character in which I had uvmapped the sleeves separately from the sweater so I could set the pattern functions differently. Converting to primitive set the pattern to the same over the whole mesh, which distorts the sleeves. I still got the error when converting back, so I suspect that I'm missing a step.
Hi diomede64.
Didn't see the UV's as I was only using one procedural shader, so I missed that part. Sorry about that. My conversions also set the shader back to what appears to be the Global or Texture 0. So, I did some more testing using different shaders and UV setups. I also hoped the suggestion wasn't interfering with your tutorials.
In further testing, after the conversions, I was able to restore shaders by dragging them back to their domains in the shader room. So it appears the models had their domains intact, which is good. Meaning they looked OK for shading and UV's after. I'm using C8.1 Pro build 153 and Victoria 4.2 with a vertex dress I modeled, but I also tested a simple vertex sphere.
Not sure why you are getting errors in conversions, but I'm guessing that its a bug with C8.5(?). Hopefully others have info if that happens on their versions and it can get reported. I was also getting multiple errors changing shaders around through conversions but was still able to make the method work. I'll continue testing and let you know if theres more info. :)
Awesome thread, this will come in use for sure.
Hmmm. Should I change the subject of the thread to "various ways to fix poke through without using conforming figures"? Or, should I change the title of the thread to "identifying bugs in C8.5 by attempting to do a tutorial"?
Thanks tbwoq. Your suggestion works in C8.1. It does not work for me in C8.5, so unless I hear otherwise from more people, I will identify yet another C8.5 bug.
So, here is the "primitive back and forth" method applied to Gobbles, as executed in Carrara 8.1 pro. In pic 1, I've posed Gobbles to generate some more poke through. In pic two, click the edit tab in the upper left menu of the assembly room. Choose convert to other modeler. Choices will appear, choose primitive. Then repeat the conversion but choose vertex.
Now click the hand icon in the upper left to allow for vertex modeling in the assembly room. The polygons will appear. They have been converted to triangles. You can choose to "untriangulate" the polygons under the model tab.
Edited to fix reference to construct tab
Note - you have to select the entire mesh to use untriangulate (you can choose edit - select all, or just double click on any polygon). Then edit the mesh to eliminate the poke through. And Gobbles will not have any unsightly poke through.
Thanks tbwoq! And I encourage anyone else to suggest their favorite method.
This made me chuckle, because it's so true :)
I probably ought to ask this question in the modeling thread, but since you guys have mentioned the importance of un-triangulating the mesh, what is the problem with triangles being in the mesh?
I'm a relative newbie also. But I found this old thread on tris vs quads (from 2008) very interesting.
http://www.digitaltutors.com/forum/printthread.php?t=9470
In my own field, which has nothing to do with 3D, art, or computer modeling - but does have rapidly changing methods of doing things, I have found that sometimes people will take an old rule-of-thumb and treat it as a commandment in a situation in which it no longer applies. I am happy to report that thus far that hasn't been my experience with the Carrara veterans. In fact, in another thread, Headwax and Roygee suggested that I convert the side of the knee and elbows to triangles to improve the joint bending of a low polygon figure I had created.
Thanks for that link, Diomede, after scanning through it it looks like maybe sometimes triangles are ok to go with you just have be careful about where you put them as they can make things look stiff I guess. I did see the knee tip over in the modeling thread and had noted that down as another great tip to use. Man that thread is a goldmine :)
And it's funny to hear you call yourself a newbie, since I've seen you model some pretty incredible stuff already!