Converting Un-Rigged clothing
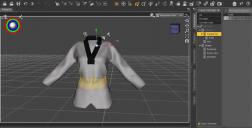
I recently bought https://www.daz3d.com/dforce-hc-taekwondo-suit-for-genesis-8-females ; and am trying to convert it for use with G3F. I was shown an excellent tutorial but this particular set of clothing doesn't allow me to execute the steps. When it comes to adjuting the shoulder to more of a T Pose, I find there are no transition dials for me to do this. No XYZ Translation, no Rotation. Nothing. (see attached picture)
Is there something that I'm doing wrong? I tried uninstalling and re-installing but that made no change.
Any help would be greatly appreciated.


Capture.jpg
1329 x 674 - 93K


Comments
First, if dForce clothing is sold at Daz, it must be conforming, which also means it's rigged. What you are seeing, or not seeing, is the transforms have been hidden by the PA. I do not have this outfit, or I'd test it, but I suspect you only need to enable the Show Hidden Properties to see them:
Second, I use Sy's tutorial for converting G3<->G8 clothing, (which may be the one you are using,) and I have both an A-Pose and T-Pose preset I created that I apply to the clothing, They actually work on both the clothing and the figures.
You can create the presets very simply:
Now you can select the entire outfit made for G3 and apply the A-Pose. Or an entire outfit made for G8 and apply the T-Pose. (Be sure to follow all the rest of the directions from your tutorial. This is just to make apply the changes to the clothing a little easier for you.)