Building my own scene
Hello Everyone,
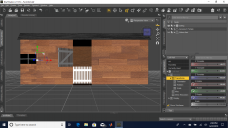
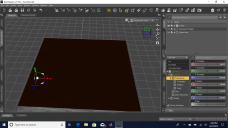
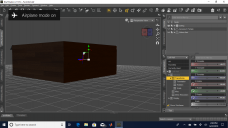
So I was looking for a horse stable to make a scene for a farm setting and couldn't find exactly what I was looking for in the shop. There were a couple of options but they didn't exactly have certain details that I was looking for. In a beginners attempt to build my own scene I started messing around with the primatives in Daz Studio. While I not necessarily done with this stable my question is, Am I using the correct objects here? Everything in the photo so far has been built using planes and adjusting their size and width to get the desired outcome I wanted(barn door for example). When I run a render on the image by itself it looks fine however, if I add a background to give the scene a blue sky and grass it just doesn't end up looking right anymore. Almost like you can tell a difference between what I made and what I didn't. If these are the tools you're suppose to use is there a way to blend these two together to make the image look more natural?
-James




Comments
You didn't include an image with the background your trying to add, so I'm going to be guessing here…
The screen captures you shared are all of the viewport, in texture shaded mode. Have you tried rendering your work as you go along to see how things look?
In Texture Shaded mode, the scene is being shown in the viewport using OpenGL. When you render the image, it will use either Nvidia Iray, (if you're working with the default, then you're using Iray,) or 3Delight. The OpenGL display is relatively fast and gives a fairly good representation of the objects in the scene, but there can be a big difference between the viewport and an actual render.
If you're using Iray, there is a Ground setting in Render Settings that let's you specify Automatic or Manual. With manual, the ground is always at World Center zero on the Y axis. With Automatic, the ground is always set to the lowest point of the lowest object. If, for example, the plane in the back is slightly lower than the other planes, Iray will make that the ground location, and the other objects will then cast an unnatural shadow on the ground.
Also, when using manual, if the objects are higher than zero, they will cast an unnatural shadow.
Now, if you haven't rendered anything, and haven't checked your work in the viewport by setting the Draw Mode to Nvidia Iray, and adding a background for blue sky and grass on the ground looks off, you really should either render or set the Draw Mode to Nvidia Iray. What does it look like when rendered?
It would be helpful, I think, if we could see the scene as it renders, either as a rendered image, or a screencapture of the viewport with Nividia Iray as the active Draw Mode.
L'Adair, apologies if I wasn't clear when I had said that when I run a render on the image by itself it looks fine however, if I add a background to give the scene a blue sky and grass it just doesn't end up looking right anymore. With a background added to the scene using the backdrop option it's almost like you can tell a difference between what I made and what I didn't. I didnt think about posting the image with the background since the backdrop stays stationary when I move the image around(I wish the backdrop rotated with the object so different views showed different parts of the backdrop only) but I've attached some screen shots of it now and changed the viewpoint to Nvidia Iray mode. Hopefully this shows a little clarity on what I mean about the blending of the two.
Also, the reason I used the primatives to make my scene was because of a video I watched online of a gentleman making a traffic cone. These were what he used during the video but it took something like 50 planes just to make the doors so I wasn't sure if there was a quicker way of making these objects using different tools.
-James
The first thing I see is the image you are using for the backdrop looks like it's "spherical". It looks like it was intended for use as either an HDRI in the Render Settings->Environment Environment Map parameter. (I have several HDRI images—.hdr or .exr—that also have a jpeg to see what the HDRI is of,) or as a texture for a sphere. Is it possible you've used one of those in the Environment pane/tab as a backdrop image? If that's the case, there would be an image you could use in the Render Settings that would give you much better results.
The second thing I notice, spherical or not, the background image you're using is too "close up" to be used with a large building like your barn. That may change if there is an HDRI you can try in the Environment Map as mentioned above.
Otherwise, you'll get better results using an image/photo where the camera is quite some distance from the treeline with a significant expanse of green in between.
Actually that is exactly what I did. The background image I am using in this scene is a picture I had gotten off of HDRI Haven. I have it saved as a PDF document directly from the Haven website and then I add it into the backdrop using the browse tool. On the website the image itself is shown almost spherical so maybe this is what I've been doing wrong this whole time with all my images. I'll have to look into this and see if that solves my blending issues.
If you want 360 panoramas as images for backdrops rather than using the dome the easiest way to do that is just put them on the environmental dome with it visible ground not enabled and rotate your camera on Y along the timeline and render them out as images to then use with your renders.
I use a low resolution one for my environment lighting myself with dome not visible then stick a high resolution render from one in my backdrop to match the camera angle
since I do animations I actually render png series then add my adjusted backdrops in Hitfilm since DAZ studio does not natively do animated backdrops though using the high resolution one on a visible environment dome solves this it also is exceeedingly slow for animations and usually too pale.
And for that matter Hitfilm has a 360 panorama filter and you can use composite shot to also render out other camera angles
**Update**
L'Adair, So completing it that way did solve the blending issue so HDRI Haven images need to be used within the render settings and not the actual backdrop. I was not aware of these settings at all, so I will need to play around with them a bit but the blending issue seems way better. I can also pan around and get different views of the background using it this way so that is also something I enjoy.
One issue I just quickly noticed was that the sizes were completely unproportional now. Do you know if the background image can be scaled down in size so that the barn doesn't appear to be towered over by the background?
Focal length on your camera