4.12 Beta IK setup

D W JohnsonD W Johnson Posts: 19
edited August 2019 in Daz Studio Discussion

     My first day in 4.12 and I'm trying to wrap my head around the new IK system. I haven't found a tutorial on it yet but just by fiddling around I see I have control of the IK chain's root and end. This is huge! I want everyone over there to know how much I appreciate the hard work. I've been waiting for this to happen for a long time. I know this is still Beta but I love it already. 

     The question I want to ask; when I'm animating in Blender, I can change the settings so the character will stretch, so the IK ends never move. It is so much easier to fix an animation on the timeline if the IK chain ends don't move at all, for any reason. Are there any plans to add a feature like that? The question is pennies to the bigger picture. I'm happy with what you've done and I'm just curious.

IK test2.jpg
1919 x 1039 - 348K
Post edited by Richard Haseltine on

Comments

  • Moved to Daz Studio Discussion since it's a question rather than a Product Suggestion.

    I'm not sure what you mean by stretching here.

  •     Sorry, that was pretty ambiguous.  I could have phrased that better.

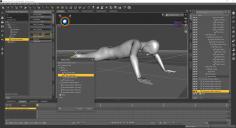
        I was referring to Blender’s Blenrig. I did a quick example with Blender’s Vincent and took a screenshot. I’m not sure what is happening with their Python script but it looks like it allows the upper and lower arms and legs to get longer without the hand, feet, or the chest being affected at all. It’s also fun with more cartooned models. I circled the ‘str’ button. If you set it to ‘1’ it is on and ‘0’ for off. In the example, only the right hand has been turned on.

    blenrig_str.jpg
    1909 x 1039 - 610K
  • If you have the right morph sets the figures do usually hae ArmLength (and Leg Length) morphs, which update the joints to match. I've no idea how IK would react to those if they were aniamated, or whether you could trigger them in response to the needs of the pin.

  • takezo_3001takezo_3001 Posts: 1,997
    edited August 2019

         My first day in 4.12 and I'm trying to wrap my head around the new IK system. I haven't found a tutorial on it yet but just by fiddling around I see I have control of the IK chain's root and end. This is huge! I want everyone over there to know how much I appreciate the hard work. I've been waiting for this to happen for a long time. I know this is still Beta but I love it already. 

     Great! Can you tell us how to find/use it?

    EDIT: Nevermind, all you need to do is select IK then go into scene, and you'll find the IK node there, then go to parm settings so you can see/control the IK there!

    Post edited by takezo_3001 on
  • If you have the right morph sets the figures do usually hae ArmLength (and Leg Length) morphs, which update the joints to match. I've no idea how IK would react to those if they were aniamated, or whether you could trigger them in response to the needs of the pin.

    Thanks Richard,

    curiosity satisifed. 

  •      My first day in 4.12 and I'm trying to wrap my head around the new IK system. I haven't found a tutorial on it yet but just by fiddling around I see I have control of the IK chain's root and end. This is huge! I want everyone over there to know how much I appreciate the hard work. I've been waiting for this to happen for a long time. I know this is still Beta but I love it already. 

     Great! Can you tell us how to find/use it?

    EDIT: Nevermind, all you need to do is select IK then go into scene, and you'll find the IK node there, then go to parm settings so you can see/control the IK there!

    I posted this in the wrong catagory and it doesn't look like the picture I originally posted made it in the transfer. It shows where everything is at. I'll repost it in case anyone else is struggling to figure it out. 

    What is not in the picture:

    * Select hand or foot in the scene that you want to be affected by IK

    * Go up to create in the drop down menus

    * Select new IK chain...

    IK test2.jpg
    1919 x 1039 - 348K
  • takezo_3001takezo_3001 Posts: 1,997

         My first day in 4.12 and I'm trying to wrap my head around the new IK system. I haven't found a tutorial on it yet but just by fiddling around I see I have control of the IK chain's root and end. This is huge! I want everyone over there to know how much I appreciate the hard work. I've been waiting for this to happen for a long time. I know this is still Beta but I love it already. 

     Great! Can you tell us how to find/use it?

    EDIT: Nevermind, all you need to do is select IK then go into scene, and you'll find the IK node there, then go to parm settings so you can see/control the IK there!

    I posted this in the wrong catagory and it doesn't look like the picture I originally posted made it in the transfer. It shows where everything is at. I'll repost it in case anyone else is struggling to figure it out. 

    What is not in the picture:

    * Select hand or foot in the scene that you want to be affected by IK

    * Go up to create in the drop down menus

    * Select new IK chain...

    Ahh, I missed the create new IK chain, thanks for clearing that up!

  • marblemarble Posts: 7,500
    edited August 2019

    I don't want to hijack this thread so I can start another if necessary but my question seems appropriate according to the thread subject title. 

    I have installed 4.12 Beta now and have opened a scene with the intention of getting to know how to use the new IK system. Unfortunately, I don't have a clue where to start. There are hints scattered throughout the Beta Release thread but I can't find a short description of how to get started. A few screenshots with descriptions would suffice if anyone is willing to explain to a complete IK noob.

    Post edited by marble on
  • D W JohnsonD W Johnson Posts: 19
    edited August 2019
    marble said:

    I have installed 4.12 Beta now and have opened a scene with the intention of getting to know how to use the new IK system. Unfortunately, I don't have a clue where to start. There are hints scattered throughout the Beta Release thread but I can't find a short description of how to get started. A few screenshots with descriptions would suffice if anyone is willing to explain to a complete IK noob.

     FK vs IK

    Imagine a monkey’s tail. If you rotate the first bone that is connected to the pelvis, normally the entire tail moves. This is called Forward Kinematics or FK.  

    If the monkey is in a tree and you want the end of his tail to stick to a branch and not move when you move the monkey’s main body, this is called Inverse Kinematics. (IK). The End of the tail would be the IK END. The pelvis or the last tail bone connected to the pelvis is what you would want to make the ROOT.

    Example

    I used a genesis 8 in this example so, that is the extent of my knowledge so far, with this software.

    1. Click on the a foot.
    2. Click on the Create button in the top left of the screen.
    3. On the dropdown menu, select New IK Chain
    4. In the popup box, just accept for now.
    5. The new IK chain will appear in your scene tab at the bottom. Select it.
    6. In your Parameters tab, select Inverse Kinematics. You will see both the Translate and Rotate buttons are in the off position. Turn one or both on and then move your figure from the pelvis to see what you’ve done.

    Now you can change the parameters to see how you can change the results. Select different ROOT bones. Use different combinations of Rotate and Translate; ON/OFF.

    …and congratulations, you have now opened Pandora’s Box. laugh


    Post edited by D W Johnson on
  • marblemarble Posts: 7,500
    marble said:

    I have installed 4.12 Beta now and have opened a scene with the intention of getting to know how to use the new IK system. Unfortunately, I don't have a clue where to start. There are hints scattered throughout the Beta Release thread but I can't find a short description of how to get started. A few screenshots with descriptions would suffice if anyone is willing to explain to a complete IK noob.

     FK vs IK

    Imagine a monkey’s tail. If you rotate the first bone that is connected to the pelvis, normally the entire tail moves. This is called Forward Kinematics or FK.  

    If the monkey is in a tree and you want the end of his tail to stick to a branch and not move when you move the monkey’s main body, this is called Inverse Kinematics. (IK). The End of the tail would be the IK END. The pelvis or the last tail bone connected to the pelvis is what you would want to make the ROOT.

    Example

    I used a genesis 8 in this example so, that is the extent of my knowledge so far, with this software.

    1. Click on the a foot.
    2. Click on the Create button in the top left of the screen.
    3. On the dropdown menu, select New IK Chain
    4. In the popup box, just accept for now.
    5. The new IK chain will appear in your scene tab at the bottom. Select it.
    6. In your Parameters tab, select Inverse Kinematics. You will see both the Translate and Rotate buttons are in the off position. Turn one or both on and then move your figure from the pelvis to see what you’ve done.

    Now you can change the parameters to see how you can change the results. Select different ROOT bones. Use different combinations of Rotate and Translate; ON/OFF.

    …and congratulations, you have now opened Pandora’s Box. laugh


    Many thanks ... at least I now know how to make an IK chain. If I can do that I can play with it and see what it does. Much of my confusion comes from the fact that I have been trying to animate using the old Active Pose pins and drag-move and I guess I'm expecting something similar although I've been told it is not similar at all. By the way, I understand the IK pins actually hold the foot/hand/whatever in place, right?

  • marble said:
    marble said:


    Many thanks ... at least I now know how to make an IK chain. If I can do that I can play with it and see what it does. Much of my confusion comes from the fact that I have been trying to animate using the old Active Pose pins and drag-move and I guess I'm expecting something similar although I've been told it is not similar at all. By the way, I understand the IK pins actually hold the foot/hand/whatever in place, right?


         Exactly. ActivePose is an IK-like system and it is my go-to on a daily basis. I think it is different because your root bone is always the model's root bone; generally the pelvis. We will probably find uses for both the new IK and ActivePose. For most of my still frame work, I think I'll just stick to the ActivePose. Without timeline worries, ActivePose might be faster (Shrug). I've only been using the new Daz3D IK system for a day longer than you so I can't say how different it really is from the old ActivePose system but I am hopeful, fingers crossed.  In Blender, I can create armatures, rig characters, and do weight maps so I'm very familiar with creating IK systems in that program. Once I animate a basic walk cycle in Daz 4.12, I'll know a lot more but that's probably next week.

  • @Richard Haseltine

         I just gave a lot of things I figured out type advice here. If I've mis-stepped, please correct me. I'm learning too. 

  • takezo_3001takezo_3001 Posts: 1,997

    @Richard Haseltine

         I just gave a lot of things I figured out type advice here. If I've mis-stepped, please correct me. I'm learning too. 

    You've done a danm fine job of figuring it out as far as I can see, thanks for the much needed explanation!

  • marblemarble Posts: 7,500
    marble said:
    marble said:


    Many thanks ... at least I now know how to make an IK chain. If I can do that I can play with it and see what it does. Much of my confusion comes from the fact that I have been trying to animate using the old Active Pose pins and drag-move and I guess I'm expecting something similar although I've been told it is not similar at all. By the way, I understand the IK pins actually hold the foot/hand/whatever in place, right?


         Exactly. ActivePose is an IK-like system and it is my go-to on a daily basis. I think it is different because your root bone is always the model's root bone; generally the pelvis. We will probably find uses for both the new IK and ActivePose. For most of my still frame work, I think I'll just stick to the ActivePose. Without timeline worries, ActivePose might be faster (Shrug). I've only been using the new Daz3D IK system for a day longer than you so I can't say how different it really is from the old ActivePose system but I am hopeful, fingers crossed.  In Blender, I can create armatures, rig characters, and do weight maps so I'm very familiar with creating IK systems in that program. Once I animate a basic walk cycle in Daz 4.12, I'll know a lot more but that's probably next week.

    Well I am hoping that IK is better than the Active Pose tool because that is so unrleiable (and prone to crashing in 4.11). The limbs move erratically and the pinning only works when it feels like it. Also, when I drag a bone, other parts of the body start twisting and bending unnaturally. Nevertheless, it was better than nothing which is why I have high hope for the new IK system.

  • marblemarble Posts: 7,500
    edited August 2019

    OK - so now I'm having some fun with IK but I'm stuck with a problem - how do I bend beyond the limits? For example, if I pin the feet (separate IK chains, obviously) and then bend the pelvis forward, the pelvis has a bend limit (+/- 25 according the my parameters). What if I want to bend beyond the 25? At the moment, this breaks the IK and the feet fly out but I'd like to increase the pelvic bend while keeping the feet pinned.

    By the way, the pinning is not as solid as I had hoped even with both translation and rotation locked the hands and feet still twitch like crazy (not good for animations).

    Also, I can't figure a way to move the IK position other than using the parameter slider. Trying to use the +/- (on the slider scale) or even manually type in the +/- numbers does not seem to move the selected IK node. Only sliding the slider along the scale works.

    Post edited by marble on
  • Unlock the bones "limits" in the "parameters settings" page on the "posing" tab, for each bend direction you want unlocked. EG, Bend, twist, side-side. That needs to be done for each bone that you want unlocked. Or, change the locked value to a larger number, for limits, but less constricted limits.

  • nonesuch00nonesuch00 Posts: 18,288
    marble said:

    OK - so now I'm having some fun with IK but I'm stuck with a problem - how do I bend beyond the limits? For example, if I pin the feet (separate IK chains, obviously) and then bend the pelvis forward, the pelvis has a bend limit (+/- 25 according the my parameters). What if I want to bend beyond the 25? At the moment, this breaks the IK and the feet fly out but I'd like to increase the pelvic bend while keeping the feet pinned.

    By the way, the pinning is not as solid as I had hoped even with both translation and rotation locked the hands and feet still twitch like crazy (not good for animations).

    Also, I can't figure a way to move the IK position other than using the parameter slider. Trying to use the +/- (on the slider scale) or even manually type in the +/- numbers does not seem to move the selected IK node. Only sliding the slider along the scale works.

    On the limits, there is under

    Edit - Figure - Limits -

         Limits On (Rotation)

         Limits Off (Rotation)

    I don't see any way to do that for Translate. Also, I've never used the other so I don't know if it works but it is there.

  • Hi, I've been playing around with the IK chains as well. Sadly, so far it seems it still has the issue that annoys me the most about animating in Daz which is, for example, when animating squats and the figure is crouching, the feet won't stay stuck in the floor even if I pin their translation in the IK parameters. When I'm placing the key poses it's relatively fine but then during the animation, the feet go through the floor and then back to the intended pose. Don't know if I'm doing something wrong or if there is some way to fix that (native to Daz, haven't tested if the glue feet to the floor script works in the beta). Still, using the IK chains seems to get better results while making the key poses, so it's still a decent addition even if there is no way to really fix this issue.

    ik1.png
    1920 x 1038 - 229K
    ik2.jpg
    1920 x 1039 - 297K
    ik3.jpg
    1920 x 1040 - 301K
  • nonesuch00nonesuch00 Posts: 18,288

    Hi, I've been playing around with the IK chains as well. Sadly, so far it seems it still has the issue that annoys me the most about animating in Daz which is, for example, when animating squats and the figure is crouching, the feet won't stay stuck in the floor even if I pin their translation in the IK parameters. When I'm placing the key poses it's relatively fine but then during the animation, the feet go through the floor and then back to the intended pose. Don't know if I'm doing something wrong or if there is some way to fix that (native to Daz, haven't tested if the glue feet to the floor script works in the beta). Still, using the IK chains seems to get better results while making the key poses, so it's still a decent addition even if there is no way to really fix this issue.

    Are you sure that's just not UI lag that would be resolved correctly without the feet-through-floor problem if you were to render the animation?

  • Hi, I've been playing around with the IK chains as well. Sadly, so far it seems it still has the issue that annoys me the most about animating in Daz which is, for example, when animating squats and the figure is crouching, the feet won't stay stuck in the floor even if I pin their translation in the IK parameters. When I'm placing the key poses it's relatively fine but then during the animation, the feet go through the floor and then back to the intended pose. Don't know if I'm doing something wrong or if there is some way to fix that (native to Daz, haven't tested if the glue feet to the floor script works in the beta). Still, using the IK chains seems to get better results while making the key poses, so it's still a decent addition even if there is no way to really fix this issue.

    The Universal tool and its derivative use Soft Pinning, where the dragging is an irresistable force. Active Pose uses Hard Pinning, where the pinned bone(s) are immovable objects. Adding Hard Pinning to the Universal Tool is apparently on the road map, but with no guarantee on the timing as it's a major task.

  • marblemarble Posts: 7,500

    Hi, I've been playing around with the IK chains as well. Sadly, so far it seems it still has the issue that annoys me the most about animating in Daz which is, for example, when animating squats and the figure is crouching, the feet won't stay stuck in the floor even if I pin their translation in the IK parameters. When I'm placing the key poses it's relatively fine but then during the animation, the feet go through the floor and then back to the intended pose. Don't know if I'm doing something wrong or if there is some way to fix that (native to Daz, haven't tested if the glue feet to the floor script works in the beta). Still, using the IK chains seems to get better results while making the key poses, so it's still a decent addition even if there is no way to really fix this issue.

     Active Pose uses Hard Pinning, where the pinned bone(s) are immovable objects.

    Except that they are not. Both in Active Pose and IK, the feet and hands move away from their pinned position - I know this because I waste so much time trying to adjust their position in later keyframes to try to avoid that sliding effect that many complain about. 

  • marble said:

    Hi, I've been playing around with the IK chains as well. Sadly, so far it seems it still has the issue that annoys me the most about animating in Daz which is, for example, when animating squats and the figure is crouching, the feet won't stay stuck in the floor even if I pin their translation in the IK parameters. When I'm placing the key poses it's relatively fine but then during the animation, the feet go through the floor and then back to the intended pose. Don't know if I'm doing something wrong or if there is some way to fix that (native to Daz, haven't tested if the glue feet to the floor script works in the beta). Still, using the IK chains seems to get better results while making the key poses, so it's still a decent addition even if there is no way to really fix this issue.

     Active Pose uses Hard Pinning, where the pinned bone(s) are immovable objects.

    Except that they are not. Both in Active Pose and IK, the feet and hands move away from their pinned position - I know this because I waste so much time trying to adjust their position in later keyframes to try to avoid that sliding effect that many complain about. 

    True, but Active Pose is more solid than the Universal Tool - which is why it keeps being used as a stick with which to beat the Universal Tool. But the limitation of Active Pose is one of the reasons Hard Pinning is on the agenda for the Universal Tool.

  • marblemarble Posts: 7,500
    marble said:

    Hi, I've been playing around with the IK chains as well. Sadly, so far it seems it still has the issue that annoys me the most about animating in Daz which is, for example, when animating squats and the figure is crouching, the feet won't stay stuck in the floor even if I pin their translation in the IK parameters. When I'm placing the key poses it's relatively fine but then during the animation, the feet go through the floor and then back to the intended pose. Don't know if I'm doing something wrong or if there is some way to fix that (native to Daz, haven't tested if the glue feet to the floor script works in the beta). Still, using the IK chains seems to get better results while making the key poses, so it's still a decent addition even if there is no way to really fix this issue.

     Active Pose uses Hard Pinning, where the pinned bone(s) are immovable objects.

    Except that they are not. Both in Active Pose and IK, the feet and hands move away from their pinned position - I know this because I waste so much time trying to adjust their position in later keyframes to try to avoid that sliding effect that many complain about. 

    True, but Active Pose is more solid than the Universal Tool - which is why it keeps being used as a stick with which to beat the Universal Tool. But the limitation of Active Pose is one of the reasons Hard Pinning is on the agenda for the Universal Tool.

    I just hope that "Hard" pinning means what it says.

  • wolf359wolf359 Posts: 3,834
    edited September 2019

    @Marble,You asked, and I believe Nonesuch00 did also 
    (in another thread IIRC ) for some guidance as to when to use the active pose tool and when to use the new IK pinning tools in 4.12.

    Although this discussion linked below is 12 years old it is still quite relevant to the problem you "new" animators are encountering

    https://www.3dbuzz.com/forum/threads/158581-Whats-IK-FK-Blending

    A quote from the thread:
    "in short, ik/fk blending basically means switching between forward kinematics and inverse kinematics (and vice versa) between two keyframes. and yes, you can use ik/fk blending with fbik, as long as the rig supports it. as far as both the ik and fk arms always staying in the same position, there are some rigs that support that too. (most of them have a script that will snap one to the other, but there is usually a pop if you try to ik'fk blend over a short period of time. like 1 or 2 keyframes)
    and now an example of needing ik fk blending would be if you had a scene where a character walks up to a wall and leans against it with their hand. you would animate the arms in 100% fk during the walk, cuz you want to animate the arms swinging with the body, until the character went to lean on the wall. at this point you would set an ik/fk 

    keyframe and leave it at 100%fk. then move to the point in time where their hand was going to make contact with the wall, set an ik/fk keyframe to be 100% ik, and place the hand on the wall. the computer would interpolate the change between the two fk and ik keyframes, (in other words fk/ik blend) and after this, you can move the body all about, and the hand stays put. if you didn't do the blend, then any movement of the body would cause the arm to fallow the body. the opposite is true when you leave it in ik, when you should be in fk. the hands will not fallow the body, and you will have to hand animate their position, and it will look akward. 

    wew! sorry about the long winded response, but i hope that helps!!".


    I wont comment directly on the IK system in 4.12 under threat of instant post eradication for "speculation" about a version of Daz studio I do not have installed.

    However in general,professional Character animation systems
    ( AND RIGS!!) have a means to switch or blend between IK &FK  on demand in the same timeline as described in the quote from the 12 year old thread above. 

    In the application ,I am well known to be using,  every motion using the Maya human IK solver is recorded into a motion layer but when you enter "edit motion layer" mode we can then use the "pose widget" to keyframe FK movements and when you exit "edit motion layer" mode the Software does the blending of the FK "posing "seamlessly into the over all movement.

    This avoids the FK& IK "fighting" over control of things like the feet staying in place when the hips have been twisted /moved with a  "pose slider or  "Universal" tool.

    This is the problem with posers 'IK system.
    you can animate with FK ALL bloody day.  
    But as soon as you pin the feet or hands with poses IK it retroactively wages war  on your previous FK position frames
    and destroys the entire animation. angry


    Active Pose uses Hard Pinning, where the pinned bone(s) are immovable objects. Adding Hard Pinning to the Universal Tool is apparently on the road map, but with no guarantee on the timing as it's a major task.


    No offense, but it does no matter where you add the "hard pinning".
     

    You need a means or a "mode" for the animator to know when he is performing an IK /FK blend either by manually key framing between the two states  or an "edit mode" that "Disables" or "freezes" the hard pinning while you use FK "posing tools" and blends those FK frames into the IK Motion.

    Post edited by wolf359 on
  • wolf359 said:

    @Marble,You asked, and I believe Nonesuch00 did also 
    (in another thread IIRC ) for some guidance as to when to use the active pose tool and when to use the new IK pinning tools in 4.12.

    Although this discussion linked below is 12 years old it is still quite relevant to the problem you "new" animators are encountering

    https://www.3dbuzz.com/forum/threads/158581-Whats-IK-FK-Blending

    A quote from the thread:
    "in short, ik/fk blending basically means switching between forward kinematics and inverse kinematics (and vice versa) between two keyframes. and yes, you can use ik/fk blending with fbik, as long as the rig supports it. as far as both the ik and fk arms always staying in the same position, there are some rigs that support that too. (most of them have a script that will snap one to the other, but there is usually a pop if you try to ik'fk blend over a short period of time. like 1 or 2 keyframes)
    and now an example of needing ik fk blending would be if you had a scene where a character walks up to a wall and leans against it with their hand. you would animate the arms in 100% fk during the walk, cuz you want to animate the arms swinging with the body, until the character went to lean on the wall. at this point you would set an ik/fk 

    keyframe and leave it at 100%fk. then move to the point in time where their hand was going to make contact with the wall, set an ik/fk keyframe to be 100% ik, and place the hand on the wall. the computer would interpolate the change between the two fk and ik keyframes, (in other words fk/ik blend) and after this, you can move the body all about, and the hand stays put. if you didn't do the blend, then any movement of the body would cause the arm to fallow the body. the opposite is true when you leave it in ik, when you should be in fk. the hands will not fallow the body, and you will have to hand animate their position, and it will look akward. 

    wew! sorry about the long winded response, but i hope that helps!!".


    I wont comment directly on the IK system in 4.12 under threat of instant post eradication for "speculation" about a version of Daz studio I do not have installed.

    However in general,professional Character animation systems
    ( AND RIGS!!) have a means to switch or blend between IK &FK  on demand in the same timeline as described in the quote from the 12 year old thread above. 

    In the application ,I am well known to be using,  every motion using the Maya human IK solver is recorded into a motion layer but when you enter "edit motion layer" mode we can then use the "pose widget" to keyframe FK movements and when you exit "edit motion layer" mode the Software does the blending of the FK "posing "seamlessly into the over all movement.

    This avoids the FK& IK "fighting" over control of things like the feet staying in place when the hips have been twisted /moved with a  "pose slider or  "Universal" tool.

    This is the problem with posers 'IK system.
    you can animate with FK ALL bloody day.  
    But as soon as you pin the feet or hands with poses IK it retroactively wages war  on your previous FK position frames
    and destroys the entire animation. angry


    Active Pose uses Hard Pinning, where the pinned bone(s) are immovable objects. Adding Hard Pinning to the Universal Tool is apparently on the road map, but with no guarantee on the timing as it's a major task.


    No offense, but it does no matter where you add the "hard pinning".
     

    You need a means or a "mode" for the animator to know when he is performing an IK /FK blend either by manually key framing between the two states  or an "edit mode" that "Disables" or "freezes" the hard pinning while you use FK "posing tools" and blends those FK frames into the IK Motion.

    The Reach parameter is the FK-IK blend control, and it is animatable.

  • wolf359wolf359 Posts: 3,834

    The Reach parameter is the FK-IK blend control, and it is animatable.


    So you have implemented an old style manual ,node by node IK/FK blending system instead of a  modern Dynamic IK/FK solver.sad

    You seem to have sparked a renewed interest in Character animation
    amongst your userbase.

    IMHO Adding "hard pinning" to the Universal tool without explaining ,to your newbie animators, that they need to manually animate the IK/FK Reach effectors for each node  ,will only add to the current level of confusion.

  • nonesuch00nonesuch00 Posts: 18,288
    wolf359 said:

    @Marble,You asked, and I believe Nonesuch00 did also 
    (in another thread IIRC ) for some guidance as to when to use the active pose tool and when to use the new IK pinning tools in 4.12.

    Although this discussion linked below is 12 years old it is still quite relevant to the problem you "new" animators are encountering

    https://www.3dbuzz.com/forum/threads/158581-Whats-IK-FK-Blending

    A quote from the thread:
    "in short, ik/fk blending basically means switching between forward kinematics and inverse kinematics (and vice versa) between two keyframes. and yes, you can use ik/fk blending with fbik, as long as the rig supports it. as far as both the ik and fk arms always staying in the same position, there are some rigs that support that too. (most of them have a script that will snap one to the other, but there is usually a pop if you try to ik'fk blend over a short period of time. like 1 or 2 keyframes)
    and now an example of needing ik fk blending would be if you had a scene where a character walks up to a wall and leans against it with their hand. you would animate the arms in 100% fk during the walk, cuz you want to animate the arms swinging with the body, until the character went to lean on the wall. at this point you would set an ik/fk 

    keyframe and leave it at 100%fk. then move to the point in time where their hand was going to make contact with the wall, set an ik/fk keyframe to be 100% ik, and place the hand on the wall. the computer would interpolate the change between the two fk and ik keyframes, (in other words fk/ik blend) and after this, you can move the body all about, and the hand stays put. if you didn't do the blend, then any movement of the body would cause the arm to fallow the body. the opposite is true when you leave it in ik, when you should be in fk. the hands will not fallow the body, and you will have to hand animate their position, and it will look akward. 

    wew! sorry about the long winded response, but i hope that helps!!".


    I wont comment directly on the IK system in 4.12 under threat of instant post eradication for "speculation" about a version of Daz studio I do not have installed.

    However in general,professional Character animation systems
    ( AND RIGS!!) have a means to switch or blend between IK &FK  on demand in the same timeline as described in the quote from the 12 year old thread above. 

    In the application ,I am well known to be using,  every motion using the Maya human IK solver is recorded into a motion layer but when you enter "edit motion layer" mode we can then use the "pose widget" to keyframe FK movements and when you exit "edit motion layer" mode the Software does the blending of the FK "posing "seamlessly into the over all movement.

    This avoids the FK& IK "fighting" over control of things like the feet staying in place when the hips have been twisted /moved with a  "pose slider or  "Universal" tool.

    This is the problem with posers 'IK system.
    you can animate with FK ALL bloody day.  
    But as soon as you pin the feet or hands with poses IK it retroactively wages war  on your previous FK position frames
    and destroys the entire animation. angry


    Active Pose uses Hard Pinning, where the pinned bone(s) are immovable objects. Adding Hard Pinning to the Universal Tool is apparently on the road map, but with no guarantee on the timing as it's a major task.


    No offense, but it does no matter where you add the "hard pinning".
     

    You need a means or a "mode" for the animator to know when he is performing an IK /FK blend either by manually key framing between the two states  or an "edit mode" that "Disables" or "freezes" the hard pinning while you use FK "posing tools" and blends those FK frames into the IK Motion.

    Thanks very much. As I've been wanting an explanation that i understood before I continued with my animation & between you, Richard, & Ivy I've a pretty good ideal what to try when I add IK transitions & a pretty ideal I should do my animation complete in FK and than save that as a backup so it won't get ruined by the Ik & FK control 'fighting each other' as you say. 

    Well good enough for my purposes, I can read til the cows come home but I need to actually continue trying to animate if I'm going to learn & make progress so thanks.

    Do you do the rough out of the animation using FK first or IK first? Thanks.

  • wolf359 said:

    The Reach parameter is the FK-IK blend control, and it is animatable.


    So you have implemented an old style manual ,node by node IK/FK blending system instead of a  modern Dynamic IK/FK solver.sad

    You seem to have sparked a renewed interest in Character animation
    amongst your userbase.

    IMHO Adding "hard pinning" to the Universal tool without explaining ,to your newbie animators, that they need to manually animate the IK/FK Reach effectors for each node  ,will only add to the current level of confusion.

    How does that differe from the process described in your quote?

  • wolf359wolf359 Posts: 3,834
    wolf359 said:

    The Reach parameter is the FK-IK blend control, and it is animatable.


    So you have implemented an old style manual ,node by node IK/FK blending system instead of a  modern Dynamic IK/FK solver.sad

    You seem to have sparked a renewed interest in Character animation
    amongst your userbase.

    IMHO Adding "hard pinning" to the Universal tool without explaining ,to your newbie animators, that they need to manually animate the IK/FK Reach effectors for each node  ,will only add to the current level of confusion.

    How does that differe from the process described in your quote?

    There is no difference. However there are more efficient ways to accomplish this today than what we had 12 years ago.
  • wolf359wolf359 Posts: 3,834

    Do you do the rough out of the animation using FK first or IK first? Thanks.

    Hi it depends on what type of animation you are doing 
    what application you are using, and personal preference really.

    I prefer to get all of any IK foot & hand contact recorded first as a"base layer" in my realtime program.

    I then export that as BVH to Daz studio with IK baked to FK
    I then Carefully add secondary  FK body & limb motion with with the graphMate editor& Parameter dials after culling down the BVH keyframes to a managable number with a vital free script from Mcasual.

    I do ALL of my lipsynch with either mimic Live or mimic Pro3 .
    facial animation (including eye blinks)are done manually in Daz studiosince I will be exporting my fullly dressed& animated Genesis 1,2 or 3 Characters as MDD to C4D for final  lighting& rendering.

    I have no use for genesis 8 as my custom.on off clothing creation pipeline is based on the T-pose and transfer utility of Daz studio version 4.8.

Sign In or Register to comment.