Transfer Utility - how to make asset attach but not conform?
 n_a_hopkin_f9a7758696
Posts: 0
n_a_hopkin_f9a7758696
Posts: 0
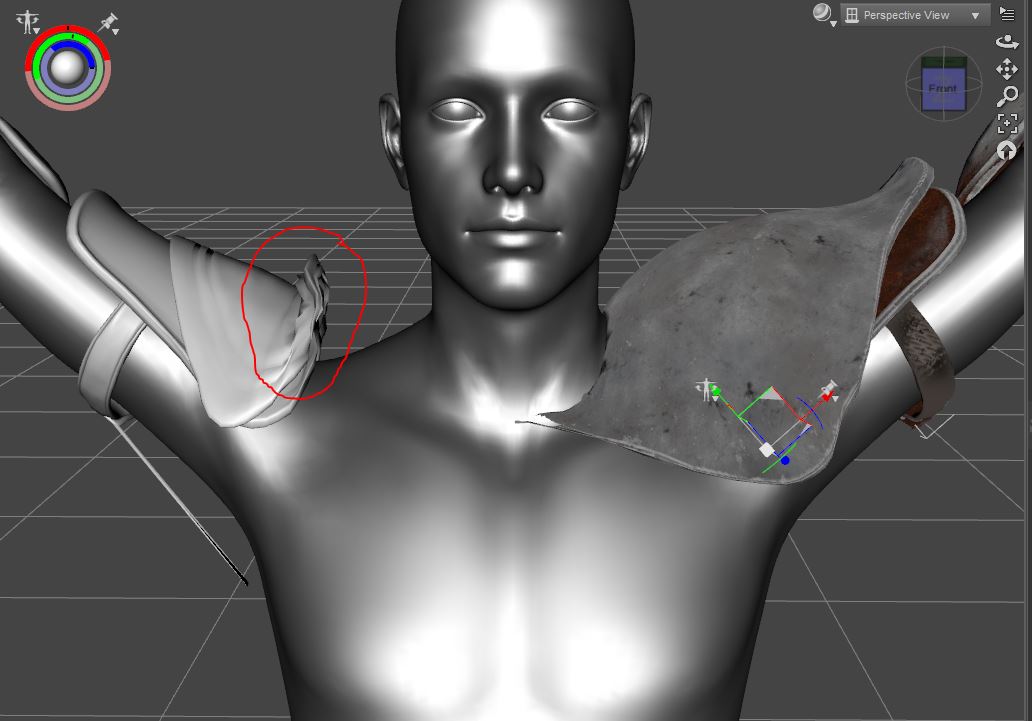
Trying to modify some armor here but I'm having issues with the transfer utility. How do I get the armor piece to move with the figure but not confrom to the figure? In the image below you can see how the modified armor on the right arm is distorted as it fits to the figure. On the left arm the armor cuts into the model which is what I'd rather the other side do. I really have no idea what to do with it at this point.
Post edited by Chohole on
Daz 3D is part of 
Connect
DAZ Productions, Inc.
7533 S Center View Ct #4664
West Jordan, UT 84084
Licensing Agreement | Terms of Service | Privacy Policy | EULA
© 2025 Daz Productions Inc. All Rights Reserved.
Comments
Just parent it to the an appropiate bone in the character, i.e. do not fit it.
You can also edit the weight maps so that they are uniform across the piece - the Transfer Utility is not expected to yield the final rigging in every case, just a good starting point
What I have done in the past is selected the clothing/armor item and clicked on the joint editor tool, then deleted unneeded bones.
Couple examples, in a pair of panties I delete the leg bones, then posing doesn't affect the crotch.
In chest armor with a neck plate, I delete the neck bones then that front piece that sticks up to protect the neck doesn't twist and contort to poses either.
However now that I'm thinking about it, I'm not sure if you can delete the collar bone without deleting the entire arm.
One can rename bones.
Thanks so much everyone! This helps a great deal. I haven't perfected it yet, but it's much better. Now I have a good starting point and am sure I'll get it figured out with this.