Need help with rigging a 3ds model in Daz Studio
 Ivy
Posts: 7,165
Hi
I have been building this 3D model in 3ds for the last 3 months, because I needed a class project for the end of this semester . So I made a exact Model of my car a 1998 3000 GT VR4.
I have pains-takely measured everything for scale, built this model in pieces as you would have a real car and even created my own UV & textures most of which are real photos I used from taking them with a pentex x40 of my car
I have it almost completely done and it works really great in 3ds so I have no issues with it for class.
But here is my problem, I would like to use this model as a Daz Studio model and maybe, be able to market it if it is good enough.
I have tried 3 ways to sideways to get Daz Studio to accept my rigging
I have even tried recreating the rigging in Daz Studio with the Imported Obj ansd creating new bones., accept i am having a wicked hard time trying to get the rigging to work for the wheels, Doors, Hood and Hatch-back. I can import all my Martial zones into Daz and I can import the Obj as a wavefront Obj into the Figure set up tool, but all I can get is my Surface settings and not my 3ds Rigging settings. I have been going over all the help files http://docs.daz3d.com/doku.php/?do=googlecustomsearch&id=Rigging+a+model+
That daz has on rigging and that just seems to confuse me more..lol. And sadly seeming daz is not part of my Teachers expertise so he is no help either..lol
Can someone plezzzzzeee! tell me what I am doing wrong. or have some good help info for rigging in daz with 3ds models?
if I can get this to come out good enough I would like have it be my first items I can market.
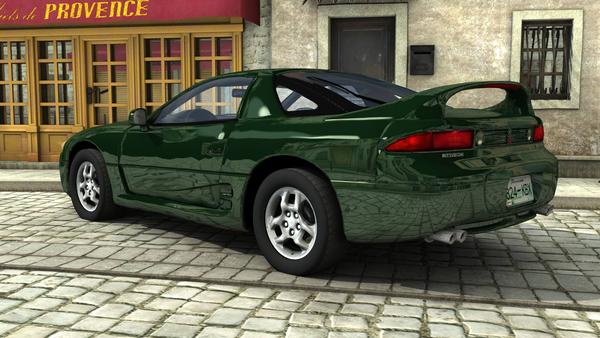
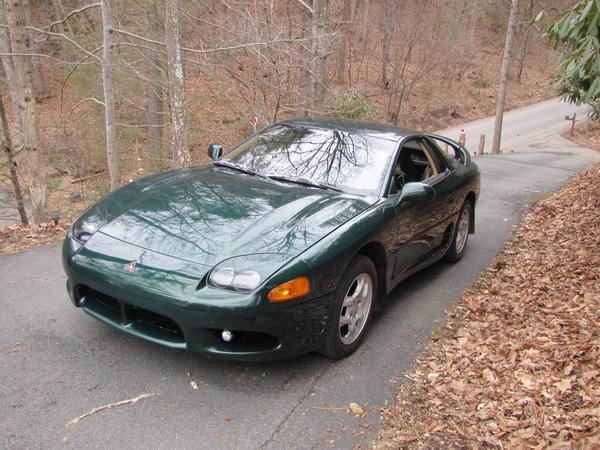
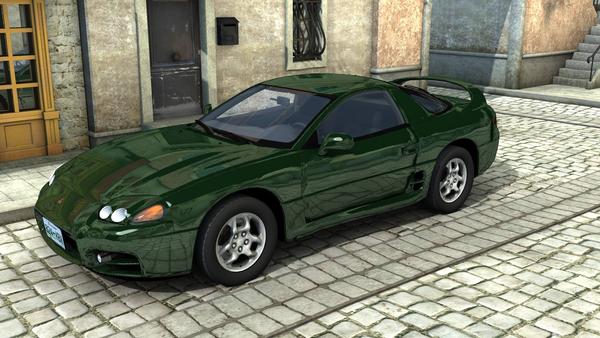
I rendered these in Daz Studio with UE2 light , so you can see my desire to get this model rigging in daz to work. one of my real car one of my model.






Comments
a couple more pictures, best viewed full size i created this with Sub-D and SSS Maps
Okay I was playing trying to get my rigging imported into Daz. and I thought i post some snip-its to help show what is happening.
The first 5 steps i loaded my Models into daz with the figure set up tool and this will show the steps i took to get my models into daz. and maybe some can see what I missed. because right now the rigging that works in 3ds but not in daz i can find my rig settings under the edit tab but the model rig still does not work correctly so I'm hoping posting these snip-its will help
more snip-its of rigging ..what am am i doing wrong?
Two questions. Firstly, where are your bones located and secondly, have you assigned weight maps to the areas affected by those bones? Since the objects being moved are rigid you'll want to select the whole wheel and flood-fill it with the weight map tools so that there's no distortion. Repeat the process for every wheel and it should work fine.
I am no help
but AWESOME MODEL Ivy!!!!
Hi, Ivy, I think your are professional modelor ^^; (I know your animations are awsome too,)
then you may not need so many things to move your gogeous car as rggied prop in daz studio.
Anyway if you hope to save your car, as daz triaxed figure (rigegd prop is same I think)
you may need to check your rigs in joint editor too. (check pivot points are setted correctly by FIgure set up tool)
I think,, you set all node roationt order,, as XYZ, if you see your rigs by joint editor tool, or change display mode,
you may find how your rigged are setted up,,
you may need to adjust rotation order, or move pivot (start point ) manually, I think.
after that, color triax weight map for each node three rotation, in daz node weight - map brush .
Then I believe, you simply need clear documetns how to,, about these step.
and I think you easy follow them.
About weight map,(in setep3) ds will auto weight map for your purpose I believe.
you may need not color manually or use smooth weight etc for your car by using fill weight for selection sets.
it is very important step , so that do not miss it. I quate from daz documents.
1 rigging preparation
2 adding bones for rigging
3 Weight Mapping a Figure
Thanks Guys for the replies.
I think I showed that the 3ds weight maps transferred over okay with the transfer wizard tool just the rigging values didn't transfer over so
So maybe I think now that something got lost in the translation in the transfer wizard.
The wieght maps transferred but the rigging was lost. somehow ..
like I said I made this car to come apart. the rotors and shocks hood doors all move.
The front wheels move on 3 axes independently and the rear wheels rotate on one axes and move together for one controls
pretty much if it has a surface it has a bone for it to move for be controlled somehow..lol all accept the gauges and shifter
I'll post more of my progress in a little while of what I i find
1 rigging preparation
2 adding bones for rigging
3 Weight Mapping a Figure
Thank you very much for the info I will differently look into my node rotation and joint editor,
I'll post more back late soon of my progress after i read some more of the links you posted :)
For mechanical objects you should use legacy Poser rigging, no need for weight painting.
Duh! why didn't i think of that..lol I really didn't want to make this a poser model at this time.
But I'll give it a try and see if pp2012 recognizes my rig zones I was going to create pz2 zones for poser runtime version anyway & I think I seen a python script for control limits on sub surface detail levels on rigged parts,
Though I am hoping to learn how to rig for DAZ4.6 and save in Duf file formats using saved items in Wavefront Object (*.OBJ) and Material (*.MTL) created in 3DS. There is no other way to imports .3DS files into daz..and some of my poser models like my Apache Helicopters rigging didn't work in Daz Studio 4.6 so that is why i wanted to see if i can convert this model to Daz first from 3DS, Which for me is a new learning curve. :) I'll be posting more as I go Than k you for the good idea :)
Okay after some time of reading all the documents I found on rigging and wieght mapping
I was finely able to rig the Hood of the car.
But now I have to find how to fix the texture not separating during the actuation of the Control. Any Ideas how to fix it?
In all likelihood you've added weight to vertices not part of the hood, or not enough. What you're seeing is the result of stretching a polygon as you move some of the vertices away from its neighbours. I've heard there's an issue with Daz occasionally welding vertices as well, so it's possible that may be occurring here.
Is there away to fix it?
If it's welded vertices, I'm not sure it can be done without importing it with the hood popped up slightly. However, if it's simply a weight map issue then it's much easier to fix. Here's a quick example of a car I exported and imported back into Daz Studio as a base OBJ (no bones). I've only worked on the hood in this example.
Here, I've selected all of the polygons in the hood and set them to a full 100% weight map. What this means is that all of the vertices in that area will be fully affected by the bones movement. This is much MUCH easier to do if you've already assigned material zones to the hood separately to the main figure as you can select polygons by region. The bone itself sits slightly higher than the hood due to the curvature so that there's no unnecessary clipping into the body of the car.
Here's how the weight map looks, along with the bone layout for this example.
Yes that does look like the welded verts issue. I think the only correction is to save out the HOOD as a OBJ and use it. The welding is default in the original object file I think. Might check it in a good text editor.
Note: I'm not as up on this as those in the CAR and Bike thread in Art Studio. They do this stuff all day.
EDIT to add, the OLD Poser morphs had a way around that in DS3 but DS4.5+ broke it.
Thanks for the Advice :) I'll give it a try to see if that corrects the welding issue.
If it don;t I can try what Jeff said , I do have a hood .Obj along qwith other prts I made in Obj. form
So I'll keeps playing with it with what you suggest first.
Yeah that is what I was thinking too. I havr the .objs already and that is how I usually do it for poser. so if i can't stop the poly from welding then I'll try it this way
I usually work only blender,, so that I can not advice about 3ds max ^^;
but when I make rigged prop,
I must keep each part which need rotation, as separate obj.
because rotation parts vertices should be not merged , I think,,
(to work easy I made them as one group in blender)
after all I select all parts then export as one obj - obj groups, and import the obj file in daz studio,
Individual obj parts are gatherd as one obj, but not merge vertices.
and each individual parts are auto assigned as Face group in daz studio.
(The import ,export setting often change how group are made in daz studio ,
It may change which 3d tool you used,, so that 3ds max user can only advice about
setting I think ^^;)
Then,, if you use "fill weight by selection sets"
ds must color each goruped vertices with full 100% for each rotation .
I believe, we need not adjust weight color.
And If you hope to offer (I hope you will sell products for ds user ^^,)
product for daz studio user, I beleive, you may better make it as triax weight figrue too.
of course I understand, rigged car not need triax weight, you can make your car as same as poser type,
general weight rig.
but only tryax weight figure can be saved as DSON at current. the file type really much for current version ds.
it offer us many flexbility and easy use them for current ds version.
If I serch items in daz shop, I must check which the item is offered as cr2, pp2, or duf (and dsf) about scean props, rigged car too.
I know there are users who do not care much, so that It is only my request ^^.
Ivy, just curious, is it triagulated in Max?
If you separate the bonnet in the modeller it should be OK in DS - as long as the modeller isn't merging coincident vertices on export to OBJ. DS doesn't merge, but nor does it split in DS4 the way Poser and DS3 did (they break models up into their consituent groups, then weld them back together as specified in the CR2, which is why several items have needed updates).
I think i know what you saying .. In m y version of 3ds I can make any Surface or munlti surfaces a rigged and it will highlight and automatically weight map the item to be rigged & the properties panels has all the rigging settling which will also allow me to manipulate the Sub-Divsion as well, which i found Daz does not let me do. ..So I think maybe having Sub D included in the Saved .Obj maybe have something to do with it though i can't see how it should effect it?
In poser like Jeff said , creating and a .Obj for each part to be moved and rigged is usually much easier way to rigged a Hard surface. .. accept even when i tried that I still get the wielded Ploy .. which tells me maybe its some where in the masking process when i create the weight map.
I'll keeps playing with it :) thanks for the idea's
That was one of the first things i checked.... like minds :)
I checked my redefine setting and looked for any invisible triangulation and didn't find any
I made pretty clean lines, it took me 3 trys to get the Model to this point. and used a script to redefine the Model on save so it shouldn't have effected the poly. I think its got to be something in Daz Transfer tool I am missing maybe. or something Im not doing right or maybe I have not turned on or something.. I was hoping it would be something easy..lol
So would it be easier to just import the individual .Obj and parent them in the pivot points for the doors and hood and trunk.?. I didn't make the wheels in individual Obj. would i need to do that too:) or can I just use the twist setting in the ringing tool?
I got a lot of info here to go over . Thanks Guys for all the help
well I went back to 3ds and saved a different copy of the Obj I took most of the little things i had rigged and shut them off and hid them so I can start with a few rig settings to see if that helps , the top few pic show you how it works in 3DS, But when i transfer it over it , Does it not transfer the 3DS rigging locations automatically because if it don;t man it be a great feature if it did..lol
But anyway as you can see I have fewer bones to deal with now in the last picture ,
Okay after working on this most of the afternoons and still could not get the poly to unweild
I decided to take a different route and build each rigged part as a obj and and inport them one at a time..
so now my question is what would be the best way to attack and rig each of this parts? Conventional weight mapping won't work will it?
or should i parent it and use a pivot point?
or is there still a better way to do it in Daz?
As you can see each part has its own obj in the renders below.
what next? ,,lol
That's probably the easiest way.