How to Adding HDRI's + Textures to the MyLibrary?
How to Adding HDRI's + textures to the MyLibrary?
Hi,
I found a Page ( https://hdrihaven.com/ , hope the link is ok?) where you get free .hdr files, but they have not a .duf.
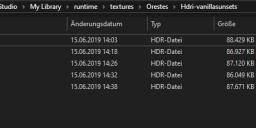
I checked now my other HDRI, they have a .duf which allows you to oneclick loading them, now is my question, where do I save that .hdr file? from my current one, its in runtime->textures-creatorname.

And the .duf explain from where it get loaded.

So, whats the best way to do it with 'stranger' hdri's?
If I add them to the runtime folder, I still have no Link in my Library via a .duf and how to use them then?
I hope someone can help. If that got already answered, please link me the Thread.
Update: Maybe someone can also give a info for textures? :D
Like this:
https://texturehaven.com/tex/?t=brown_mud_leaves_01
how to handle the bump, diffuse, normal etc? to have easy access to them in Daz3d?


Comments
In the Editor tab of Render Settings add them as an environment map, in the Environment group (assuming the redner settings are at their defaults click the micro thrumbnail of the Runs HDR, select Browse from the menu, and pick the HDR). Make any other chnages needed, then File>SAve As>Render Settings Preset.
and for textures?
You can open the HDRI file directly from the Iray Render Settings (using Dome and Scene, or Dome Only mode) by clicking on the micro thumbnail next to Environment Map and navigating to the folder with your HDRI's. After it loads, you can tweak some of the settings if yopu like, and simply save as a Render Setting. The preset will rely on the location you use to save those HDRI's, so dedicate a folder for them somewhere with other resources because if you move them later, the presets will no longer work. The HDRI's could go in your library under General (where some Merchant Resources go) in their own set of folders, or in a separate library for your own creations, so to speak.
For texture resources in general you would have to set up the bitmaps manually into the shader of choice from the Surfaces tab, and then save them as a shader preset or materials preset. Start with a similar shader preset, or a blank default shader preset. Of course, you would need some object in the scene to which to apply the shader. If you look at shader products, they usually use some simple geometry that suits the type of materials. Frame it up, maybe add some lights, to get a good thumbnail image and save.
It doesn't matter where they are (presets must be in a mapped folder for Studio to see them), you just need to be organized. Look at how PAs set up their folders, one per product, sometimes one per zone on a figure (makeup, skin, eyes, lips, etc.). Whatever makes it easy to keep track of. I would set up a separate library for your own presets so that you can keep them separate from the purchased products. It's also easier to back-up, since there won't be any installers to help recover them. Purely your choice.
Thanks for the long answer, I did just fly over it, I will check it all complete and try out later! But thanks already :)