Grainy Render
 Mr_ E
Posts: 68
in Art Studio
Can someone recommend better render settings than the ones I posted? Aside from the grainy issue, the edges look rough.
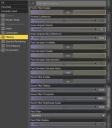

Filtering Render Settings 2.JPG
647 x 742 - 72K
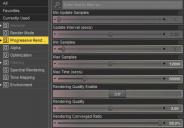

Progressive Render Settings.JPG
620 x 432 - 49K
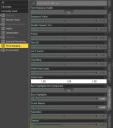

Tone Mapping Render Settings.JPG
649 x 738 - 66K
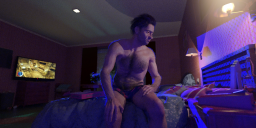

Hotel Room - Sitting Up with Blue Spotlight.png
1476 x 665 - 2M


Comments
Its been explained to me that grainy Iray renders are either from too much light, or not enough. I could never get it right myself.
I have a suspicion that low light levels is what is causing the problem. Try increasing the emissivity light levels by a factor of 100 or more to check this.
Regards,
Richard.
Not really. You can run it through a denoiser or a bloom or blur filter but that will remove detail. It's sort of the opposite of those sharpen filters that add graininess and contrast. I think your render looks good just keep rendering til the DAZ Studio on the computer converges to 95% quality at 1.0 quality setting for 15000 iterations maximum for 0 seconds time (0 seconds time means take as long as you need to get to 95% or to 15000, which ever comes 1st).
I'm not an expert by any stretch, so take anything I say with a grain of salt...
The main thing is, there's not enough light in the scene. But simply increasing the lumen of the emissives might actually not help. IRAY renders tend to be grainy if a lot of light comes from relatively small sources (lamps, screens, windows), making certain parts of the scene very bright while other parts remain in shadow. What you want is for the space to be as evenly lit as possible (without destroying the mood you're going for.) You could place several point lights throughout the room and try to evenly lighten the entire scene just a little.
Other things to try:
- Set max time to 0 (= no max time) and render even longer.
- Your character looks out of focus. Does your camera have Depth of Field enabled? If so, adjust the focus or disable Depth of Field.
- Set Max Path Length to 10. This restricts how often a ray of light will bounce off a surface and might help a little with the overall rendering speed. It might make certain remote corners of the scene even darker than they already are, so you should combine this with the point lights mentioned earlier.
- Since this is an indoor scene you can turn on the Architectural Sampler.
- If there's unnecessary geometry off panel you can quickly hide it with IRAY section panes.
- Switch off all displacement maps unless you really want them.
- For objects that are far away and possibly blurred out by Depth of Field you should also switch off bump maps and normal maps.
Hope some of this helps, good luck!
Try changing your pixel filter to Mitchell with a radius of 1.0, to my (inexpert) eye, that seems to reduce overall blur.
I've never tinkered with the "Noise Degrain Radius" setting, but you can try setting that back to default, or less - maybe it's one of those dials that going down makes it clearer? You can also try it with the "Post Denoiser" off. Seems counteractive, but what that does is basically blur your image to reduce grain. Having it off should give you the raw image, at least you can see what it would look like without the filter applied, could be the denoiser causing the issue.
How many samples/how long did this run for? I've seen some images come out blurry, but not as much as that one - that's excessive.
Edit: I just tried the Noise Degrain Radius setting, doesn't seem to make much of a difference. Not on a simple scene, anyway.