High Poly Exports Workaround
 UpL8Rendering
Posts: 129
UpL8Rendering
Posts: 129
Hello all,
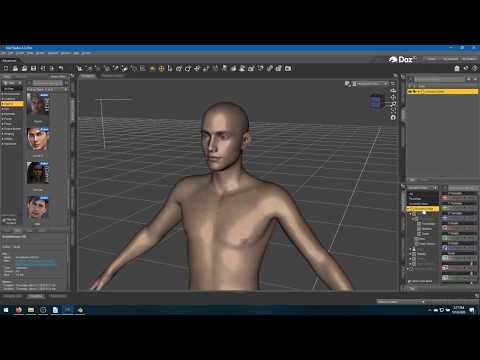
After months of experimenting I think I have finally worked out a way to get rigged high poly characters and morphs out of Daz Studio, into Blender, and ultimatly into your game engine/renderer of choice.
I just put up the first video tutorial on getting things set up. This is my first real video tutorial. Before I do the next one I would very much like to hear any feedback you might have.
EDIT 1: I changed the title from Solved? to Workaround. High Poly exports aren't solved but this may be a good way around part of that. Plus after a day of thinking about it the original title seamed click baity to me.
EDIT 3: New video link below:
I cut 5 1/2 minutes out and streamlined the process significantly. I also added a brief explanation on why we are scaling down parts of the mesh. Thank you TheKD for the question.
Daz 3D is part of 
Connect
DAZ Productions, Inc.
7533 S Center View Ct #4664
West Jordan, UT 84084
Licensing Agreement | Terms of Service | Privacy Policy | EULA
© 2025 Daz Productions Inc. All Rights Reserved.
Comments
Interesting. What was the reasoning behind scaling the eyes and mouth?
Blender transfers the mesh data from one object to the nearest vertex on another object. Most of the time it's pretty accurate. Parts of the mesh that intersect each other, like the eye sockets and the eyes, or are really close like the teeth, mouth and lips can cause issues. I found that shrinking them down to their own little islands helps.
Ah, that makes sense. Seems like a simple solution too, but one I would have never thought of on my own. Looking forward to the sequal :D
Thank you
Am watching this with great interest.
I'm happy to hear that. Thanks
A very easy tutorial to follow! Great job.
Thank you. That means a lot.
nice work ;) keep going :)
Thanks. Will do.
Bookmarked! I'll get back to you when I fail at it when I get the time :p.
Thanks, I will watch, try your method, and comment by, Sunday evening.
Haha. I'm sure you will be successful - Results may very.
Thank you. I look forward to your thoughts.
I found a weird issue in Blender. When you scale the Teeth by .01 and scale back by 100 they don't always come back to the correct position. Scaling by .2 and back by 5 instead should work fine.
I'm re-recording those sections.
Probably just a rounding error in a python script although 0.01 & 100 aren't that small or big a number.
Yeah. I thought maybe too it was because I was working in .01 scale but that doesn't seam to matter. If I do the same thing while in orthographic mode it is a little more reliable but still glitches occasionally.
I'm looking at just doing another quick run though instead of trying to patch in the changes. I think I can cut the amount of saves I do to 1 or 2 and cut out about half of the selecting material slots. I also remembered that there really isn't a reason to collect the textures to a folder. At least for this set up.
Still a work in progress. Stay tuned.
Cool, I have been trying to set up a so-so complicated hi-res scene in DAZ Studio to do the tutorial tomorrow.
I got so far and then failed. When I "append", I cannot see the low poly mesh, i.e. if I hide the high poly there's nothing there. I can see it in my scene collection and it's "visible" (eye icon) is enabled but I don't get a mesh. I have a shape in the scene for it. Weird.
This one is on me. Sorry. At the beginning of the high poly import I mention setting the Scene Properties to .01 if you are going to be exporting back out to Unreal Engine.
When we create a new file for the standard poly character Blender likely defaulted back to 1.00 scale. I forgot I have that setting locked into my startup file.
When you append the standard poly into the high poly scene it is probably doing so at 1/100 the size. (1st Pic Below)
With the standard poly character selected change it's scale to 100. (2nd pic below)
Then press CTRL and A and Apply All Transforms (3rd pic below)
You should be back in business.
I am going to record a new version just importing everything into one scene to eliminate all the extra saves and keep that issue from happening to someone else.
Thank you for reporting back with your experience. You helped me find where I could make improvements.
The tutorial really only covers getting the character mesh set up for high poly, not really an entire scene. That being said it's certainly possible that some parts of the tutorial might be able to be used to do more than I was originally intending. If you do try it I would be very interested in hearing about your results and experience.
Yea, it worked. I got as far as, "and we'll fix that in the next video" :p. Thanks.
Looks pretty rough when you fiddle with rotation on the joints.
Great!
That does look rough. I don't get that issue with Genesis 8 characters but I haven't tested with any Genesis 3. That might be the difference. I will do a few tests. Thanks for pointing that out.
I did a test with Genesis 3 Female using a more straight forward approach of importing everything into the same scene without all the extra saves and appending models in.
With the character shape selected I also enabled Preserve Volume in the Modifier Panel.
I should have the updated streamlined method recorded, edited and uploaded in the next few days.
Ah, OK! Will give that a go. Thanks.
Alright, I tried with "preserve volume" and it didn't make a difference. I'll wait for the full tut.
I will knock it out as soon as I can and post back here when it is up.
Very interested to find out how you sort the issues out around the mouth/parts of the mesh that get welded. I had the same problem when I was trying to find a way to do this in Maya. Didn't know enough about Maya to solve it and nobody could help (they thought what I was trying to do wasn't really possible/reasonable).
That sucks you were so close to a solution and couldn't find someone to help you figure that next part out.
When you transfer the vertex groups some of the lower lip weights get transferred to the upper lip and vise versa.
So when you rotate the lower jaw bone down some parts of the lower lip stay put and some parts of the upper lip go down.
Here you can see how some of the LipLowerMiddle weights got transferred to the upper lip and are missing from the lower lip.
Same thing with the upper and lower teeth.
Yup, that's precisely what happened. Maybe hammering them will work... I can't remember if I tried that.