Trouble with decals
 dennisgray41
Posts: 823
dennisgray41
Posts: 823
in The Commons
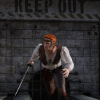
Why does she always gey that hard line on her leg, and how do I get the decal to look more like water running off her leg?
Iray Foam and Bubbles

decals.jpg
400 x 463 - 162K
Daz 3D is part of 
Connect
DAZ Productions, Inc.
7533 S Center View Ct #4664
West Jordan, UT 84084
Licensing Agreement | Terms of Service | Privacy Policy | EULA
© 2025 Daz Productions Inc. All Rights Reserved.
Comments
It looks like you are not positioning the decal in the right place. Try moving it and see if you get closer to what you are looking for. Decals are hard to work with, because you can't see them in the textured viewport preview. Have you tried Iray Preview mode?
Thanks. I have moved it a lot. Iray preview can be harder to work with because this are hard to move and it still takes a minit or more to render. Sometimes it doesn't.
You’ve moved it, but have you rotated it? Orientation matters, too.
Decals are usually the last thing I mess with in a scene. When I'm ready to start working with them, I hide everything but the object I'm applying the decal to, along with the lighting (so you can see what the decal will look like in the final render). That way, you save more resources to hopefully speed up the Iray preview.
I've done a lot of testing with decals as my new product I've just released use them: https://www.daz3d.com/dotify-for-genesis-8-female
There's a few things that spring to mind:
Feel free to ask if you need any more help!
i think iray decals project onto the front/back of the cube by default, so you can just view your iray decal cube in one of the other viewport views and ensure that that decal cube is placed so that the front-face of the cube is angled so that it will project onto the surface you want (front face will be one with Blue Z-axis arrow)
also... to speed up iray preview, you could try turning off visibility fo the unnecessary objects in scene?
on an unrelated note, anyone know how to get iray decals to work with geoshells? i asked in technical help but nobody answered me...
@lilweep yes i know how they work with geoshells - the problem you're probably facing is that the're not showing up. If you change the opacity of your shell, you'll see the decal underneath.
Essentially, the decal is projecting onto the object the shell is of, not the shell - the shell will always be the top layer. Unless...
...you set the offset to a negative value. Visually this gives the appearance that the decal was applied directly to the object, as the shell is now inside it. If toggle the visibilty of the object off, the decal disappears.
If it is that you wanted to use a geoshell to mask off part of a figure or object so that the decal doesn't interact with it, you need to do the reverse:
This is how my Dotify product works - its on sale at 30% off as a new release if you're interested
Ah thanks, that answers my question.
Dumb question. Where are these located?
You need to select the decal in the scene tab, then you'll find these options in the parameters tab.
New question... decal nodes cant have emissive surfaces?
I am pretty sure they can.
fair enough.
While you guys are talking about decals, is it a known limitation/bug that decals on a figure don't show up on instances of that figure?
- Greg
I would expect it to be a limitation, given that an instance isn't real geometry.
Question, I need to marry an emblem to the back of a cape. I have gotten as far as the emblem placement but it will not parent to the BACK of the cape! The parent directory only shows clothing options such as upper chest, lower chest not upper back or lower back. Is their a way to lock the emblem to the cape so when I simulate it or change pose I dont have to do the back emblem every time?
Is their a way to lock the emblem to the cape so when I simulate it or change pose I dont have to do the back emblem every time?
Is your emblem a 3D object or a 2D logo? In other words is it supposed to be embroidery or an image that was painted or sewn on to the cape?
If so, maybe you should try adding the image of the emblem to the actual texture of the cape.
Open the texture Map of the cape.
1) Select the cape in the SCENE TAB.
2) Switch to SURFACE TAB and near the top is the DIFFUSE Channel (might be called Base Color)
3) Hover/Left-click the mouse over the thumbnail icon of the Image being used for the Texture. (it will show you the name and location of the Texture Map - note the name)
4) Choose BROWSE and navigate the that file and Copy/Paste that file to a new location (usually the folder where I'm keeping the working files)
MAKE YOUR OWN VERSION OF THE TEXTURE
5) Open that file in an image editor and position your emblem on the cape. Save as PNG or JPEG.
6) Back in Daz Studio, repeat steps 1 -> 4 and this time BROWSE to the NEW VERSION of the cape texture you just made and saved. Choose it.
7) Check in Daz Studio to see if the Emblem is where you want it. IfF not, I adjust it and save with a new name, usually like CapeEdit01 then CapeEdit02 until I get it right and then erase the ones I don't need.
Short Video
Showing how.