*Released dforce Desert Queen Hair* Commercial
 chevybabe25
Posts: 1,274
chevybabe25
Posts: 1,274
https://www.daz3d.com/dforce-desert-queen-hair-for-genesis-3-and-8-females
YAY for Strand Based Hair!!!
I'd like to include some general information and helpful tips for you to use my new sets in the store :)
What is the difference between strand based hair and fibermesh?
Strand Based Hair is generated inside Daz Studio. Fibermesh is actual mesh generated within Zbrush. Fibermesh can bring even the nicest computers to a painful crawl once it is imported into Daz Studio. Strand Based Hair is so much lighter!! There are a lot less hairs in your viewport, and the rest are generated during the render. I don't know all the magic behind that part, but its really awesome.
SBH ( Strand Based Hair ) is DYNAMIC! - Yes!!!!!!!!!!!!!. As an artist that has been working with Daz Studio and Poser for almost 20 years, this is what I always dreamed of!!!!!! Well I have also dreamed of being a millionaire too, but I'll settle for this  .
.
But what if I don't want to run a simulation? With the ones currently in the store, you do not need to run a simulation unless you want to. There are morphs that will move the hairs around like a traditional hair model too! The coolest part is that you can use the morphs before a simulation, without a simulation, and/ or after a simulation.
How do I use it? Select your figure and load the model like you normally would. Make sure that you do not have the geometry editor tool or the awesome Mesh Grabber Tool selected, pose your figure and render.
How do I use the morphs? These SBH hair models are currently in pieces to add more versatility. Selecting it in the scene tab will make the morphs appear in the parameters tab ( They are parented to the head) . Keep in mid that because these hairs are separate pieces they are grouped. So you will have to expand the options in the scene tab to find the individual pieces. Then just play with the sliders to your liking!
How do I simulate the hair? Welll there are several ways to do this, but the easiest way is to click on the simulate tab and click simulate. No extra settings needed. You can also use a timeline animation, or use the settings provided to use just gravity.
There will be so much versatility!! I have added a ton of separate surfaces so you will be able to easily kitbash these. Shut off certain surfaces to combine them with other SBH hairs orrrr maybe even combine them with some of the regular 3d hair models in the store and make a hybrid!
Technical Stuff:
Line Start With & Line End Width - This is how thick your hair is and how it tapers. I kept mine slightly thicker @ .09. and .03 to keep the amount of generated hairs to a minimum. If you want the hair to be thinner or taper more, you can turn this amount down, but oviously you will have to add more hairs.
Root Radius - This is the mode I have chosen to favor. It doesn't require painted maps or interpolation algorithms ( where hairs can go off in crazy directions for almost no good reason) and it is much more predictable for me when I import my hair from outside programs. With that said, there are no options for the cool stuff like frizz. Sorry guys :(
PS Points (per hair) - for those of you that model this is similar to CVS in a curve. It can control how smooth the hair will look. If you do a simulation and the hair just turns to a straight mess, try turning this down. The lower the setting, the more stiff the hair itself will behave and keep it's shape. Too low and you may end up with some jaggy edges. I feel like 20 to 30 is a good start for these stiffer styles.
PS Hairs (Per guide)- This is fairly self explanatory. If you want a fuller look, you can try adding more hairs. More hairs will probably require more computing power. But feel free to play with the setting.
PS Hair Tip Separation - This is a clumping option. Positive direction moves the hair away from the tip. Negative direction forms a clump at the tip.
Bias and Gain - This also has to do with clumping.
Bias is where along the hair shaft the clumping/non clumping starts. The lower the number the higher up the hair shaft the tip separation starts and vice versa.
Gain is how the bias transitions along the hair shaft.
I don't bother messing with these too much, but feel free to play with them.
PS Hairs and PR Hairs - PS hairs are supposed to be more accurate when simming than PR hairs. Also, I have found that PS hairs have a more delicate, natural look to them. PR hairs are great for adding a little extra bulk or frizz depending on how you use it. To get hair more dense looking, you can add PR hairs one or two at a time. I like to think of PR hairs as a multiplier, so you don't need to add a whole lot. If you want to make the hair appear a little more frizzy, you can play with the distribution radius and the tip separation for the PR hairs.
More Technical Questions * This will be added to as questions come up so all info can be placed in one convenient place
I like to use the NVIDIA Iray Preview. The hair is not chowing up in it. How can I preview the hair in that window?
You can view the hairs by going into the parameters tab: viewport line tesselation sides. You can change this setting from 0 to 2 or higher.
I want a certain section of my hair to drape more. Is there a way to do that? Yes! There are a few options you can use to adjust the draping so it suits your particular scene better. You can adjust the PS Points on the surface you select to something higher. The double dutch braids in particular are kept fairly low around 20. This keeps the whole hairstyle fairly stiff. I would start fairly high at maybe 60 and see what results you get and what you are exactly looking for. If it drapes better but its lost too much of your shape you can adjust other options as well.
You can also adjust the Local Shape Constraint Stiffness. Turning this down lower will also make the hair drape more while keeping the shape of the hair more in tact.
You can also adjust the tips of the hair with Local Shape Constraint Tip Stiffness. This will loosen up how the tips drape more. A lower number will spread those tips out more during a simulation.
All of this is a process of trial and error and what exactly you are looking for in an end result.
I want to simulate hair on a figure that is on a floor. When I sim the hair it makes an explosive mess. Help! This wasn't a question posed here yet but I know it's on the way :) You have a few options to handle this situation. If you are on an older computer that doesn't do so well with simulations, try keeping the model's head height as the same level the default figure loads in. I hope that makes sense. When a simulation is going it is essentially pulling those hairs to the end pose. Further away from default equals more pulling.
If you have a decent computer and you don't have an issue with simulations then you can simply change the simulation settings - Pose Transition Time to something higher than 1. The promos I did with Victoria on the floor all had a pose transition time of 3 - but I believe 2 probably would have done just fine.
Some general dhair issues were discussed in a different dforce hair thread and I want to share them here along with solutions.
"Needs greater stability when dealing with hair not pretty much falling straiht down, but with head/neck at 'strange' angles.
Hair falls with gravity. If you bend the head to the right, then the hair should essentially fall to the right. However, depending on the style of the hair; you may need to use a pose, a morph, or a simulation setting to nudge the hair in that direction. If it is a stiffer style, you will more than likely need to adjust the points or the stiffness.
I have had on several occassions tried to get a hair to flow a certain way. Case in point : https://www.daz3d.com/dforce-soft-curls-for-genesis-8-and-genesis-3-females the promo with victoria on the ground. I tried several animations to get her hair to fall like that. Using morphs i was able to nudge the hair the way i wanted but it still didn't fall the way i had hoped. Simply changing the simulation controls "Start Bones from Memorized Pose" to off used gravity instead of an animation. It's a lot of trial and error. Understanding your options, settings, and little tricks along the way can give some wonderful results. The key is really to be patient. Learning takes time.
"Needs to be affacted by wind nodes in a consistent fashion"
I am not quite sure I understand what the author meant by this, so for the time being.. Im going to guess.
Hair that is lodged into a figure will not move. No matter how hard the wind blows.
" Needs to be able to cope with morphs that could produce poke-thru (such as elf ears) without crashing"
If you have poke through, you will get a mess. Plain and simple. The bigger the mess the more likely chance you will have a crash.
I understand you will want these products to do everything and then some that you can throw at it, but please understand we can't forsee all of your creative visions :)
I will look into seeing if morphing within daz studio can potentially be done by a customer. If it can, I will share some info here.
"Needs to handle motion in animations without leaving a 'trail' of hair floating in the air behind the figure."
I'm guessing that this is referring to producing a still render with a simulated hair animation.
Easy fix. Change the pose transition time to something greater than 1. If you still have trails, adjust to 2. You can also increase the stabilization times to something greater than1.
You can also try and move the figure closer to world center so there is less "pulling" on the hair during the animation.
Now go have some fun and be creative already!
I will be here checking this thread as often as I can to help, should you get stuck, have questions, or just wanna show off pretty pictures :)
Daz 3D is part of 
Connect
DAZ Productions, Inc.
7533 S Center View Ct #4664
West Jordan, UT 84084
Licensing Agreement | Terms of Service | Privacy Policy | EULA
© 2025 Daz Productions Inc. All Rights Reserved.
Comments
A few hints, tips and tricks with the hair!
This hair has a lot of points and will sim slow. You can turn them way down, which will run so much better during an animation. The trick is that you need to adjust the gravity.
Under the settings tab for the hair, click on gravity 1.7 (ideal). Click on the hair object. Select surfaces. You can select all the surfaces and change ps points(per hair) from 75 to 40.
Run all your simulations and freeze them before attempting to run a simulation on the crown.
Any other questions, comments etc.. ya know where to find me :)
more helpful info :)
https://www.daz3d.com/forums/discussion/436117/desert-queen-hair#latest
Hi, I seem to be having some problems with this product. I understand that there is a special setting for the hair to show up in nVidia preview, but even when I render it, it doesn't show up. Any ideas? Am running 4.12.1.118.
My best guess is that you have the geometry editor or the Mesh grabber tool selected :). Just select a different tool and it should render :)
ou were rightY
You were so right! Now, I just have to figure out how to cut down the resource consumption, or whatever other tricks you gave others, because it is taking ages to start rendering and to finish .... and I don't have a slouch machine.
YAY!!
I'll post them here too :)
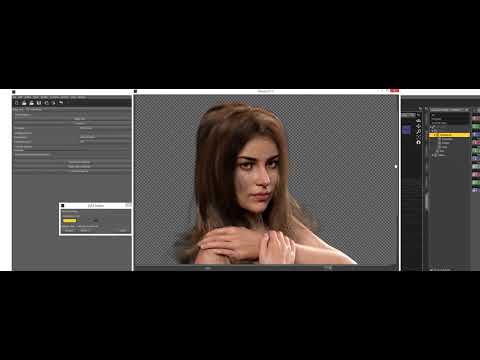
Select the Hair in the scene tab ( the hair is parented to the cap so you will have to expand it to see it)
Select the surfaces highlighted in the first image attached. Change the PS Hairs Per Guide from 6 to 3.
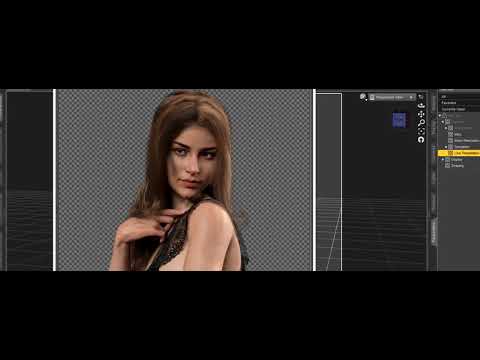
Select the surfaces highlighted in the second image attached. Change the PS Hairs Per Guide to just 1.
This will reduce the vert count to half( 16 million). If this will still not render on your machines then maybe something else is going on.
It's rendering now, although still slowly. The only other times I've seen behavior like this is when I have a lot of complex shaders in the scene (water, etc.), so I am guessing it's got to do with that. Thanks for always responding so fast and thoroughly!
I tried this the other day and it totally worked. I have a 1080ti and 32GB of RAM and with the new character HD, this hair and one of the new outfits, it was dropping right to the CPU. But I changed to these settings and the GPU kicked right into action. I think the hair looks fantastic, BTW. I'm going to try your suggestion of keeping the head at the regular place and then moving it down on the Y axis afterwards.
Strangely, when I do a viewport nvidia render, it's doing fine, but it crawls when I render it out (even in a smaller dimension than the window).
I think my windows settings must be messed up. It looks like both of my gpus are set to run the monitor (so the viewport render is fast), but it crawls when doing a regular render .... presumably because it DAZ isn't getting the GPU power it needs to render out a pict.
You are very welcome :)
If it's not an up close type of portrait, you can try changing the hair width. On the surfaces tab ( you can highlight them all) and then change the "line start width" to something larger. I don't remember what the default setting is but it's prob around .12. You can change it to something higher like .17, and change the the "line end width" by the respective amount. You can then reduce the amount of pshairs. It's all trial and error for this unfortunately but it will make it much easier on your machine.
"Strangely, when I do a viewport nvidia render, it's doing fine, but it crawls when I render it out (even in a smaller dimension than the window)"
Hmm My thought is that when using the NVIDIA part for testing, you are essentially slowly filling your GPU. By the time you do the real render, theres no room and it dumps it to CPU. I would try saving the scene, rebooting your computer, and try rendering again.
Oops cross post.. didnt see your last comment :)
YAY!! So glad it worked! I feel so bad that this wasn't working for some, so future products I'll try and keep the vertices much, much lower. Yes please do! It saves so much aggrivation if the hair doesn't need to colide with extra things. If you are using floor poses and you want to have the hair collide with the floor, simply raise the floor too :)
So, my test renders confirm: blazing fast with no hair and very, very slow with hair, even with your settings modification. I am using two GPUs and have 32GB of RAM, so I don't think there's a problem there. I am inclined to think (since I never have problems with file sizes being too big, and it could just, but doesn't default to CPU) that the problem lies somewhere with (borked) shaders because it's the only other time I have had exactly this kind of problem.
It's definitey a possibility.
Oh, thanks for that hint sir. Since i fall in love with Oso's cats and foxes and try to make as many scenes with them as i can, DForce optimization is quite handy
Still, can i ask you something about?
I was sure, that i see some where in D-force hair surfaces a setting , to make strands lean close to body. But now, of course, when i realy need this function, i can't find it anywhere.
Do you know anything about this?
I do know that OSO and I set up dhair very differently. I believe he uses "target surfaces" and I use "root radius". Target surfaces have more options like angles, frizz etc. but work best on hairs built within Daz Studio. I build mine in an outside program, so Root Radius works best for my hairs, as it follows more closely to how the hair is designed.
If you could explain what exactly you are trying to acheive as an end result, I may be able to help you find a way :)
Laura
To get the hair more slick or wet looking, you can try a couple of things:
you can try lowering the "local shape constraint stiffness" to something much lower like 20.
increasing ps and pr points on all the hair surfaces. ( I believe the default is 75, so I would try 100) Keep in mind, the more ps points will also require a lot more memory.
Maybe this is what you're looking for
https://www.daz3d.com/forums/discussion/478941/quick-and-easy-ways-to-make-hair-look-wet