Core Shadows
 claesakeschlonzig
Posts: 0
claesakeschlonzig
Posts: 0
Hi, This core shadows passage is not so soft as I want, can I changed that so it looks more natural? I am on Daz Beta 4.12 It is sun light in the environment and rendering time is 3 hour.
kind.png
244 x 516 - 159K
Daz 3D is part of 
Connect
DAZ Productions, Inc.
7533 S Center View Ct #4664
West Jordan, UT 84084
Licensing Agreement | Terms of Service | Privacy Policy | EULA
© 2025 Daz Productions Inc. All Rights Reserved.
Comments
Sun light acts as a distant point light and produce very harsh shadows. I don't believe you can change it. If your environment mode is in Sun-sky only you can't introduce a parametric light, however you can a mesh light. Use a primitive (a plane or a disk) similar to how photographer use a diffuse disc in real life. adjacent to where the sun light is coming from...
In the first image, I only has the sun as a light source
In the second image, I added a primitive plane and made it emissive and almost invisible. As you can see, the shadows appeared to be softer, but it is not a complete fix.
Maybe try using the dome and an HDRI if you're not already. Really much easier than any other light setups and after some fiddling with rotation or adjusting the colr a bit you can get a great look. Also it lets you blurr the light if you want so even softer effects are a pretty easy too. Easiest way to get dome and default HDRI is just to push the return to default render settings button, but then you'll probably want to turn off autoheadlamp unless you're not already using a camera you've set up. Worth mentioning that a camera that you've set up or that came included in an environment you've gotten somewhere will often have the headlamp turned on for the individual cameras, and you'll likely want to turn that off as well. The auto headlamp setting under render settings does not effect any other cameras.
It really looks to me like the facial wrinkle lines and creases are so deep in that character that what you're seeing is actually super realistic and maybe just not the atractive look that you're going for. Will likely be softened significantly with an HDRI, or with a different or rotated HDRI if you're already using one of those. Also all of the other lights work perfectly in conjuction with the HDRI dome.
Thanks for your answer, to JVRender I will say I shell try your idea with emissive plane, my shadow is self shadow your are casting shadow, I don’t know if that means something.
To Spacious I say I not so familiar to HDRI, but I will look and see. Before I have tryed with only scen light but the color of the shins is not so good, the best skins tones is with sunlight. I have no autoheadlamp on. I built a studio with so little of the sky blue can hit the body. Sometimes I have set color to the studio Prob side, sometime with different color on sides and floor. I wanted the model super realistisk as I used as model for paintings!
If you just press the return to default or whatever the button says on it under render settings, and the default HDRI light dome should be on. I think the auto headlight in the perspective view is already set to off, but now I can't remember, so check and usually it's best off. The great thing about an HDRI light doem is that the light and color come from all around your model like in the real world. Like if the sun is shining on you, it's not just shining directly onto your face, it's also illuminating you from behind a bit and from all sides. The brightness and color tone are different from every direction just like the real world. Addthe reflections from the objects in your scene and it's pretty much like magic.
You can get the same effect with various combinations of the other types of lights, but you've got to use a lot of them coming from different directions at different intensities to achieve it.
Honestly the portrait of Ellita you posted looks quite good. If you're really just looking for a simple adjustment, maybe try moving the bright light tha'ts causing that jagged edge on that shadow twice as far away and then turn it up twice as bright.
I personally prefer to work in Dome and Scene mode. Combining the HDRi dome with parametric lights give me more control over most of my lighting needs.
I'm going to show you how I set up a basic 3 point lighting system for my portrait renders.
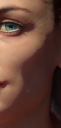
Here is the top view of my scene. I have the figure/model in the center. I generally use Spot lights. I added a Key, a fill, and a rim light, the setup is similar to a photo studio setup: Key being the primary light source. The fill acts light a diffuse (disc) and the rim lights as a back light to give the model a bit of depth.
I keep the HDRi as an ambient light source.
In in this image, I only turned on the Rim light so you can see only the hair, head, shoulder part of the model are illuminated. By default the spotlights geometry is a point light, but I changed the light geometry to a disc and gave it some dimensions by increasing the width to 75. A point light casts a very hard shadows, but changing the it to a disc and depending on the size you can soften the shadows.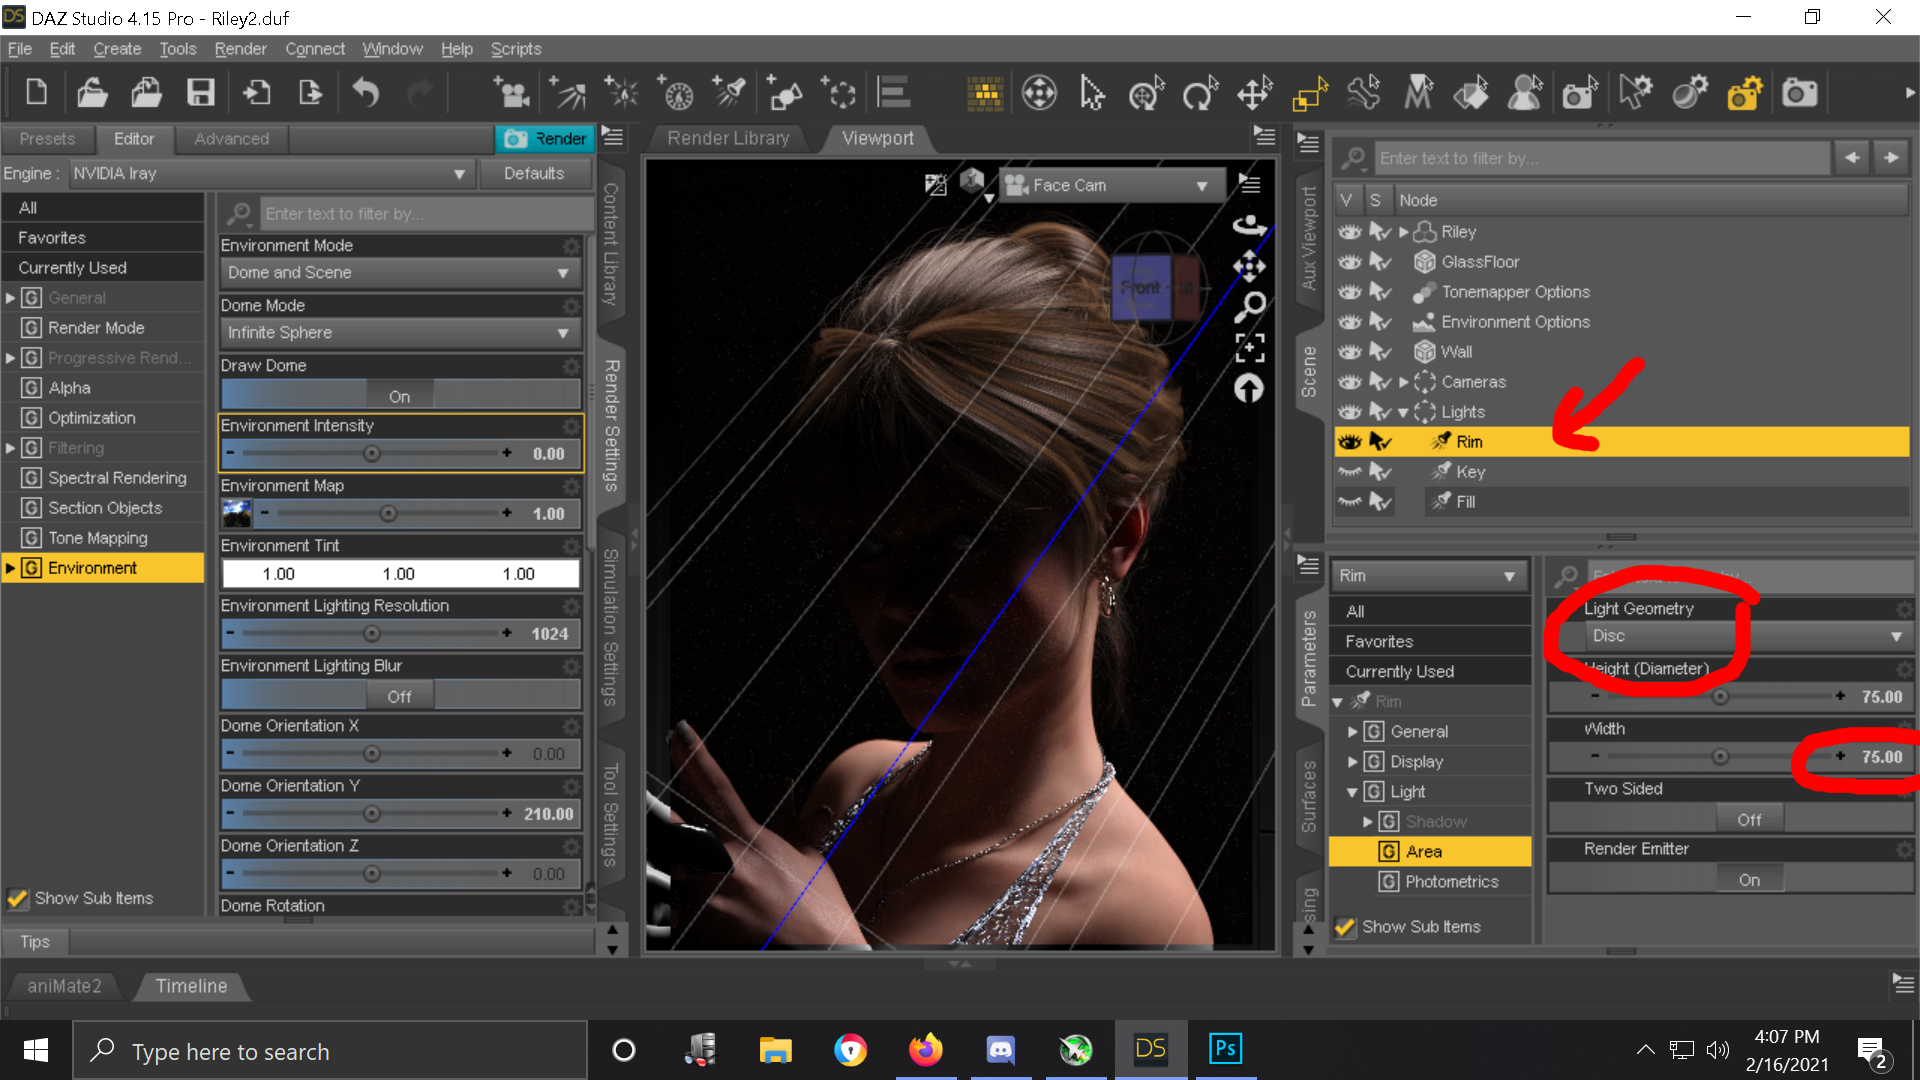
Here I turned on the key light only. I turned the key light's geometry from point to rectangle and gave it a width of 75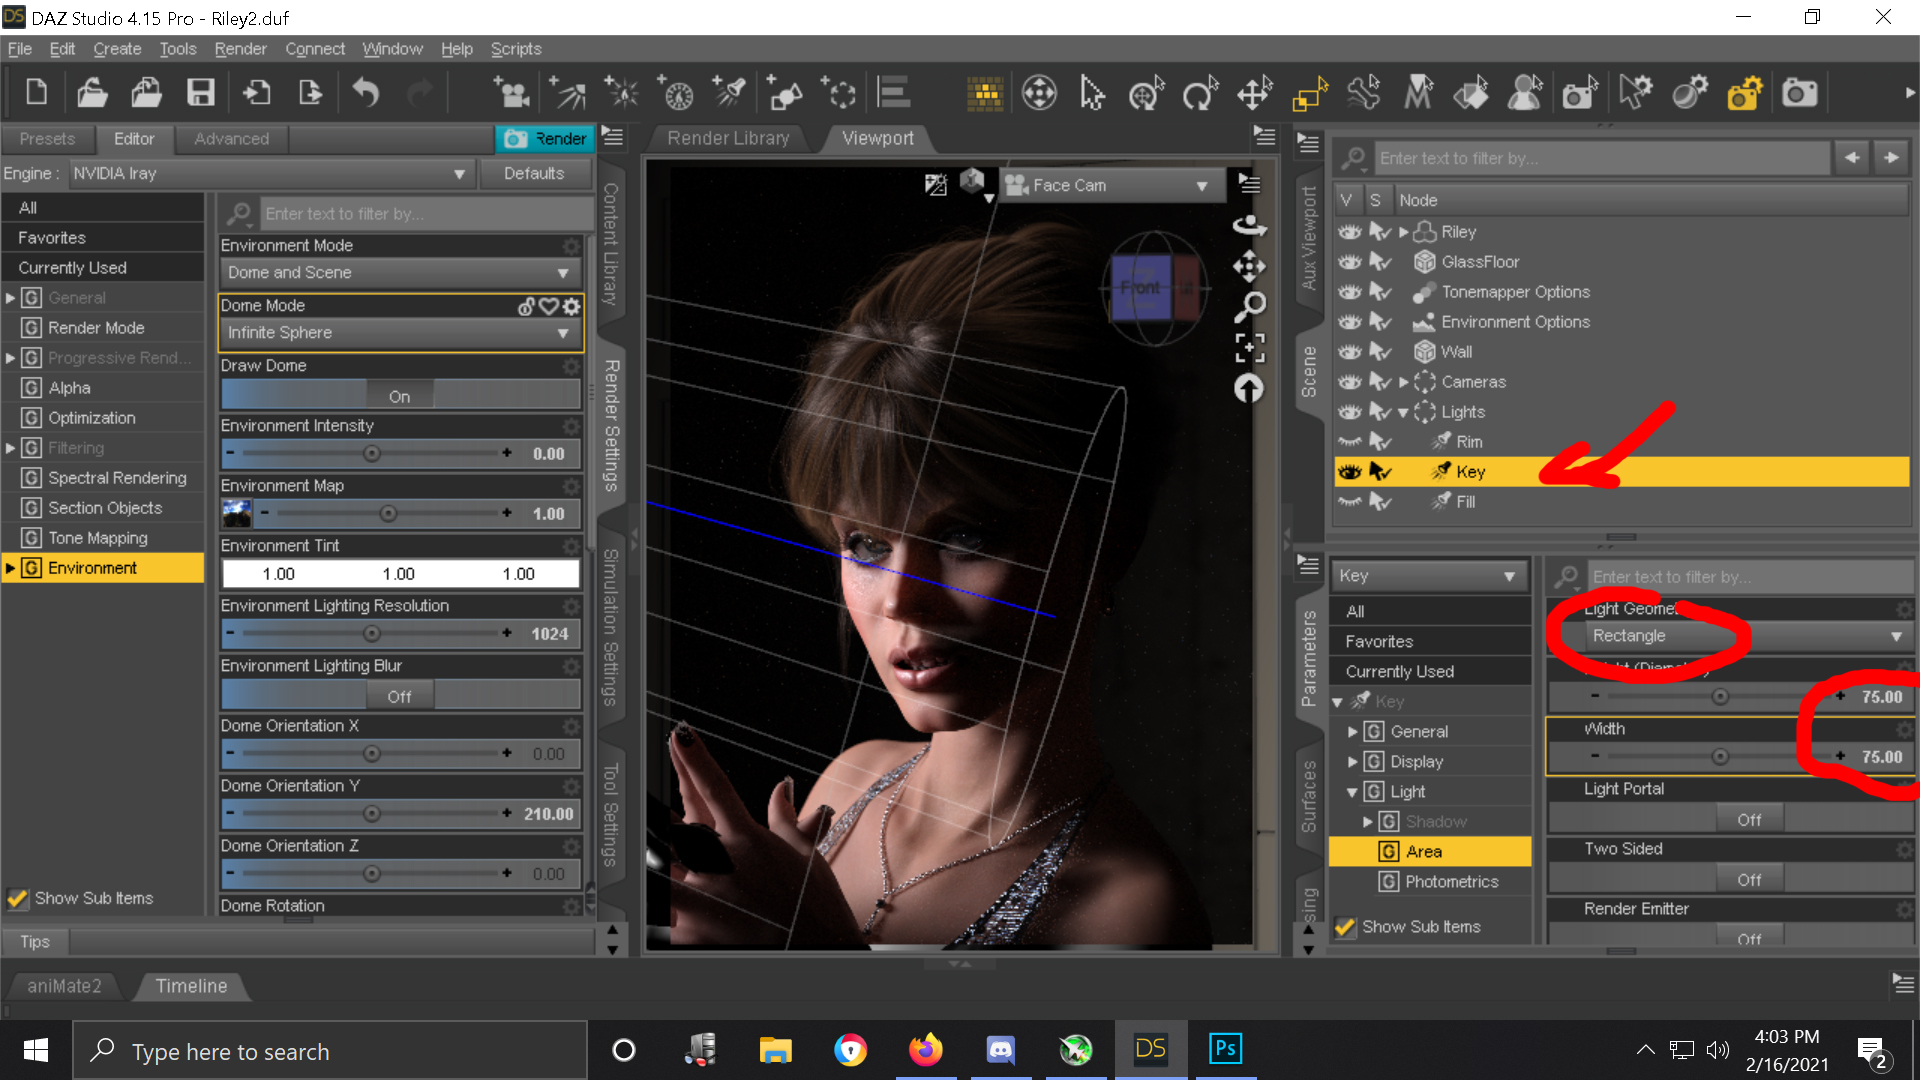
In this Image, I only used the fill. Light geometry : rectangle, width 200. This also a much dimmer light, I don't want this to overpower the Key. Technically you don't need a light but it is easier than creating an umbrella prop to reflect the key light back onto the model
And with all three lights on
And with the HDRi added, I used the default HDRi
This is the final render.
Hi, Thanks to both of you, .
I made some changes in Sunlight mode, I made some minor shape changes and increase SS Haze settings and I got little improvement..
With HDRI and Scen I now found 2 new tools in my work box and so long I am most please to use both together. Thanks again!