How to HDRI + feet
 Hylas
Posts: 5,070
Hylas
Posts: 5,070
I've been using HDRIs for skies, distant scenery, and abstract portrait backgrounds.
Now I've bought Prometheus and I'm struggling to make those HDRIs work for me.
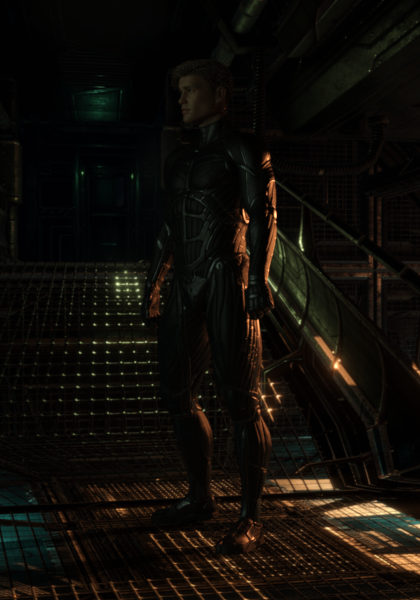
The light is beautiful and the shots look (mostly) good as long as I don't show the feet:

Zoom out and my character is awkwardly floating above the scenery:

Experimenting with "Finite Box with Ground" and other such settings.
Now my character is standing but the scenery is distorted:
So... what am I missing?
These promos from Spaceship Interiors manage to do it:


Daz 3D is part of 
Connect
DAZ Productions, Inc.
7533 S Center View Ct #4664
West Jordan, UT 84084
Licensing Agreement | Terms of Service | Privacy Policy | EULA
© 2025 Daz Productions Inc. All Rights Reserved.
Comments
https://www.daz3d.com/iray-hdri-toolkit
You can make your own. Link
A tip someone on the forum gave me that's helped a lot with these types of HDRIs is to move your camera to the center of the scene. I don't fully understand why it works, but I get consistently better results with the camera zeroed and locked on the X and Z axis.
I recently bought this set so I'll give it a try too and see if I can get some good results or not.
Also a side note: why are JDA_HDRI products _never_ in the same location? I own 5 different products from them and they are installed to 5 different locations in my runtime
Yeah I've tried all sorts of angles with the centered camera and it still looks wrong. So much for that tip!
Best little tutorial I've come across so far with regards to explaining HDRIs as backgrounds:
Typically (real, not rendered) panoramic HDRIs are created by photographing a sphere with a mirrored surface, so effectively the HDRI is not centred on the camera but on the position of the sphere - that is zero in the x & z plane. You might just need to guess at the Y (height) value.
In a rendered HDRI, the camera itself can be used to capture the panoramic scene, thus replacing the sphericial mirror directly. So, unless you're getting in to 2.5D projection mapping, the best position for the camera in your render is close to 0,?,0.
Change ground from Auto to Manual and move the character down. You can even make them stand 'in' water this way.
@dtrscbrutal: Thanks, will look into that!
@Catherine3678ab: LOL, the robo voice is endlessly distracting. If V3 could talk, that's what she'd sound like anyway, watching it now.
@fishtales: Thanks for the input! That's not the issue I'm dealing with, though. Ground position is already "manual" and my figure is standing on the ground. If I move them further down they'd indeed sink into the scenery and I don't want that. I just want them to stand on the floor!
The other things to watch for is Camera Angle, Zoom, Height/Position and Focal Length all of which can change how the asset works with a HDRI.
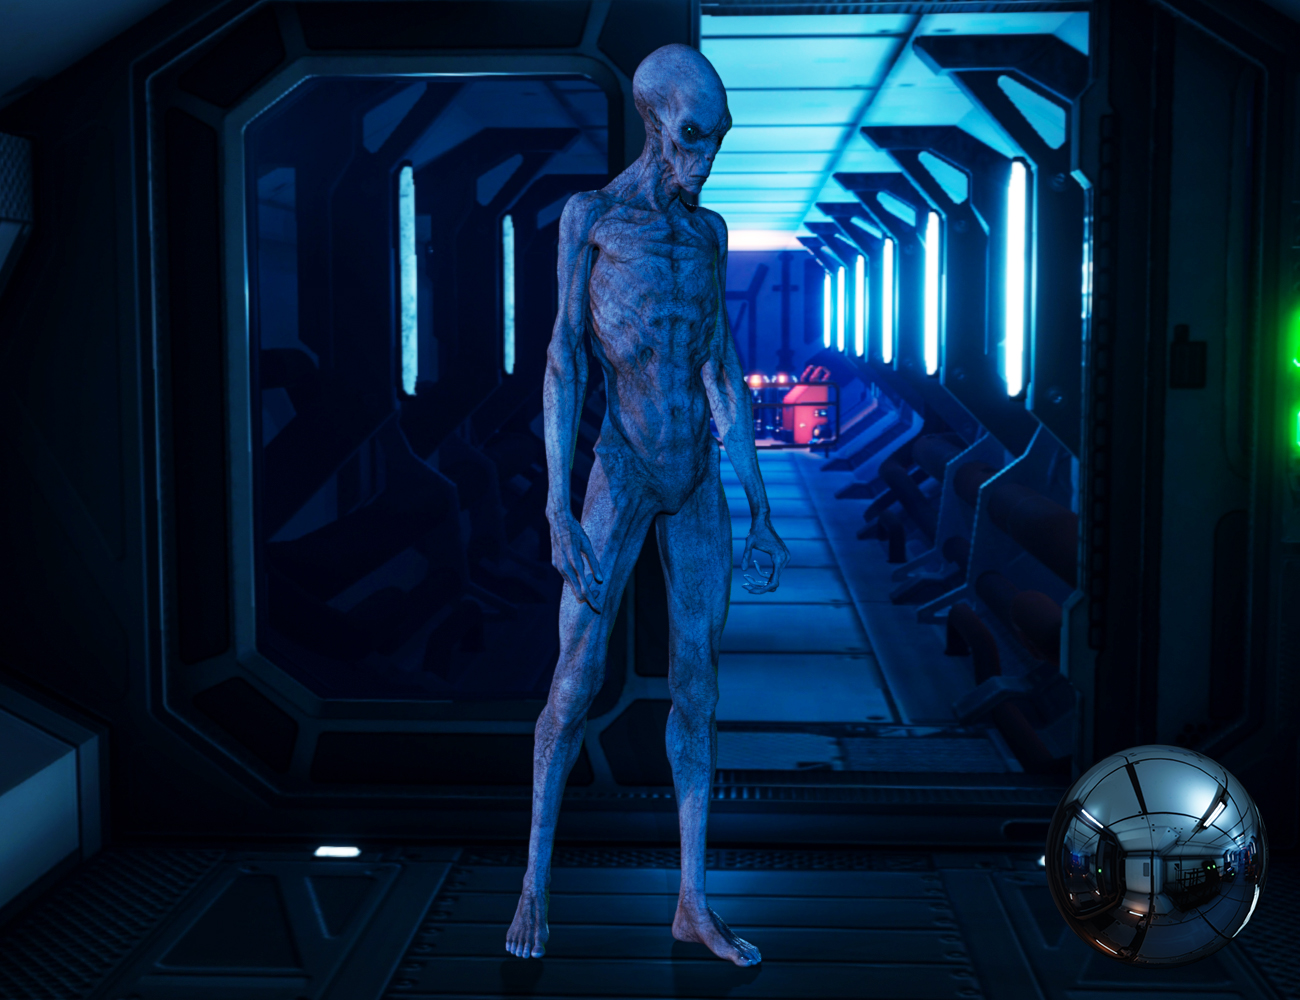
Ok, so here´s some progress:
Character needs to be at X=0, Z=0
The soles of their feet need to be planted on Y=0
Ground Position Mode = Manual
Dome Mode = Finite Sphere
Dome Origin Y needs to be Dome Scale Multiplier x100
Dome Scale Multiplier is 100 by default, so set Dome Origin Y to 10'000
Now your character possibly looks like a giant or dwarf, and the backdrop is possibly distorted.
Adjust Ground Texture Scale and Dome Scale Multiplier until you get a better result.
(Each time you change Dome Scale Multiplier you have to re-adjust Dome Origin Y to it's new value x100)
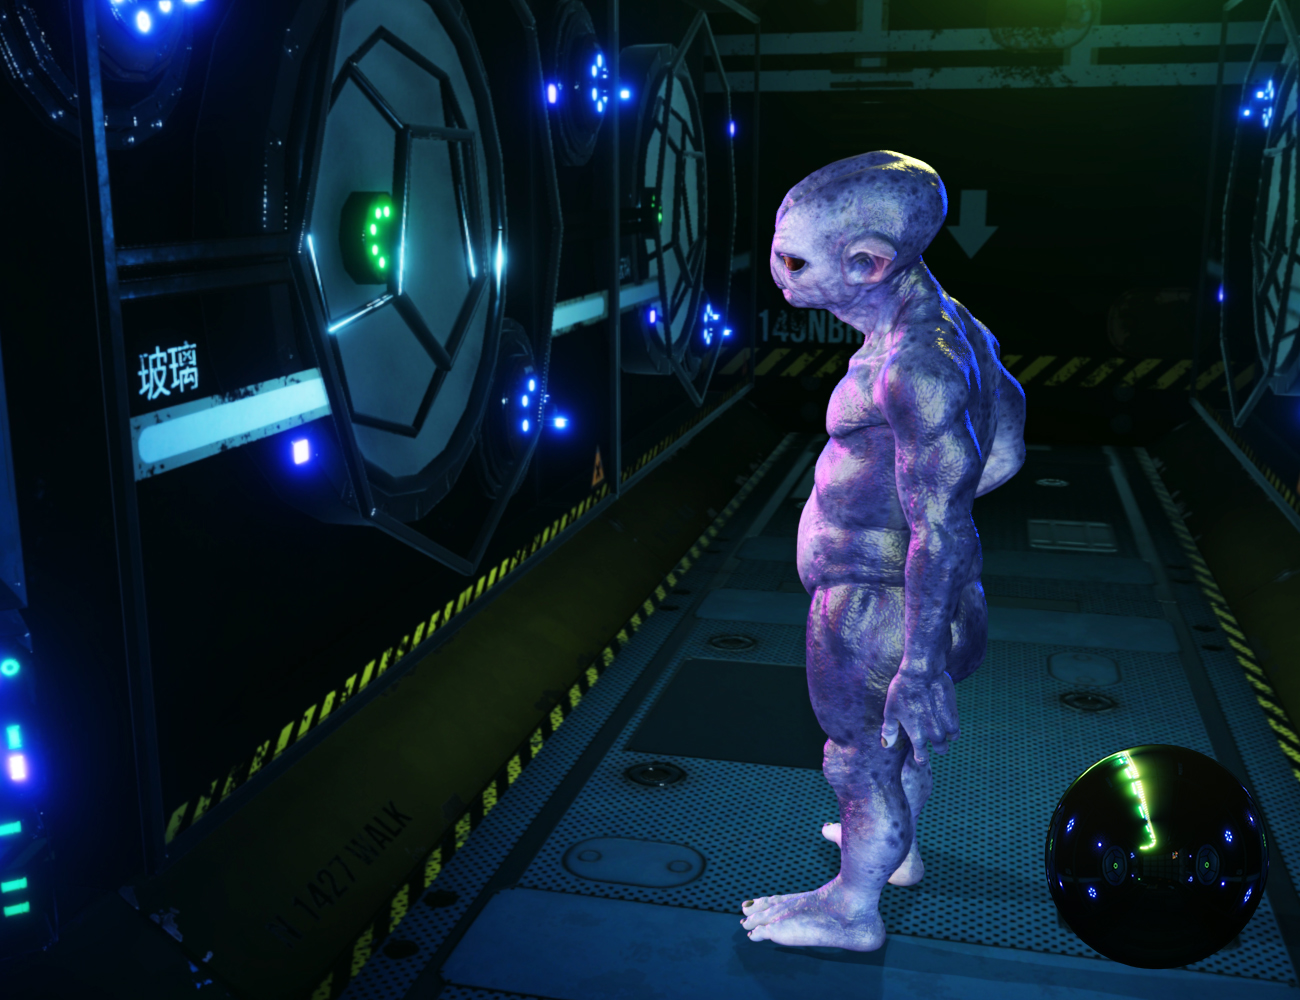
Above example is Prometheus 6
Dome Scale Multiplier = 15
Dome Origin Y = 1500
Ground Texture Scale = 190
Still more distortion than I'd like...
I wish there was a way to "squash" or "stretch" the finite sphere, I think that would help with the distortion.
Will keep trying things, input by experts welcome.
It took me a long time to get these two to work :)
Click on image for full size.
Click on image for full size.
I was skeptical of interior HDRIs before and this has definitely put me off buying any more.
I´m most probably keeping this product because it does give nice, dramatic portrait light; and it´s hard to argue with the 2.99 price.
But I feel like it's going to be impossible to use these to tell a multi-part story because they only look good from very specific angles.
What´s the point of selling all these nice, detailed, hi-res interiors if they´re just glorified lighting rigs?
I see that there's HDRI sets specifically dedicated to interiors (not just by this one PA). I'd love to hear from folks who bought such products and how they´re using them.
I have found some work, most don't and that is with a lot off work :)
When I use them for backgrounds I usually use mesh for the ground or floor, the backgrounds being seen through windows or over the fences, etc.
In addition to what others have said about character placement and proper camera settings (focal length being a biggy), accurate ground shadows can go a long way to address "floatiness" when using a character with an HDRI environment. Mec4D has some great tips and tutorials on using shadow catchers you might find useful.
Some HDRI just don't work to have the ground in the scene because there's too much around the center, making the items flat and distorted, or the ground area itself isn't flat enough (i.e. there are stairs, etc).
Yeah, I found I wasn't able to make poses on the ramp in the OPs example HDRI look good from any angle when the feet are in frame (which is a shame because the lighting is great at that rotation), and it seems to be because the ramp nearly at the center of the map. When one crops out the feet though, things start to look okay. I will say, some of the HDRIs in this pack look okay with the ground included, and in fact the HDRI in the OP does look okay with feet in frame with the right rotation of the map. I've attached an example with camera centered, Y = 151 with x/y rotation and focal length to center the character in frame, and ground set to manual. I will say though, while the positioning looks natural to me, the HDRI seems too low res for this kind of use. I'm actually considering returning it now.
What i have been doing is using Matte planes to allow my 3D assets to interact with the HDRI. Here are a few examples.
Forgot the image showing the Matte Catchers
@HellWolve
1.) Load HDRI
2.) Add character position and pose
3.) Use primitives, planes, cylinders and cube if needed to represent a surface in the HDRI that you would like your character to connect with.
4.) Select the primitive
5.)Utility/scripts/Nvidia Iray or Utility/Daz Default Resources run the script "Create advanced Iray Node properties"
5.) Under "Parameters" for the primitive you will see an option to "Enable Iray Matte'
Render with iRay
You're a genius Tygpsx! Thank you so much for these instructions. I never knew how to do this before.