Transferring Morphs Between Figures Tutorial - Released!
 Catherine3678ab
Posts: 8,400
Catherine3678ab
Posts: 8,400
As there seems to be a surge of interest in transferring morphs between from the G3 clan to the G8 clan I've decided to put together a tutorial illustrating some points for transferring a full character morph from G3M to G8M. The images are in the edit basket ;-)
Sometimes one can get away with shortcuts, sometimes one cannot. So I'll also be showing how to get rid of a newly made morph one does not want to keep.
Mandatory is to pose each figure at times to the default pose of the other one. For those that want pose presets I have attached 2 in a zip. Put them anywhere under the proper figure that you want to put them. Each preset is in the folder for the figure it is to be used on. Very basic.
Update: Here the post. It's in the wilds ;-)
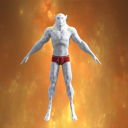
This is G8M morphed with Skin Changer Wolf from G3M.


Daz 3D is part of 
Connect
DAZ Productions, Inc.
7533 S Center View Ct #4664
West Jordan, UT 84084
Licensing Agreement | Terms of Service | Privacy Policy | EULA
© 2025 Daz Productions Inc. All Rights Reserved.
Comments
Really looking forward to this tutorial! Since most Genesis 3 textures can be used on Genesis 8 figures, it would be great if we could use the character's corresponding morph(s) too!
Great, I like to see my tutorials getting good homes :-)
The ink is drying on the images ... I expect to glue them to the .pdf pages tomorrow ... then a night to clear the mind to proof-read it so 'maybe' a release come Sat. or Sun.
Decided to add a bonus with regards to making little "fix-it" morphs too.
Well I certainly don't know how they could work either ... if they do for some, great. I've read of others who returned the products and of others who totally messed up their morph collections [there's one very important line to read in those manuals].
As I understand the matter, one of the reasons for going to "new base figures" is because certain fields fill up and a fresh start would be nice. So to take "all the burdens" from the previous figure and give them to the newest figure - does not in my books make a whole lot of sense.
The method I'm using here would not all by itself make for a finished product if being done by a PA for their own work forward [esp. for extreme morphs} as there would still need to be a slew of correctives made. Maybe those script converters take care of that?
Anyhow while waiting for my vision to return, if anybody's in a hurry, a clothing of G8M's mesh is required. G8M - base resolution, NO eyelashes {or any other geograft} - 0 render SubD [may or not matter but certainly is okay to do] - export out an .obj using settings that will also be able to import it back in having it land perfectly from whence it came. NO groups. I used the Carrara settings with no groups and I normally collapse the uvsets too. And to help lighten the load in the scene, no textures on any figure - I just apply a basic shader.
Should not take that long to make a "converter" in a spreadsheet.
1. The morphs/characters are just lists of vertice deltas, those lists can be found in legible and editable form inside the morph files
2. When you have figured out, which line on the list moves which vertice on the source and found the corresponding line on the target figure, you already have all the information you need.
One of the good things in DS is the fact that most of the files are basically text files that are not that difficult to understand.
Instead of trying to find some solution where you get the work done using several programs and hoping that the output is what you want, often the easier and faster method is editing the "code", and spreadsheets are very good at that - I could even build a 3D model for buildings and/or machines in a spreadsheet, you don't need a 3D modelling program for that.
That would be great if the vertices & meshes match up. The big problem is that you need to interpolate from a vertex on one figure onto the surface of a facet on the other, preferably with minimum human intervention due to the number of vertices & facets involved. In theory it's dead simple. In practice, it's a challenge. I have started to write a 'shrink wrap' program to do it myself and.. Let's just say, even though I have written my own 3D Finite element modeller and I was starting from a program 70% done, I ended up buying (ouch - don't like to buy) the RSA script.
Regards,
Richard
I remember one day wherein I actually coded into a Commodore 64 computer, bit by bit, an entire program. 1010001010100010101011110101011101010101000100101000101001010 that type. I was meticulously careful. Turned out that the company's manual had a typo in it. Program had an error in it and would not work. That basically was the beginning and end of any grand plans of me to code anything. Then one day the kitty kat walked across the keyboard, and that killed the Commodore 64.
Those were the days, you wanted to play a new game... You took the computer magazine where the code was printed and started copying, hoping that you got every character correct and would be rewarded with a pixel bouncing on your screen
C64 came later, that one I used to make calculations for trusses in university.
IF I'm remembering correctly the game I was hoping to get was more like a pre-pacman type thing.
At any rate, found some fast acting glue for those images in the .pdf ... one more read through after supper and it just might be released later on tonight :-)
Update: And here it is :-) Sharecg.com
And if you need them, don't forget the pose presets attached to the first post ;-)
Thank you very much! I thought I did not need the pose presets but I do, Reset to Default pose is not the same... ; )
That's right, these are not the same. My pose presets are to set one figure to the default pose position of the other figure. Just moving the arms and legs.
And you're quite welcome :-)
I am now the proud owner of a G8M_Darius7 Morph and feel like a sorcerer's apprentice! :) Very good tutorial I think, I just don't understand why, on page 21, we need 2 morphs and then delete one? ("Select the undesired morph and simply delete it.") Thanks again for making this tutorial! Btw, unfortunately the Darius7 textures are one of the few that do not fit perfectly onto G8M, darn... ; ) (Fortunately, the morph looks fantastic with the Isaac for G3M textures too!)
hahaha ... no you don't "need" two morphs just to delete one lol ... I make most of my tutorials as a walk-through - so everything I encounter I put in because many people as they are doing their work may encounter something similar. Maybe there was nothing wrong with their first morph - they may just want to try again and improve. Somehow as we make morphs there will be morphs we want to delete - so I illustrated how to. This is one of the reasons why it is always a good idea to read the entire tutorial before re-reading it and following along.
Congrats on the 'new' G8M_Darius7 morph.
You could try making a copy of the Darius7 textures and working them onto a G8M template [using an image editor that works with layers].