what is the most effective way to Iray light up a large indoor area?
 Toobis
Posts: 966
Toobis
Posts: 966
So i'm wanting to make a sports hall brighter for Iray just so it can be about the right brightness range for the general lighting in the building. Nothing lower or higher but I struggle to make the scene brighter. Can anyone tell me how to light up a large indoor area with Iray lights?
Post edited by Toobis on
Daz 3D is part of 
Connect
DAZ Productions, Inc.
7533 S Center View Ct #4664
West Jordan, UT 84084
Licensing Agreement | Terms of Service | Privacy Policy | EULA
© 2025 Daz Productions Inc. All Rights Reserved.
Comments
One quick thing to try is to lower Exposure Value (can even set it to 1, 0 or negative numbers). If it gets too washed out, raise EV a unit or two.
Set the ceiling surface Emission color to white, that will open up Luminance and Luminance Units, change Luminance to like 1000 (you'll need to play with this) and set the Liminance Units to kcd/m^2. If you don't want the entire ceiling glowing, then add some planes (or spheres) as the light source, apply Uber shader and do the same thing to them as I mentioned with the ceiling, then you can move them around as you want. If you want to get really fancy with cone lighting effects you do a search for free IES light profiles and then add them to the Emission Profile.
I am not a fan of tweaking Tone Mapping except when needed, it's not needed to light a room, no matter how large the room.
This is not a Daz room, interior so I had to light it myself. I applied the same emission trick to the ceiling light bottom surface. A few more on the walls, and there is one spotlight aimed at the main character from the foreground. That's it. You can see from the shadows on the ground, light is comming from above in all directions.
K I think I got the hang of it. Thankyou :)
https://www.daz3d.com/forums/discussion/comment/7048791/#Comment_7048791
Changing the "cm^2 Factor" helps lighting interior scenes, as the default values are set for bright exterior scenes.
No, the default values are still wrong for exterior scenes. I discovered the cm^2 Factor trick because it was the only thing that made the Sunny 16 rule for outdoor photography work.
Of course Tone Mapping needs adjusting for different environments, with different lighting. You can't use ths ame exposure settings on a camera for allsituations (if you use auto-exposure check the photos' metadata to see how it varies values).
I said "except when needed" lighting a room doesn't require this unless you have very specific goals and just about anything you can do with the tone map you can do better in post.
There is no metadata in the pictures.
Was that a photograph? Most cameras/smart phones add metadata for the f-stop/ISO/speed, among other things, which would show you how the exposure is varied by circumstance.
Yes, you can post-work - but unless you use a Beauty Pass canvas you have only eight bits per channel so strong tonal adjustments are likely to bring posterisation, where the tones you are stretching have large gaps between successive values and the tones you are compressing end up with many originally distinct pixels sharing the same value. Geting the one mapping close to right in the first place, where Iray uses higher precision during rendering, is safer.
Ok you mean metadata from a real camera, I thought you refering to metadata in a Daz Iray rendering, which contains none.
I would just like to know what specifically you don't like about using the exposure settings in the tonemapper? Not trying to convince you otherwise, just curious.
@charles Wow, what a render :-O!
How long did that one take you to create and how long did it take to render???
Well for starters, you can convert a 8bit to 32bit in photoshop no probs, its 2 clicks. Ok it's pulling from a source that was originally 8 bit, but honestly unless were talking CMYK for print, what why? And I can still just convert the original to CMYK in Corel. I had not really played with Canvas Beauty but after doing that for some hours now, at first I was like cool, in the end I'm like blah. It's not THAT practical. Not for the stuff I do anyway.
But to answer your question, why should I wait for a render or a laggy viewport update for tweaking tone mapping (if Iray view in viewport even works for my scene, because in some cases it fails or hangs Daz), when in Photoshop or other programs I can just open tone mapping and adjust them in real time and get the same effect? Then save that tone map for sequence images I want the same tone mapping to apply. Not only that but with actions and other tools offered in Photoshop and its plugins, I can tweak the photo out with much more precision.
I too would really like to know the actual real benefits of needing to render in Canvas Beauty. I've seen the results now, and am not really that impressed.
A side note, I have some 100+ photoshop actions, and a majority of them will not work with the image being in RGB/32 mode, and the Beauty EXR version is much more grainy. Also, I get just as much if not more posterisation from it when manually tone curve adjusting. Maybe I'm doing something wrong.
I'll put together some renders tomorrow and post them here. I'm sure for some artists this is great for post work, but I'm left scratching my head how.
A day to first convert the low poly crowd assets from the original format I got from cgtrader. Each had to be brought in and retextured. There is something like 50 figures, each with 2-5 textures but not applied so I had to manually find the right textures for each and reassign them. But then that's saved as a sub scene in Daz for future use. So count that or not. Once those were done I used the scatter plugin lots and lots of times. Probably a couple of hours of doing that and specifically assigning some 50 of them to where i wanted. Then there are 5 real Daz characters in the scene, so couple more hours there. The convention hall was probably 2 days work, an asset from Turbosquid. It came in with no textures and had to go around to each object rassigning shaders to each and every thing. The booths, aren't actually finished, they are from CGTrader and needed some adjustments in Rhino3D, I exported them as OBJ and brought them into Daz. Now Rhino applied each layer a color randomly and that's how you are seeing them, I have yet to go back and apply the real shaders to them. That was a couple of hours of work. However this is not the scene I am actually using for my project, this is just a goof off one for posting here and added the waiter with Plumbus because the waiter was a unique character from the crowd set. And he had nothing on the plate but thought it needed something, and at that same moment thinking about what to add I was downloading the Plumbus so that's the story there.
Render time about 20 minutes for 5k itterations. But i'm also running a monster card, the Quadro 8k..so there's that. I think it took about 12 GB of video ram, no more than 24 (half) for sure, I remember looking at the GPU and thinking damn I could do 2 at once....I should add more people. But adding people doesn't really eat up that much more memory, the geometry is low and the textures once in are just reused, it's not loading the texture over and over again for each person, it just uses a pointer so I could probably do the scene with 10x as many people if not more. Something to try when I get the chance, just to see just how many I can stick in a scene and still render to GPU. But with the new GPU instancing stuff that's been out for several years now, I've seen game animation with 10s of thousands of characters all moving in animation, in real time, that's the really impressive stuff. I'll see if I can't dig up a video tomorrow.
You can change tonemapping on the fly whilst the final render is being done (on the left of the render window is a button that expands the available render settings). Specifcally, you should be fine changing shutter speed, f/stop, ISO and white point without the render restarting.
Here's an example.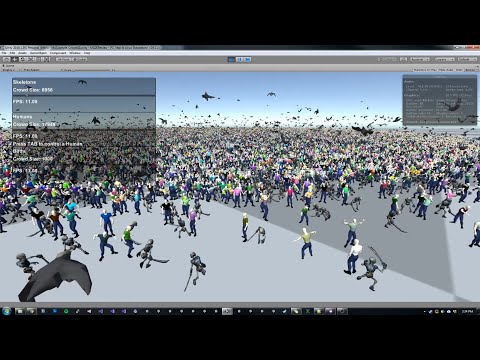
I was also put off by the "Tone Mapping" for a long time because I thought it was trying to do something that tone mapping does in graphics applications and I didn't want to change tones at the scene level...
At the same time I was cursing DS for having to increase every light in interior scenes by 100 times the realistic values, but then @margrave suggested using 10 for the "cm^2 Factor" in "Tone Mapping" and that was all that was needed to get the interior scene lighted with realistic values.
The Tone Mapping in Photoshop is a different process from the Tone Mapping in DAZ Studio. The former is a graphic process and the latter a camera process.
OMG You are right, after like 2 years of using Daz there is still stuff I didn't know about it. Thanks.
Fair enough. I still don't think this is the ideal way to light up a scene though.
Thanks so much, @charles, that really let me peek into a different universe, lol. The animated 30k crowd size in the video, your 48 gb vram, but especially those many hours of work you spent developing this render just for fun, very inspiring! I will never play on that level, but thanks a lot for sharing that motivating making of post!
There's a vast difference between post-working a raw 32-bit render vs an 8-bit render.
The 32-bit render is far more versatile.
There are many ways to light an Iray scenes, this is just an illustration of my approach. This scene is one of the Winterblack Halls presets with the lights as set by the PA. I used default Iray render settings other than it is scene only (so no dome lighting) and only let it go to 500 samples as I'm on a slow computer right now.
Default Exposure Value 13. Very dark even with 420 candles and a distance light. I always find the default for interior scenes way too dark.
Exposure Value 11. As Frinkky pointed out, you can change this value on the fly with the pullout. So if the render starts too dark, reduce EV by 2 until you are seeing sufficient light. Very fast to do.
Exposure Value 9. The previous image was brighter but still somewhat subdued. I bumped EV down another two units.
If you have ever owned a camera which takes a RAW format photo in addition to a normal JPG, then you will know that you are much better off editing the RAW format than the JPG, in particular if adjusting the light levels. The brightness of the JPG can only be pushed up so far before it looks washed out in many areas, where as in the RAW you can increase the brightness a fair bit whilst keeping the overall quality acceptable.
Exactly the same principals apply with DS, use a beauty canvas and you can adjust the brightness far better, but the basic PNG will not allow the same amount of adjustment. So the principal is to get the light correct in the render, by either adjusting the lights or the tone mapping, or else render to a canvas.
Can anyone elabourate on how to do this part from one of the first repliers.Thx.