Daz to Sketchup and back to Daz
Hello,
It took me weeks to figure this out, and I thought I’d share what I discovered if it will help others.
I’ve seen this asked many times, how to import/export drawings between Sketchup and Daz. I’ve tried multiple things and I find the following works for me.
As of this writing I am using Daz 4.16 Pro, and Sketchup 2018 Pro. Also, for metric readers, I apologize, I’m used to imperial measurements, and I’ll be using them throughout.
I’ll write this as a walk-through. I hope it helps.
First, to export from DAZ into Sketchup.
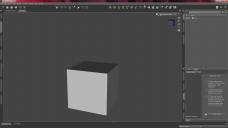
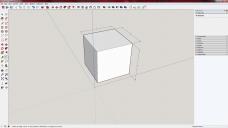
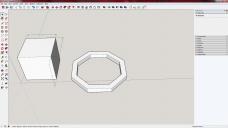
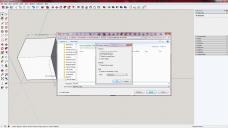
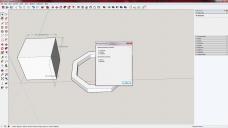
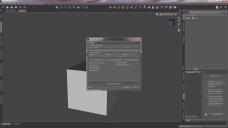
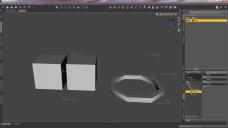
We’ll start by creating a primitive within DAZ. I’ll start by making a cube 3 feet on all sides. (Picture 1 & Picture 2)
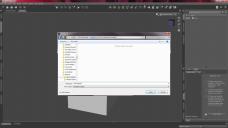
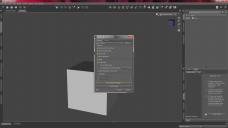
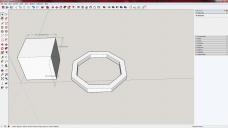
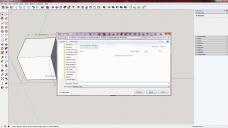
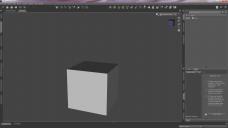
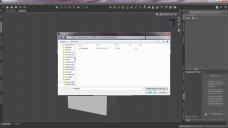
Next, we’ll export it as a COLLADA (*.dae) document. (Picture 3) Under Export options, I believe these are the defaults. Click Accept. (Picture 4)
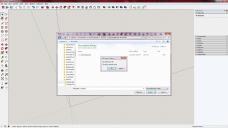
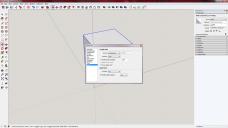
Now we move to Sketchup. (Picture 5) I have a few added plugins, but I will I use them for this tutorial. Click File > Import and navigate to the file you imported. I didn’t change the Collada import options, but I have them shown just in case. (Picture 6 & 7) Next, I changed the measuring units to Architectural (Imperial). Click on Window > Model Info and under Units (Picture 8)
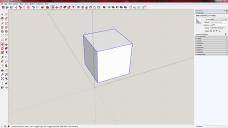
To verify the object came over properly I added dimension data to the drawing. (Picture 9). Three feet equals thirty six inches.
Now, to move it back into Daz. Before I do, let’s add a little something. I added a 6’ diameter octagon. 6 inches thick, with the center area cut out. I want to make something simple, like a fire pit, and this is a start. (Picture 10)
IMPORTANT:
Before Exporting it.. Go back into Window > Model Info and change the dimensional units back to decimal and mm. If you don’t the scale will be all wonky. Trust me, this got me multiple times. Notice the measurements in the drawing have changed. (Picture 11)
To export it, click on File > Export > 3D Model. Choose to export it as an object file, give it a name, and choose the options. (Pictures 12 & 13)
I chose to NOT export texture maps. As your sketchup drawings become more complex, this adds to export time, size of the file, and even a subfolder with images. I do not believe DAZ imports this very well, so I don’t even tempt fate here. BUT, I learned a work-around to help you with textures and surfaces I’ll cover later. I deselected “Export two-sided faces” and “Export Edges”. I tested all 8 combinations, and only the exports that had deselected “Export two-sided faces” worked. I couldn’t tell the difference between the exports that had “Export Edges” checked or unchecked.
Once you click on OK, it’ll chew on it, and eventually give you a results screen. (Picture 14) Sketchup will create two files, an .obj file, and a matching .mtl file.
Importing back into DAZ.
Now.. Back into DAZ. Notice I have the original cube still in my scene (Picture 15) I am keeping it for comparison to what we import back in.
Click on File > Import and browse to your file. Choose as a Wavefront Object file. (Picture 16) Click “Open”. You’ll be shown a list of options. The most important here is the scale. I believe Daz’s units are in centimeters. And you’ve set the sketchup units to millimeters. So I set the scale to 10%. (Picture 17)
As I type this, I think I could set the sketchup units to centimeters, and then in DAZ set it to 100%, but this works for me, so I don’t fiddle with it.
Click “Accept.” The object will come in and added to the scene. A couple items of note. First, it comes in with the same name as the file that was imported. Second, it comes in as one unit. If you exported multiple items from Sketchup, they’ll be one item in DAZ. There is a way around this, but I’ll cover it later. (Picture 18)
One last thing. Let’s look at the surfaces. (Picture 19)
Under the “Tool Setting” tab and the “Geometry Editor” (on the left) and the “Surfaces” tab on the right, we see there are two surfaces listed in our import:
“_auto_” is the name Sketchup gave to the surface it imported off the original cube. If your Daz export has multiple surfaces it’ll number them “_auto 1” and so on.
“FrontColor” is Sketchup’s version of “Default”. It’s the name of all surfaces that haven’t been given a non-default surface color and texture.
IMPORTANT: Sketchup will only export the “Front” surfaces, so if you import something into DAZ and it doesn’t look right, it might be because the surfaces in Sketchup were reversed. (I see this happening a lot when using the push-pull tool.)
You can use the “Tool Settings/Geometry Editor” tab and the “Surfaces” tab to manipulate these surfaces just like normal. (Picture 19 & 20).





















Comments
Chapter 2: Manipulating Surfaces.
Let’s go back into Sketchup and manipulate some surfaces of the fire pit. This will demonstrate how I work around different surfaces, and make it easier leverage Daz’s surface tab.
First, let’s add some surfaces to the fire pit. (Picture 21) Next I’ll highlight one surface. Two things happen, the surface is highlighted, and under the “Entity Info” sub-pain on the upper right you’ll see two faces listed. (Circled in red, Picture 22) The important thing to see in the upper right are the two faces shown. Currently both have the default grey/white icon shown. I haven’t changed their color.
Now, let’s reverse the face on the highlighted surface. (Right click on the surface, and select “Reverse Faces”) As you can see, the face we reversed is darker now. (Picture 23)
This is a fire-pit after all; let’s change all the surfaces to a concrete material. Under the materials tab, I selected “Polished Concrete New” and painted all the selected surfaces one at a time. (Picture 24) Looks good right?
As you can see, the surface we reversed earlier looks like all the rest, but let’s take a closer look.
First let’s select one of the neighboring “right side out” surfaces. (Picture 25). I selected a surface to the right of the suspect surface. Notice the Entity Info in the upper right. The upper Face icon is different. Let’s drill into this and look more closely. Click on it to give you a “Choose Paint” sub-window. (Picture 26)
Click on the “Edit” button. You’ll get the Edit Material sub-window. (Picture 27). Notice near the top it says “Polished Concrete New”. This is the material we selected earlier. This will come in handy later, but for now, we know where it is.
Now, let’s look at the inside-out-surface. We select it, and notice the differences in the faces in the upper right of the screen. The “Front Face” is still shown with the default icon, while the “Rear Face” (the lower icon) has the icon of the concrete. (Picture 28)
Let’s see what happens when we export it, and then import it into Daz. First we export it like we did before. (file name “fire-pit-2”) But the results screen is now a little bit different. (Picture 29) It now says there are 3 Materials. Last time it said only 2. (Picture 14)
Now we import it. Just like before. But this time in Daz the suspect surface stands out. (Picture 30). Let’s give it a real concrete surface and it’ll show up even better. (Picture 31).
So how do we fix this? In a simple example like this one, it’s easy. In Daz, simply apply the same shader to the “FrontColor” surface, and it’ll look fine. But, the right way to fix it, is at the source; 1) Select the surface. (Picture 32) 2) Right Click and “Reverse Faces” (Picture 33) 3) Click on the Front Face icon under Entity Info. (Picture 34). Then select the proper paint and click OK. (Picture 35 & 36)
But notice under “Entity Info” both faces have the concrete icon. To do it right, you should change the back face to the default paint. If you try to merge two surfaces that different surface properties, the results can be unpredictable.
Now, as a double-check, let’s export/import it again, see what happens.
I exported it as “fire-pit-3”. Imported the new file into Daz, and applied the concrete shader to the surface. (Picture 37)
Chapter 3: Material Surface work around.
So what about things you design in Sketchup, but you have all your materials in Daz?
I have many surface shaders in Daz, but not that many in Sketchup. And I don’t want to try moving materials between the two. Well, don’t try. Just let Sketchup note what shaders you want where, and call it good enough.
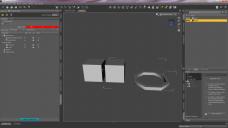
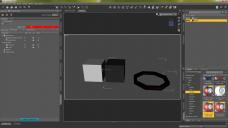
In Sketchup, I made four 3” cubes. Then, just to make them look unique, I used the move tool and moved one or more corners of each cube to bend them a little. (Picture 38)
I’m going for four shades of glass. Red, Green, Yellow, and Blue. I’m going to use the material creator to create some pseudo materials. Good enough to know what I want in Daz, and that’s what really matters.
Under the Materials tab, on the far right, there’s a “Create Material” icon (Circled in Picture 39) Click on it to open the Create Material window. (Picture 40)
Use the Picker to change the color to something random, it doesn’t really matter what. I’m shooting for some red glass, so I’ll find some shade of red. (Picture 41). Then, and this is key, In the text field, enter the new shader name. (Picture 42) and click OK.
I’ll select all the surfaces on the first cube by triple-clicking on it. (Picture 43). Notice there is only one face icon under Entiry Info in the upper right? It’s telling you there are many surfaces selected. Since the material is already selected, use the paint can and color all the surfaces of that cube. (Pictures 44 & 45)
I’ll repeat the process for the remaining cubes. (Picture 46)
Well, that was fun, but just one more indulgence. I added a pyramid with each of the four colors on a face (Picture 47)
I’ll export it like normal (filename: test cubes) and import it into Daz. There were five materials exported. The fifth “FrontColor” threw me for a moment, then I realized. I didn’t color the bottom of the pyramid. So it’s still the default color.
Now import it into Daz like the rest. Granted, the materials don’t look all that impressive, but we only need the names. And, as you can see, the surface names came through the export/import process. (Picture 48)
Now it’s just a matter of applying the shaders. (Picture “cube renders”) OK, I’ll admit, I’m not that good with glass, but you get the idea.
Chapter 4: Building a building for Daz.
The next thing I wanted to learn, was how to build a building that I could use in Daz. With hide-able walls. So, a simple house it shall be.
First start out with a simple floor. Say 12x20 feet, and let’s make it 6” thick. (Picture 50) We’ll use the offset tool to make the walls 6” thick. Then, make the floor concrete and wood. (Picture 51). Finally, what I do, is draw lines in each of the corners, these will become the footprints of the walls. (Picture 52). Now, to make it separate, make it a group. Again, this is very important. Since the floor is a group, and not open for editing, you can use it to trace wall information.
Next, the walls. Make sure the floor is not “open” for editing. That’s important. For the first wall, follow the lines for a wall, I’ll do the left wall first. If you then “hide” the floor, you’ll see the surface that will become the bottom of the wall. (Picture 53) And I’ll use the push-pull to make it 8 feet tall. (Picture 54) I added some color to the inside, and some siding to the outside. And again, before moving to the next wall, make it a group. Now that both pieces are groups, within Sketchup I can hide or unhide either group as I need it. Repeat for the other 3 walls. (Picture 55). To repeat, it is very important to make each floor or wall its own group. It’ll make things easier when it comes time to export.
Finally, the roof, also its own group. (Picture 56) As you can see, I have the walls hidden to show the roof is its own group.
It’s ready to export to Daz. (Picture 57)
The export process is almost identical as before, with an added step or two. Before exporting click on each individual group, Sketchup will only export what is selected, or the entire drawing if nothing is selected. So select a group, export it, give it a good file name, like “Roof” for the roof group, and move on to the next group. I hide the group once I export it. This helps when there are interior walls. Now, each component of our house has its own individual file, ready for Daz.
It is very important, NOT to move any of the groups within Sketchup before you import them. When you import them into Daz, they’ll come into Daz in the same locations as they were imported. So if you move them in Sketchup, they’ll be in their new location within Daz. So it’s best to have them all placed properly before you do any export.
Once all the components are imported, its only a matter of applying surfaces to all those defined when you made it during sketchup. And as you can see, each file, upon import became its own prop within Daz. (Picture 58) And, just like previous examples, I apply shaders to all the surfaces within Daz.
And, just like other props, I can make them visible or invisible so I can render what I want. (Picture 59) Picture: House Render Sample