An Iray ring-light - Building your own rig step by step
 maclean
Posts: 2,438
maclean
Posts: 2,438
Since I used to be a fashion photographer, it occurred to me that with Iray, I might finally be able to build a ring-light that approximates reality. And I did it, so I'm sharing it.
What is a ring-light?
The original ring-flash was a circular flash which attached to a camera lens for shadowless photography, mainly for medical use. It later became popular with fashion photographers (David Bailey, in the 1970s, etc).
A ring-light is a version reproduced in the studio by arranging flash-heads or tungsten lights in a circle around the camera.
Why make one?
Lighting without shadows is easy enough in 3d, but a ring-light isn't the same thing. It has shadows. They're just extremly tight and even. Plus, it's a lot more fun to build your own rig, and, you can get some interesting effects by playing with the light and camera settings.
Making a 6-light ring - 2 o'clock - 12 o'clock
1. Create a new camera at default settings and zero all transforms. You might want to name it 'ring camera' or something. This will be the parent for all your lights
2. Create a new Photometric light and choose Apply Active View Transforms . The light should load at zero transforms. Name it 'light 12' and move it to Ytrans 50.
3. With that light selected, create a 2nd PM light and choose Copy Selected Item . Name it 'light 06' and set Ytrans -50 to move it to 6 o'clock.
4. Create a 3rd PM light and choose Copy Selected Item . Name it 'light 02' and set Xtrans 40/Ytrans 24 to move it to the 2 o'clock position.
5. Create a 4th PM light and choose Copy Selected Item . Name it 'light 04'. To move it to the 4 o'clock position, set the Ytrans value to -24.
6. Now create lights 08 and 10, copying the 04 and 02 lights. Set the Xtrans values to -40 to move them into position.
7. Now parent all the lights to the camera, and that's the rig finished. You can save it as a scene and merge it with any new scene you're working on.
There are two reasons for parenting the lights to the camera. Firstly, the lights are in the correct position and move with the camera, so that whatever you see through the camera view will be perfectly lit. Secondly, the camera scale will affect the lighting and can be used for different effects without moving all 6 lights into new positions. For example, if you use a longer focal length and move the camera back (Ztrans) , you may want to scale it to change the lighting. As you scale the camera, the lights will follow.
Camera Settings - Focal Length 100mm
Light Settings
Spread Angle 40
Light Geometry - Disc
Height 50 / Width 50
Lumens 25,000
All other settings at default.
Important - Before rendering, you must set Environment to Scene Only, and switch the camera Headlamp Off.
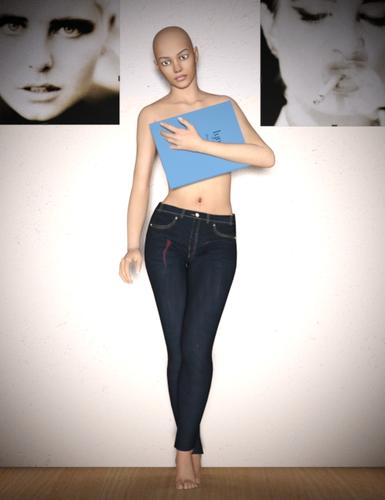
Render 1 - Settings above
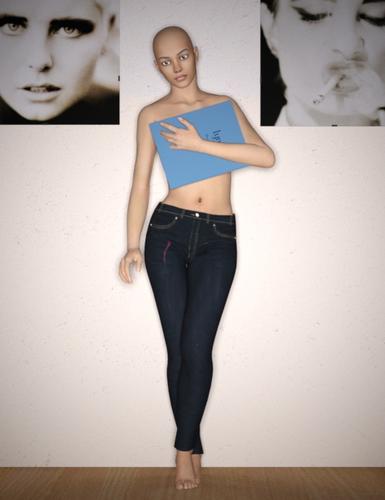
Render 2 - Light Disc Height/Width 10
Render 3 - Camera Scale 50%
Render 4 - Spread Angle 20
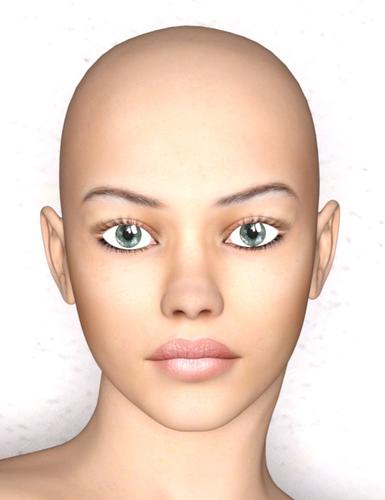
Render 5 - Head shot - Focal Length 200mm / Lumens 7,500
All render times - Approx 25 secs
Things to play with
Camera Scale - Scale it up or down
Light Geometry - Try other geometries for different effects
Harder shadows - Use smaller light geometry Height/Width
Tighter shadows - Scale camera down
Narrower Beam - Reduce light Spread Angle (Seems to increase render times by approx 3x)
The settings for all 6 lights should always be identical, but you don't need to adjust them one by one. To change the light settings simultaneously, select all 6 lights in the scene pane. In Parameters, click in the left-hand pane and press CTRL+A to select all the lights.
To make a ring-light with other distances
1. Create a cylinder primitive with 12 sides. This is your 'clock-face'.The diameter should be twice the distance you want your ring lights at. I used a diameter of 100cm for a light distance of 50cm. Set the cylinder to Xrot 90.
2. Go to Front view, frame the cylinder, and set Viewport Drawstyle to Wire Texture Shaded. This allows you to see the 'clock' divisions to position your lights.
3. Select the camera view in the viewport menu, create a new Photometric light and choose Apply Active View Transforms . The light should load at zero transforms. Name it 'light 12' and go back to the Front camera, using Ytrans to move it to the twelve o'clock position on your cylinder. (You'll need to switch to Preview Lights (CTRL+L) to see your cylinder.) If you can't see the light against the cylinder, use minus Ztrans on the cylinder to move it behind the light.
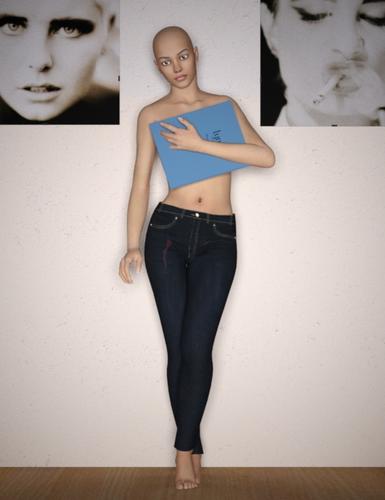
Oh and, excuse the crude model. I don't use human figures, so this is an old V4 with no hair. She has no top, so I gave a model book to hold to preserve her modesty. LOL. I'm sure someone can do better with Genesis.
(Rendered in my Model Agency product. Appropriate, no?)
mac

Daz 3D is part of 
Connect
DAZ Productions, Inc.
7533 S Center View Ct #4664
West Jordan, UT 84084
Licensing Agreement | Terms of Service | Privacy Policy | EULA
© 2025 Daz Productions Inc. All Rights Reserved.
Comments
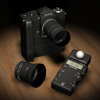
Here's the pic of the setup.
mac
Really nice, thanks!
You could make a 'perfect' ring light with a torus, but your set-up has the advantage of simulating someone using a regular ring light rig in real life.
Yep. That was the idea. Perfection is overrated. LOL.
mac
Very nice and useful, thanks :)
Another approach to creating a ring light:
Create a torus primitive with values appropriate for the ring light bulb. E.g., inner diameter should be around 6-10 cm, outer diameter 1-2 cm more than the inner. Keep the segments/etc relatively low, as when converted to an emitter, each face is effectively considered its own light source (at least LuxRender does this). Make this primitive an emitter ("Convert to light" in Reality, the IRay emission shader, UE arealight, etc).
Create a second torus primitive and make it a bit larger than the first. This will be your reflector. Turn up the face count on this primitive so its curve is fairly smooth. Parent this to the 'bulb' primitive, which should result in the 'builb' being centered in the 'reflector'. Using the geometry editor in Studio, delete the 'front half' of the 'reflector' primitive to make the ring that a real-life ring light would have. For the remaining 'back half' of this torus, also flip the normals in Studio so they point in (e.g., towards the 'bulb' primitive). Set this primitive's surface to a metallic (generally silver) or high-gloss white material as supported by your render engine of choice.
Now you can parent the 'bulb' primitive to your camera and get a ring light that will behave very much like a real-world ring light. You can vary the spill by scaling the 'reflector' primitive's size up/down a bit relative to the 'bulb' primitive.