Geometry / Polygon Group Editor
 alexhcowley
Posts: 2,392
alexhcowley
Posts: 2,392
Guys,
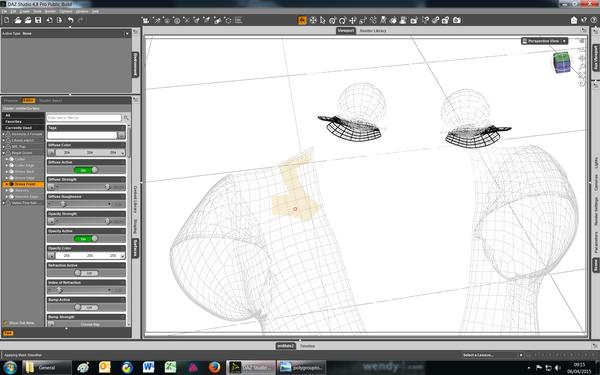
I'm having problems selecting the appropriate polygons with this tool. I'm trying to widen the neckline on a gown. I select selection type polygon and selection mode drag. I then click on a strip of polygons at the top of the gown and drag down around the edge of the neckline. It works fine for a few rows and then the left edge goes all jagged and it starts selecting polygons way out to the left of the strip I started with. Also, the boundaries of the selected area don't match the mesh outlines of the polygons.
Given my vast level of inexperience with this tool, I suspect I'm making a beginners mistake. Any helpful comments would be appreciated. Incidentally, I'm using 4.8 beta.
Cheers,
Alex.
Daz 3D is part of 
Connect
DAZ Productions, Inc.
7533 S Center View Ct #4664
West Jordan, UT 84084
Licensing Agreement | Terms of Service | Privacy Policy | EULA
© 2025 Daz Productions Inc. All Rights Reserved.
Comments
It looks to be selecting the polygons on the back, not the front. Because you are in hidden line display you aren't seeing the edges for those. If the rows of polygons run nicely around the neckline you might want to select just a couple of polygons, then right-click and from the menu choose the Geometry Selection>Select loop command (cmd/ctrl = ) rather than trying to drag out the whole selection.
Thanks, Richard. I'm a little puzzled as to why Studio is selecting polygons on the back of the gown when I have selected the front on the surface tab.
I will try the loop selection and let you know what happens.
Cheers,
Alex.
Richard,
I've made some progress on this but I'm still having problems. I've selected the polygons and then used geometry assignment/create surface from selected to create two new surfaces, front blank and rear blank, on the gown. I then saved the gown as a wearables preset and exited studio.
I then restarted studio, loaded a V6 and applied the wearables preset to her. When I attempted to remove the new surfaces using the opacity slider, nothing happened.
I then repeated the process, this time adding a geometry assignment/assign to surface to the end. Save as a wearables preset and then apply the wearables preset to a fresh V6. Same results, the two new surfaces stubbornly refused to to vanish when I set the opacity slider to zero.
The last time I tried this technique was with studio 4.6 and I don't recall having any problems. Any further suggestions you can make will be gratefully received.
Cheers,
Alex.
There should be a highlight line around the polygons belonging to the selected surface. If you look at Tool Settings with the Geometry Editor tool open are there any polygons in the surfaces? I'm not entirely sure I'd expect Wearables presets to save geometry changes, though it's obviously storing something or you wouldn't see the surfaces listed.
Richard,
I've made some progress on this.
1) I selected wiremesh mode in the viewport and then selected the gown in the scene tab
2) I selected the front of the gown on both the surface tab and the tool settings tab. The selected surface turned pink.
3) I then selected a block of polygons, which turned grey, and locked it. This process was repeated until I had built up the area I wanted to turn into a separate surface / material zone.
4) I then used the geometry assignment option to turn it into a surface called front blank, as before, which then appeared on the surface tab. Once this was done, I unlocked all the previously locked polygons.
5) I selected the back of the gown on the surface tab and the tool settings tab. It turned pink, as before.
6) I clicked on the first of the polygons I wished to select and then dragged the cursor. Nothing happened, the polygons were not highlighted in grey, as they had been before.
I am completely baffled as to what it going wrong here and any further help you can offer would be gratefully received. One final incidental, I tried the select loop and it did not follow the neckline but splayed out all over the place instead.
Cheers,
Alex.
I wonder if the normals on the back are flipped? That might explain why they were selecting from the front, when you didn't want them, but not from the back, when you did. Unfortunately I don't think I have that item, if it's a product name "Regal Gown".
Richard,
This is the product:
http://www.daz3d.com/a-fine-regal-attire
Can you explain what you mean by normals?
Cheers,
Alex.
The marque and lasso selects have always selected backside polygons, that is why they are so useless. Using the polygon tool requires a bit of strategy of hiding the polys you don't want so you a 'clear shot' at the ones you do want.
Normals are basically the direction a particular polygon faces...which side is the front and which is the back.
Here's a screenie from Blender showing the normals (the blue lines). Most of them are point 'out', but I flipped the ones pointing in...
Many programs would have problems properly displaying the texture/surface with the normals facing two directions like that. Or display other odd/unexpected behavior.
OK, I do have that - and the normals, at least on exporting as OBJ, look fine.
You can use the viewport to help show "flipped" normals, the attached pic is my OpenGL settings in 4.6 and 4.8 (pic was taken in 4.8), I've been using this for a while to help "fix" flipped normals for my friends, as it makes the normals stand out like sore thumbs in the viewport.
Will it show them in wireframe shaded, though?
Yeah, simple 'fix' if it doesn't, flip to solid or texture shaded....