My first try at a (free) product
 Starbase 1 - Nick
Posts: 71
Starbase 1 - Nick
Posts: 71
I decided I wanted to try and learn to make stuff for Daz. I'm pretty fluent with the lightwave modeler, so I was hoping it would be fairly easy for the other parts.
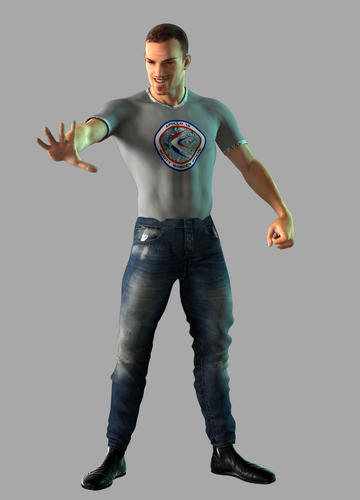
I started with a free low res body suit, and cut away the parts I did not need for a t-shirt. Pulled it into place over a Genesis 2 template leaving plenty of space between. I subdivided smooth once, to check for no poke through, then used the VERY handy heat shrink, to pull it 98% closer to the template with a 5mm extra space. Then subdivided smooth again, and picked out a new surface for the hems, let LW make a UV map for me.
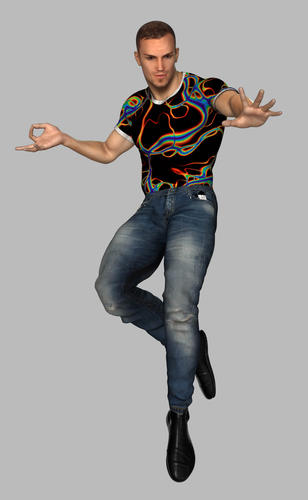
For this first shot I went for some lurid patterns so it would be easy to see what was going on.
Running the import utility was pretty much idiot proof, (at least for this idiot!), though the surface came in glaring white. I've not done much with the Daz surface editor, but was able to apply the UV map fairly easily. I'm not trying to do bump for this first pass.
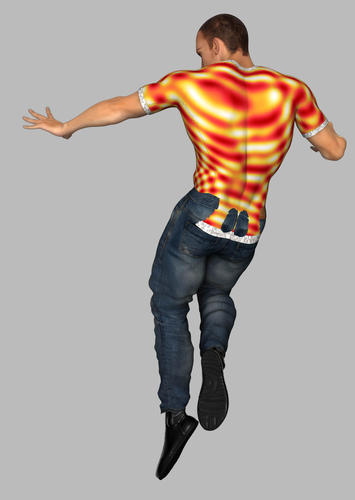
I was REALLY pleased to see not a trace of poke through! Though the jeans I added had this problem, so maybe I'm better at this than I thought.!
There are a couple of problems, and questions, though, and I'd be very grateful for tips,
* The shirt does NOT work well with the jeans, they overlap in a messy way. Any suggestions on how I should handle this?
* Are there any tutorials or docs on turning it into a nicely packaged product, with some handy presets for applying different surfaces? I'd like to release it with lots of patterns and logos!
* I copied and flipped the hem polygons before I exported - the idea was to get some inside polygons to stop problems if you git to see just inside. This seems to be rendering badly - is there a better way?
There are a couple of things for me to fix too - most obviously the visible seams in the baked UV map, but that's a lightwave issue.
Nick
Daz 3D is part of 
Connect
DAZ Productions, Inc.
7533 S Center View Ct #4664
West Jordan, UT 84084
Licensing Agreement | Terms of Service | Privacy Policy | EULA
© 2025 Daz Productions Inc. All Rights Reserved.
Comments
Since you have no pokethrough with the figure, then using a smoothing modifier when you get it into Daz should work fine. You could have the shirt collide with the pants for an untucked look, or the pants colliding with the shirt for the tucked in look :)
Thanks kaotkbliss - any point to tutorials on those options?
When you have your scene set up in Daz, just select the clothing you want to be on top (for example, the pants) Click Edit -> figure -> geometry -> apply smoothing modifier
Then go into parameters for the item (the pants) and select the mesh smoothing option and change the collision item to the other item (in this case, the shirt). Then increase the collision iterations until there is no more pokethrough.
That sounds easy enough, thanks fr the tip!
Should anyone else find this thread while looking for how to use Lightwave to make Daz content, I found the fix fo the seams in the baked UV textures. Just set 'oversample' to 2 pixels, and it will extend the map to avoid anti aliasing along the edge.
Nick