two-tone fabric shader for iray?
 WillowRaven
Posts: 3,787
WillowRaven
Posts: 3,787
in The Commons
Is there an iray fabric shader that allows one to create stripes? I want to be able to pick the colors of the stripes and how many stripes I want.
Daz 3D is part of 
Connect
DAZ Productions, Inc.
7533 S Center View Ct #4664
West Jordan, UT 84084
Licensing Agreement | Terms of Service | Privacy Policy | EULA
© 2025 Daz Productions Inc. All Rights Reserved.
Comments
Do you need multi color stripes or just one color? There are a few stripes type settings in my Business Class fabrics as well as in my Egyptian Fabrics shaders sets. You would just choose a background color and a stripe color. The stripes are just an overlay which you can change the size of to get more or less stripes, plus you can choose from pre-done colors or just change the color manually on the diffuse overlay and/or top coat sections of the shader. It depends on what type of material you want as well. There are 7 fabric types in one set and I think only 2 in the other. In theory you could also apply the striped overlay file to another material as well if needed.
For this specific project, I want to select the collar of a t-shirt and change what is normally one color to two colors, like in the attached image. Then it occurred to me it would be useful for all sorts of things with a single mat zone to be able to have the effect of stripes or patterns where we choose the colors. My memory is telling me there used to be something like that for 3DL use, but I'm still sorta new to iray and am not familiar with all of the tools out there.
Would either one of your sets create a collar and sleeve trim like this uniform?
Ahh..ok I see. For that particular use you may want to see if the clothing you want to use lends itself to making your own mat zones and applying just different color solids to them - IE one for the white and one for the green in this example. The reason I say this is because the rotation of the stipes to lay exactly that way around the collar will be difficult with just a regular "striped" shader. The stripes probably won't lay the way you picture them there with ust a normal tiled pattern.
For general purposes, sure, a striped shader will work nicely overall such as in the area of the shirt that is red. But to get it to curve around the collar, I would first see if the clothing item already HAS a mat zone for the collar itself (and the arm trim). Sometimes they do and it's easy to change it. That would give you one color on those areas only. To get the second stripe on them you would have to create an additional mat zone that only covers half the collar (and half the trims) and apply another color to that section of them. If the shirt doesn't have an exisiting independant mat zone for those areas, you would need to create 2 of your own to pull it off.
I sort of covered this in the product video for the Business Class shaders, but the concept will work with any tiled shader. Have a look at the videos on the product page here and it will show you how to make the zones. It takes a few minutes but it might be just what you want to do. The mat zone stuff is in the second video, but you might want to watch the first for general shader application of the type I mean.
https://www.daz3d.com/ultra-shaders-business-class-fabric-shaders
Forgot to add...you COULD do this on the texture map for the shirt itself, but that would require something like GIMP or Photoshop and a totally different approach.
I tried that first, but the collar, which does have its own zone, doesn't divide at the right spot and although I have Hexagon, I never learned how to use it, so don't know how to change the mesh. {See screenshot of collar}
Any idea of how I would split this?
Thanks ... Will definitely check it out :)
My first plan was to revise in Photoshop, but the creator of the shirt didn't use a regular texture map I could revise, but colored swatches or squares.
Sorry ...didn't see the attached. Can you link the product...maybe I have it.
Sorry ... Forgot to attach it... but here is the product link, too: https://www.daz3d.com/lincoln-dforce-clothing-for-genesis-8-males
I was watching the videos ... your shaders look amazing, even if they won't work for this in particular.
https://www.daz3d.com/ultra-shaders-business-class-fabric-shaders
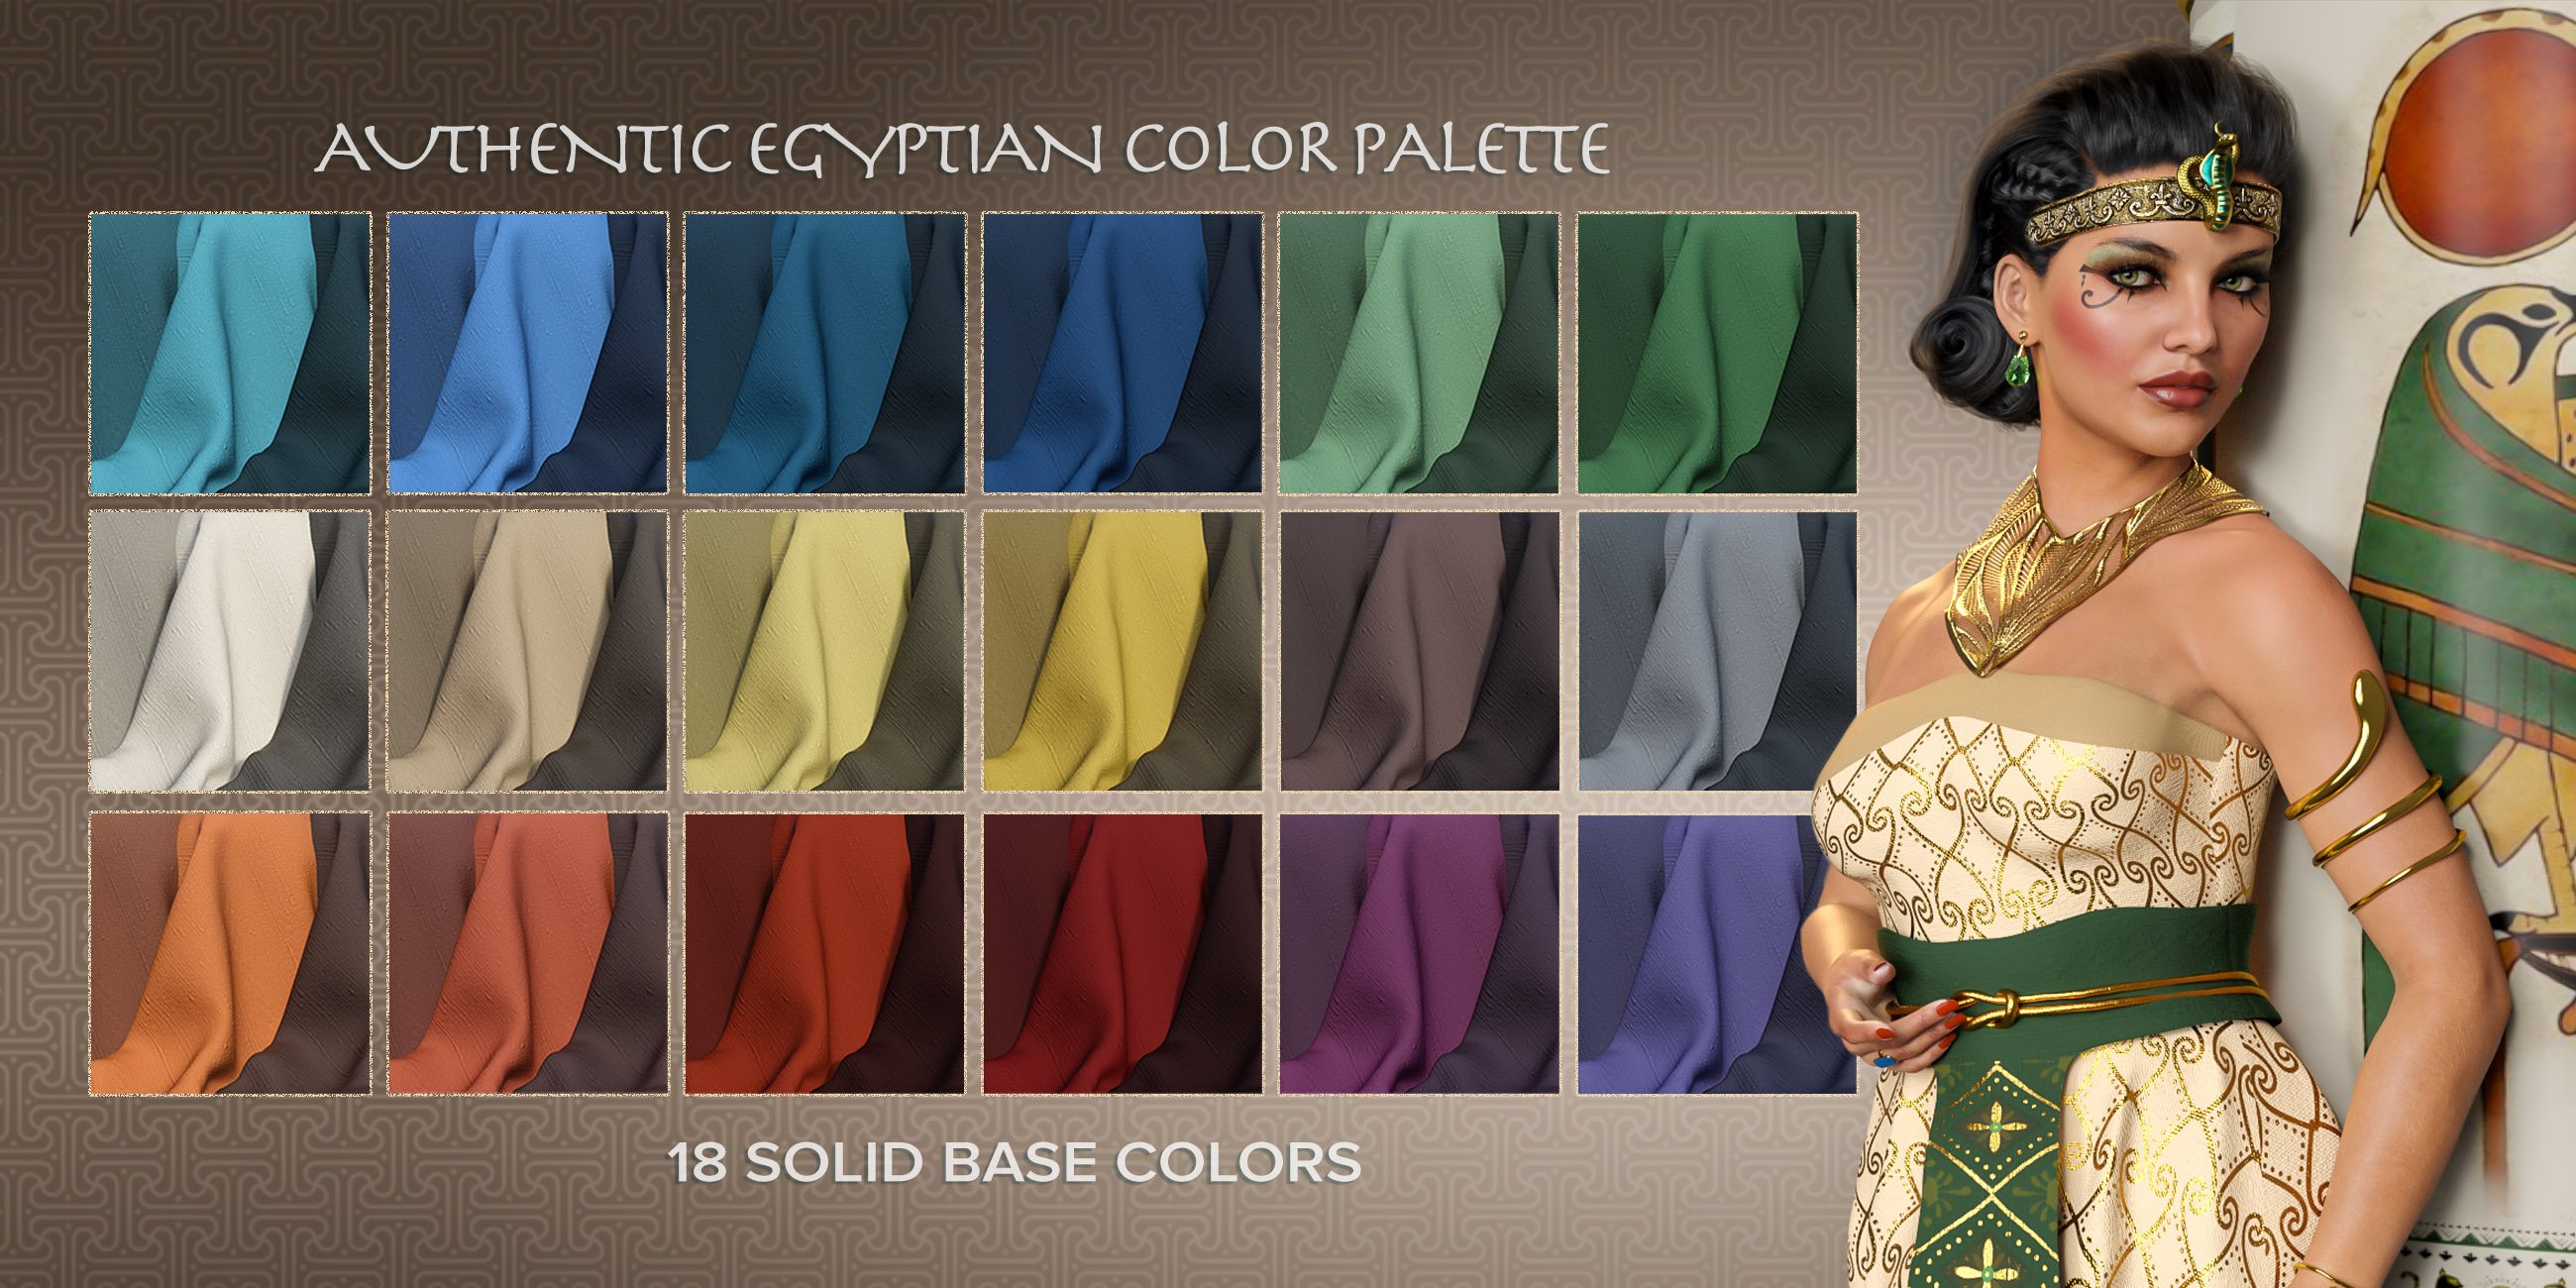
https://www.daz3d.com/ultra-shaders-egyptian-fabrics
I have the business class fabric shaders, and they are excellent.
Aww..thanks barbult :)
Willow...I see how you can half and half the collar from the screen shot, but it won't do that curve downward to a point with the overlap is all.
Zai ... I'm loving your business shader set. Here is what I managed to get with the stripe pattern at size 2. I don't seem to have much luck with the provided vertical offset settings, so I did it manually, but this will suffice until I can bribe someone to build the uniform for me, lol. I know it would sell, so maybe I have to learn how to make dforce closes in hex, lol. Until then, I'll have to cut and splice the collar in post :)
Oh yay! You did it!
Yes, the vertical and horizontal offset settings are mostly for trying to get a better match up on seams if needed. Since there's no way to control where seams fall on any given model from a shaders perspective, sometimes you can cheat a bit by messing with the offsets. Mostly for more intricate patterns though, to sort of fool the eye into thinking it matches up better. Also for positioning on smaller items.
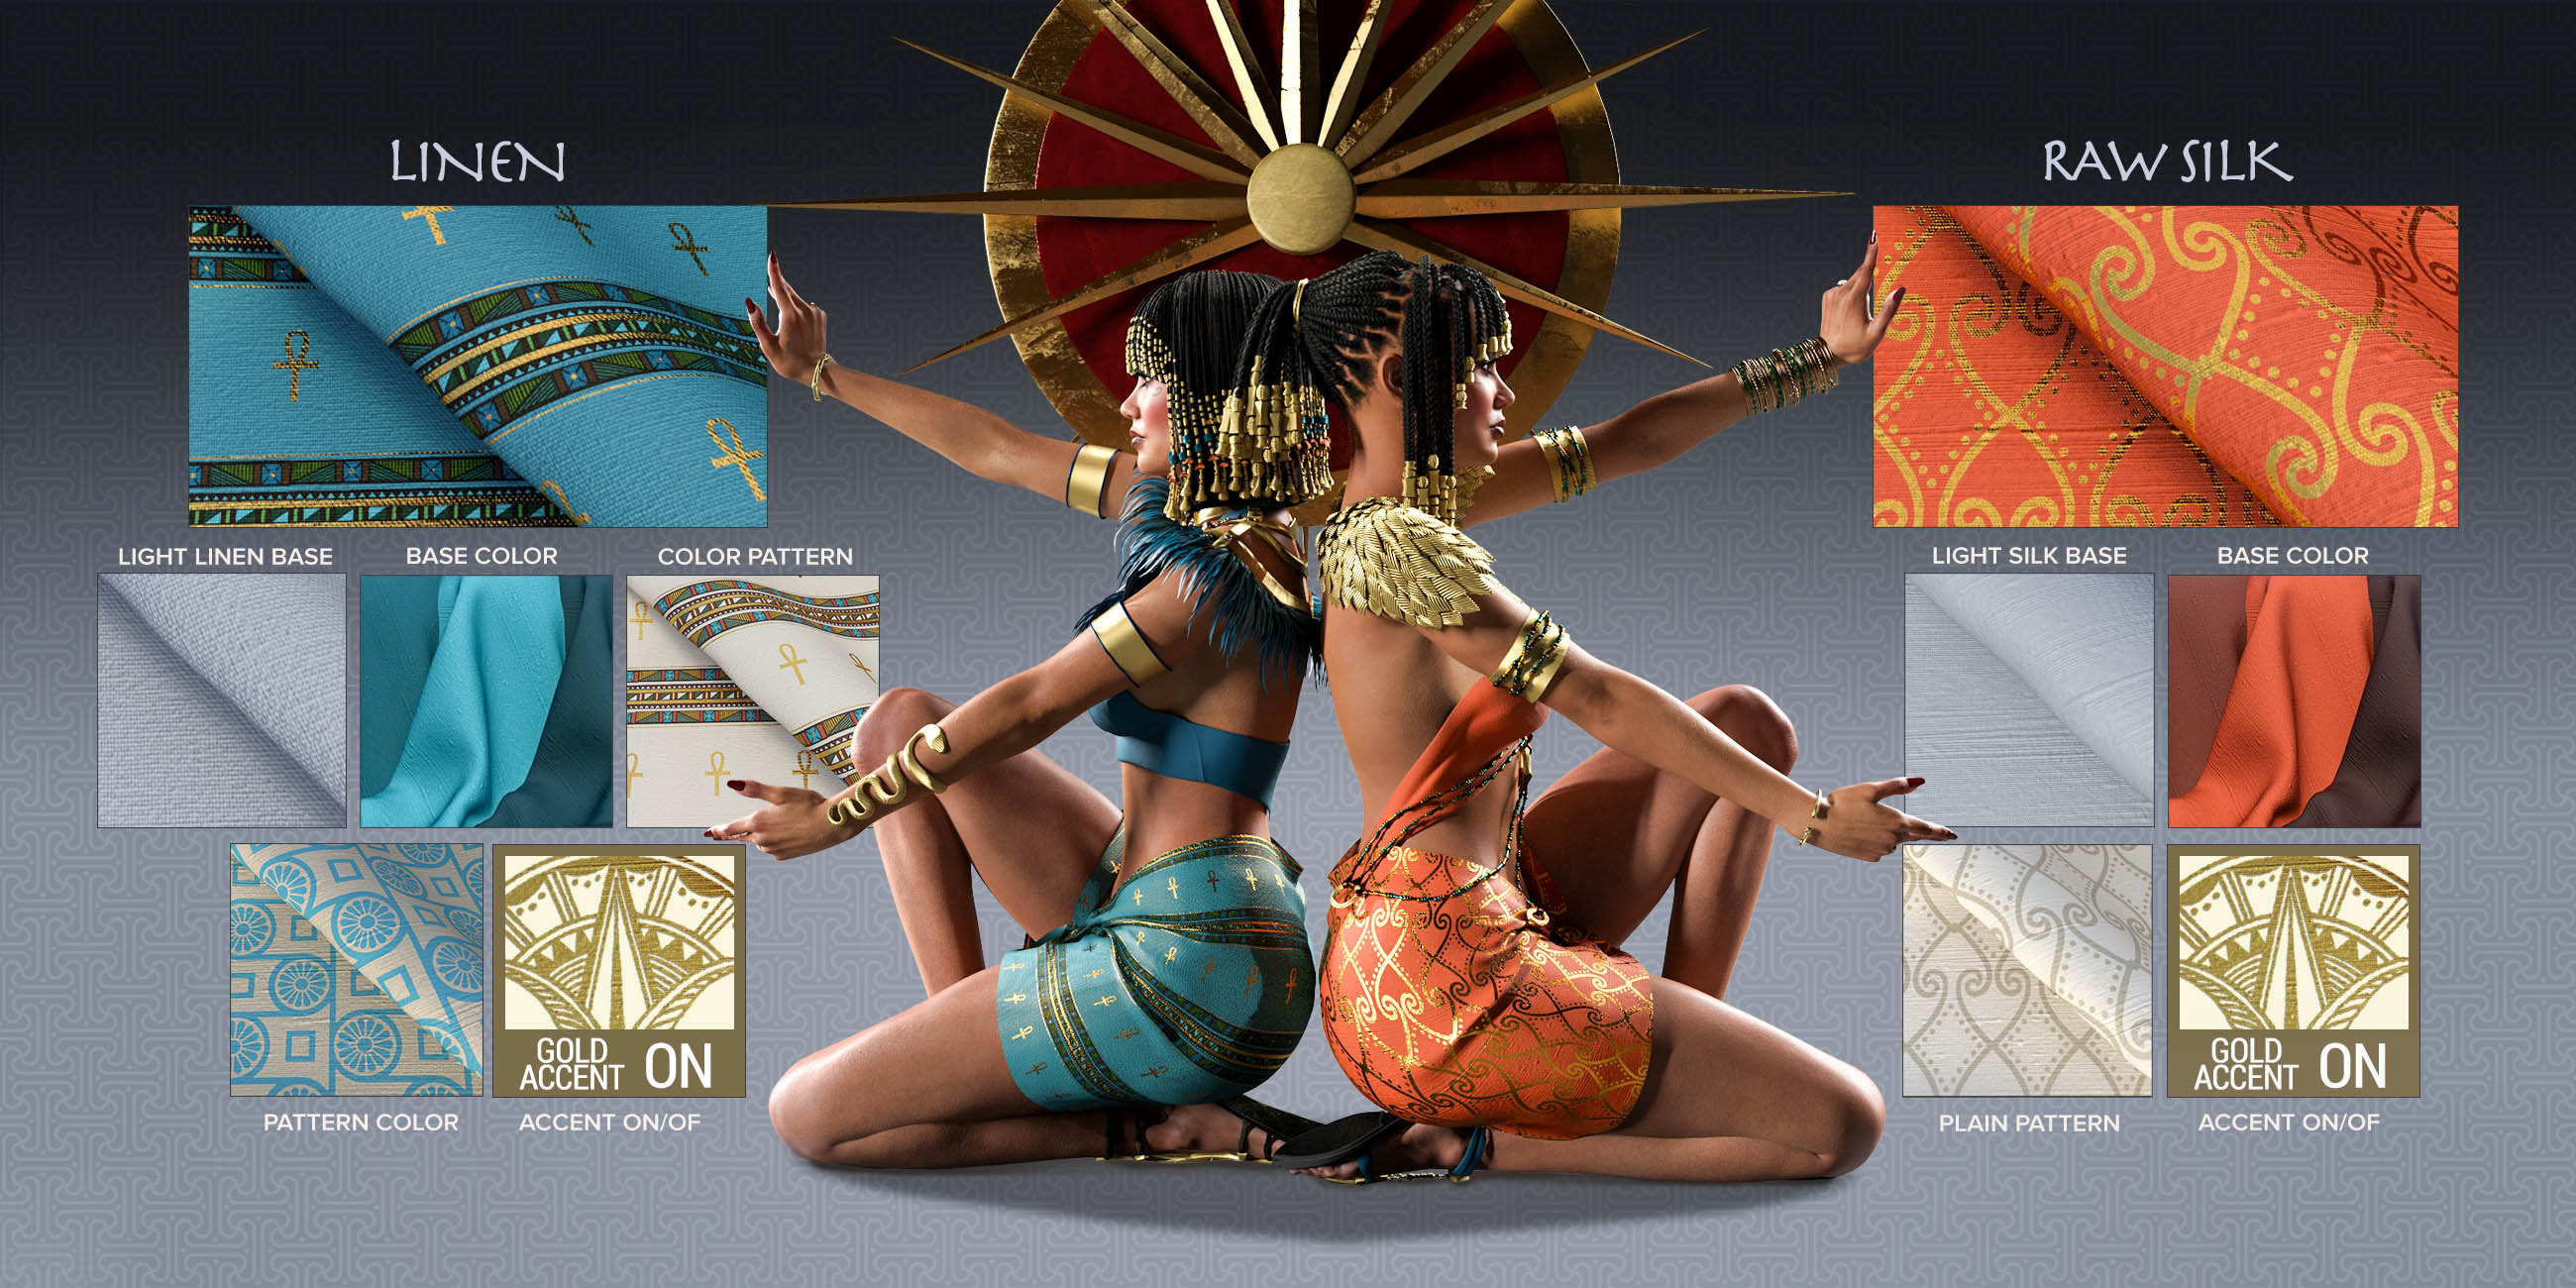
For instance on the Egypt shaders, on her belt at the bottom corner, I wanted the gold flowers to go straight down the middle of the flap so it didn't look weirdly offset, so I shifted it over a couple times until it sort of centered horizontally and also landed in a pleasing spot vertically with regard to the plain green of the actual waist belt.
Or..on this one on the blue skirt, I shifted it vertically so the dark stripe part of the pattern landed at the waist so it acted sort of like a belt/hem at the top and none of the little gold ankhs were cut off, as if it were made to be that way on purpose.