Making a figure into an OBJ.
 Scavenger
Posts: 2,674
Scavenger
Posts: 2,674
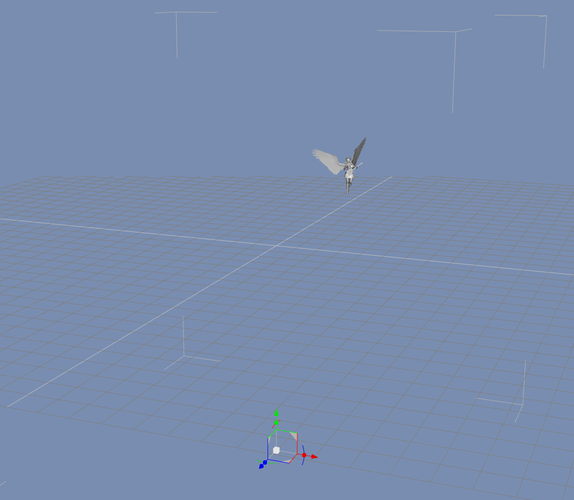
After finishing a picture, I decided I wanted to take one of the characters from it and make an object to use elsewhere..maybe as a figurine to put in the background of other stuff..don't know....
I got rid of everything else in the picture and exported to object.
When I import it, I get the solid white object with no textures despite there being a mtl file next to the obj and it's way off set.
So, Is there a way to do what I'm doing, fixing both what I did wrong on export (if that's the procedure I want to use) and on import so I get the colors too?
Daz 3D is part of 
Connect
DAZ Productions, Inc.
7533 S Center View Ct #4664
West Jordan, UT 84084
Licensing Agreement | Terms of Service | Privacy Policy | EULA
© 2025 Daz Productions Inc. All Rights Reserved.
Comments
whenever I export an item and then reimport it I simply go to the surface tab and right click the original to copy surfaces and then right click the copy and paste the settings
sometimes have to reapply the mats via the mat file
If you're exporting from and importing to Studio, you could also Save As Scene Subset. That'll create a .duf file and let you pick which elements in the scene get saved.
does anyone know why this happens? Is the mtl file getting corrupt?
does anyone know why this happens? Is the mtl file getting corrupt?
The MTL file will hold limited information at best.
A quicker way to turn an item into an OBJ is Edit>Figure>Rigging>Convert Figure to prop..., which should preserve all material settings.
I appreciate the replies...none have answered any questions though.
Mattymanx: I want to reuse this down the road..long after the original is gone. So I want it all in one nice package that I can use her, or in other things that use obj format.
Tim_A: Saving as a subscene does not answer what I did with the export so it's off center, or why there's no color when I import. I am looking to take a figure and turn it into an object. Not have another daz scene to load or merge.
Richard: When I try that, I get a naked figure with all the clothes and props next to it. I want it all as one.
You have to convert each item in turn. You can do that, or export and reimport then reapply materials and save as a Scene subset (or even as a Figure/Prop Asset from File>Save as>Support Assets). The MTL files are iffy at best - not everything will read everything, though it is annoying if DS won't read its own - so you aren't going to be able to simply drop the item into another application whatever happens. Imported OBJs will, I think, always put the centre point at the origin - if you are going to save as a scene subset or asset you may want to move it with the Joint Editor, or you can reposition before exporting.
Totte told me on Facebook about the "Collect Maps" checkbox in the export, which when I then reimport, gives me the colors, though one of the shaders comes in too large on the texture. I wind up with a Maps folder of 54 different jpgs, though, so still not ideal.
I fixed the off center by moving the figure to 0.0.0 from where it had been in the scene.
Is it somehow possible to save just the whole ...color form, as a single image that gets "shrinkwraped" around the object when loaded?
Save a duplicate scene of the figure and clothes/hair you want and remove all non essential items
export the whole as a single piece
Import back into the scene it was exported from
Copy over your material settings
Delete originals
Save as a scene and or save as a prop.
1. Have the main figure with all the whatever "parented" to it, in exactly the position you want it to load. [can use the parameters tab to position to center].
2. Have a folder ready, nested in the Runtime > geometries > YOUR name > whatever ... into which to export the new .obj files to. Why is because one has to keep the images together with the .obj file. This is to prevent them getting separated from each other as is likely to happen if one exports everything to a desktop.
3. Select the main figure ... export it out as .obj file. Save to that Geometry folder you made for it. Use the "Poser" settings plus ONE change.
COLLECT MAPS. D/S has to have the .mtl in the same folder as the .obj file AND the texture images in a nested folder IT MAKES called "Maps". I have attached pictures to illustrate.
....
busy thread ... okay you could possibly narrow down the images collected and/or negate the effects of losing special settings that cannot be saved to .obj form by using the Shader Baking options OR "texture atlas" which can pack the textures to one page.
The Bryce export option is prob the best and more likely to bring textures back, your obj will work ok in most other softwares btw it is just DAZ import that can be fussy,
also try putting the obj and mtl file in with the maps.
I am kind of used to reimporting straight away and copying textures over from the original and saving as scene asset if using in studio as know it does this.
Will the created obj use fewer resources than the original figure? I'd like to create a scene with a bunch of statues, but if I use too many Genesis or Genesis 2 figures, my computer chokes.
And have a simple name with NO SPACES in it when you name it for export.
Tahnks Patience..I'm going to need to look into this "shader baking or texture atlas" stuff...
You're welcome. The Shader Baker as I recall has a few fields that require "browsing to" each session of D/S that it is used in [like where to save the files to] ... and as I recall, leaving it to save to where it wanted to BUT in a newly created folder there [so pics are not all over the place] AND with a desktop shortcut to the desktop ['cause it's easier than searching through all the program folders looking for stuff] worked best.
Somewhere in the program folders there's a tutorial image or .pdf for how to use the texture atlas plugin. I think it's used by many for reducing the number and/or quality of images for the purposes of games.
Will the created obj use fewer resources than the original figure? I'd like to create a scene with a bunch of statues, but if I use too many Genesis or Genesis 2 figures, my computer chokes.
Following the 1.2.3., not necessarily ... one could look into removing the fancy [and normally heavier] bump/displacment/HD/etc images to lighten the load. I haven't worked with them but seems to me that there's a clone or geoshell feature that is helpful for those scenarios. I know I purchased one item in the store and quite frankly was rather ticked. All the chairs were cloned or something to one [for an audience group of chairs], so one could only change the master colour/textures and they'd ALL switch over. I like variety, and trying for the reality of spills on the cloth does matter. For the statues though, it would depend upon the scenario ... possibly for a garden row or building supports or ??? one could have 2 or 3 "masters" and the rest in as clones/geoshells/whatever they are.
In 4.6x anyway, that issue is addressed in the program. it adds an underscore to fill the gap.
Goes to show how many names with spaces I use...got in the habit of NOT doing it a long time ago and never realized there had been a change in behavior.
But it still doesn't deal well with the spaces that are pre-existing (coming from old exports or other sources).
Yeah, spaces can certainly cause 'minor problems' here and there ... importing them into Hexagon will get them "grouped".
Well, I've moved this project forward.
Using what i've learned from another thing, and advice from here, I now have almost what I want, which is 13 texture maps rather than the 54 I had at the start...
First, I texture atlased the original figure, so I got 7 maps (Diffuse, spec, opac, normal, displa, ambient, bump). Then exported to an object and re-imported it.
A bunch of manual transfer of texture settings because some of the numbers get all weird (like ambient is way up).
I then saved as a Support/prop. Had to move the map folder to where I want it and do some find/replace on the path in the DUF file..
the 6 maps that aren't from the Texture Atlas are bugging me..they're reflection or other type of maps..largely from the eyes, left in their original location in my general runtime.... I'd rather they be in the 7 Texture atlas maps...
I'm not sure if doing another Texture Map from the current version might get them all combined or not.