Need help fitting/transferring an obj file
 tam_c3df5332fc
Posts: 115
I have been trying to do this for so long that it is hard to remember which thing work and which did not, but that is why I am asking for help
BTW, this is an old obj file, so maybe this is why it is not working as expected
1) Import obj file
2) Apply Iray Uber and set Base to weighted
3) Apply texture
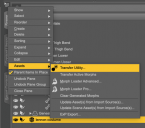
4) Run the transfer utility tool and you see the result
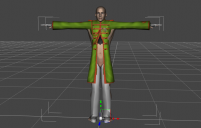
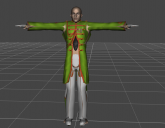
I have taken these similar steps before and file initially looked fine, but then once a pose was applied, the textures broke apart
Not only that, but when I try to open the file that was successful (I have proof, because I took the screenshot) now it just shows the G8M standing in an A pose
I am tired and if you are good at making old obj file fit to G8M chars, please let me know








Comments
I haven't used Genesis 8 much but I do use the transfer utility a lot.
Some questions:
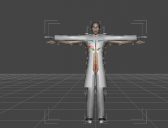
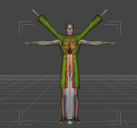
1. If this is Genesis 8 shouldn't the arms on the figure be halfway between where they are and the side of the body when doing this as their zero position is different to Genesis 2 and before? See the attached image.
2. Which figure is the object file for? Is it all one piece? Eg. trousers and jacket separate? Are there gloves also?
3. What settings did you use in the transfer utility? You say you set base to weighted, how did you do that?
I gather the clothing is in the T pose, so it's for G3M??
Load G3M and import that .obj file ... it "has to be" landing exactly where it should be. If it isn't, fix that first. Export out fixed size, then import that back in.
Then load G8M and leave it at the default A pose. Skip your step 2.
Run transfer utility G8M is donor, clothing .obj is target. G8M is clone -- select the T to A pose G3M [or whatever I called it]. Clothing leave as is.
After that has run, IF I'm remembering the steps correctly, that should now be on G8M default pose A, now forget the weights stuff, just apply whichever shader you wanted on the clothing [or not], but select the clothing and save it as a figure/prop file. Then delete it from the scene, select G8M and load that newly saved clothing file. It should be loading in place and hopefully fitted to G8M. If it isn't fit to, right-click on the clothing and apply the fit to option. CLOUD FLARE, DOING NOW A SAVE FILE AND MAYBE THIS POSTS AND MAYBE IT DOESN'T. I DO WISH THEY'D FIX THIS FORUM SOFTWARE.
'nite.
Thanks for the info Catherine. I don't use the later figures much so I'm not as aware of the processes.
@Catherine3678ab,
Thank you so much. Your suggestion of making sure that the object was the exact same size as the model, followed by export/re-importing is what worked.
While it is not perfect and I had to place a unitard to patch up the "holes" or "see through" areas, but it is much better than it was before
@Pendraia,
Thank you for asking your questions, you led me to a solution with question regarding if it was one object, which it is and I gave the texture a black background, which gave color to the pants and shoes
It makes sense to load the G3M because this was an old object, so G3M with the T pose is what this object was using. I ended up making the object fit the G8M, as you suggested, and it works pretty good.
Thank you both so much
One more note, yes the cloudfare kept me from being able to post back to you sooner, so you are not the only one experiencing this issue
I think we're all have issues with cloud flare...glad if I helped in a small way.
Kind of still the same question as the subject states, but I would still like the object to fit better.
When I used to use Poser, it had a fitting room, is there something similar in Daz.
I have tried dForce, but the clothes/objects do not seem to fit better, they just look more loose than they were previous.
For example, I am trying to make some slacks fit better of the unitar, mentioned above, but it does not seem to be working - see attached screenshot
Main question - Is there something that makes clothes fit better?
Inside Daz Studio you can try to apply a smothing modifier, and set it to collide with the green object.
Or you can add a push modifier and weightpant where you want the mesh to be pushed out.
Or outside Daz Studio, you can take it into a modeller, e.g. blender, and adjust the clothing, and then either import it as a morph to the existing clothing or as a new object.
Have you tried a Push Modifier (Edit>Figure>Geometry>Add Push Modifier)? You can use a weight map by adding a Weight Access node (Create>New Push Modifier Weight Node) to control where the push is applied.
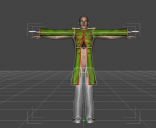
What I see happen there is the pants are colliding against the character when they need to collide against the green item underneath.
If you have a smoothing modifier already try changing what it's colliding against.
If that doesn't completely get rid of it the push modifier already suggested could help.
Both of these options might only partially fix it though. The best solution is to fix it in a modeller to fit over the green clothing and either update the base mesh or create a morph.
@felis
@Richard Haseltine
@Pendraia
Thank you guys. I just returned home from the lunch shift and I tried what you guys suggested and, as far as the pants & unitard go, it worked - see attached screenshot
I still need to figure out how to make the jacket fit better and, with that said, this project is already 100% better
Thank you so much
Glad you got it fixed. It will be a cool outfit when done. Are you doing a beatles render?
Oh dear, is that jacket not welded at the seams. That would be a big problem only solvable by using a modeller to weld the seams together. Depending upon various factors you might lose the uvmap so that would then need to be remade.
If using Hexagon, with the .obj file, weld the near points [tools > utility option]. That might help keep the uv set but would lose the shading domains. So those then need to be remade [either in Hexagon or in D/S].
...................
With regards to those annoying cloudflare problems, I have noticed that if one can carefully scroll the page so that the post button shows, click on that. Sometimes one can do some more typing in the type box BUT it is very hard to proof read what one is saying.
@Catherine3678ab
In Hexagon, it appears to be one object. I do not see what I have to weld, but I understand your point of the gaps between the parts
Please see attached screenshot
BTW, thank you guys for being patient with me. I am working during the day and evening, which means that there will be delays in my replies
Okay, no, those seams are too far apart to weld together with the auto feature. That is an old .obj ... It would require some remaking of the mesh to close the gaps.
In Hexagon one can select 2 lines and then the Bridge tool to make new mesh between the 2 lines.
Does this happen to be free somewhere on the 'Net?
@Catherine3678ab
The following is a dropbox link to the zip file containing the object and texture:
https://www.dropbox.com/s/bpq3v5jt057kpku/lennon.zip?dl=0
Please feel free to fix it and if you take screenshots, so that I may learn how to do it for myself in future references, then I would appreciate it
Is it alright if I have a look also?
@Pendraia
Yes, please feel free to make any corrections. All I ask, is that you take screenshots, so that I may learn how to do it myself in the future
No worries, I'll post some screenies.
Okay, I'll take a look at it tomorrow.
Sales and insomnia, wonderful combo.
Okay I took a look at this. I would suggest trying to weld line to line carefully. Then you might not lose the uvmap. If you bridge the gaps, you will lose the uvmap. {and then after the mesh work is finished, have to make a new uvmap.}
Might not want to aim for perfection so much as just enough to make the picture look better.
... and it is okay now to remove your download link ;-)
When welding, look for that crossbar, if it is not present, the weld will not happen.
Thank you for all your suggestions. As usual, I am running late for the lunch shift, but I thought I would update my progress so far.
Hexagon is a life changer - thank you so much for letting me know about this awesome tool
Still not perfect, but it is much better than before
Looking much better!
That looks way better. Looks like a totally new mesh.
Catherines suggestion was a good one similar to what I thought.
Did you fix the hole where there's a missing polygon in the back also? I also noticed you had a lot of polygon islands at the end of the sleeves and under the coat, I wasn't sure what they were there for and if you don't need them you should probably get rid of them.
@Pendraia
Sorry it took so long for me to get back to you. Yes, in a way, it is a new mesh. The one with all the "islands" or holes is after I applied the Transfer Utility to the original mesh. When I went back to use Hexagon instead of the Transfer Utility, then most of the issues went away.
Unfortunately, it is still not perfect, because the Hexagon only fixes things for that particular pose. As you can see by the previous screenshots, when I pick another pose, then the elbows are now un-matched.
Also, I have hidden the fingers of the mesh because they were not aligning with the G8M figure as well. Not only that, but with certain poses, sometimes the fingers would grow to the size of "Edward Sizzerhand" size - very strange
I wish Daz had a "fitting room" like Poser, where you could select the figure and have it calculate the size of the clothing to match the figure
That explains it. I've only seen transfer utility do that on a couple of occasions. I wonder why it did that? What options did you use in autofit?
I didn't know that the fitting room could do that... but poser tends to make my brain turn to mush.
Ideally one would have to close 'all' the open mesh seams, possibly remove some of the floating mesh, fill in the occasional hole, then with the polished .obj back in D/S, turn it into a clothing piece. Save it. AND THEN make a kazillion [well, a few anyway] pJCMs to help the clothing look its best in more poses.
However this mesh was not made with today's technology in mind. For all the work, it would likely be faster to simply make a new outfit from scratch.
Funny I thought that also Catherine. Sometimes a mesh doesn't work out the way you want it to and it's often easier to start again using the knowledge gained than to finish the first.
That said I'm a sucker for trying to finish stuff myself. I've just been over all my half finished meshes and I'm trying to work my way thru them.
One thing learning 'how to' make mesh and do texturing teaches, IMHO, is an appreciation for all those wonderful professional goods [which are not always perfect either] esp. during sales when the hobbyist can afford some.
Very true...having an actual product in the store at Rendo now I know the hoops I had to jump to get it there. Doing freebies is much more my speed and less stressful.
There is an enormous amount of work that goes into a product to get it store ready.
I keep working on my creation process as I want my freebies to be the best they possibly can be. So much to learn and even retired too little time.