IRay is just unacceptable
 Visual Symphony
Posts: 31
I have just burned my last nerve trying to get Iray to cooperate with no success, no matter what I do I just cannot get rid of noise.
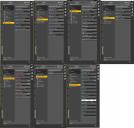
here are the settings of the last run..
active viewport (and it still went to only 9hrs for 4%) so I gave up (NO ONE should have to wait 9 hrs to make anything
ALL MATERIALS are Iray including skin optimization and UBER Base
A total of 6 lights..2 primitive planes set at 50,000W/ luminous efficiency 5, 3 point lights set at 20,000 intensity with luminous Flux at 1500, and the camera headlamp!


c.jpg
662 x 404 - 132K


d.jpg
1610 x 1540 - 340K


Comments
I'm not sure but I think your Progressive Render settings are too high. Try setting them back to default and do a test render.
I have previously set those to default settings, though render time does drop drasticly and completes within about 2hrs...the quality of the render doesnt change...its still unbelieveably noisy
I'd suggest lowering the shutter speed further, or the FStop, or raising ISO. Your lights are still probably a lot dimmer than daylight so the change to shutter speed alone probably isn't enough. You also have Architectural sampler on, that will slow things down so try truning it off.
I forgot to mention that I have tried that also, at one point my ISO setting was at 1000.
the render before this was an environment setting of "sun and sky" with all other lights off and there was still no change of the ammount of noise.
I rarely have interest in outdoor scenes and much prefer "indoor" and studio settings (i'm actually a professional photographer) so I even looked at it as an actual photoshoot and discovered that "real world" camera settings didnt have the desired effect either
Try setting Maximum Samples to 50000, Max Time to 28800 and leave the rest on default.
Personally I think the lights are too bright but the camera settings are compensating for that although the whites are well blown out.
trying the 50000 and 28800 now, im hoping this does something :/
The camera settings in Tone Mapping work just the same as the camera settings on a digital camera. If the lighting is set correctly you should get thae same results as you would witha real camera. You should also turn off the Headlamp on the camera.
Your luminous efficacy is too low. Incandescent bulbs are around 15. Intensity doesn't really play a part in Iray. Your luminous flux is very low.
Finally, do you have an Nvidia graphics card? If so, is it selected in the advanced tab of render settings? My Studio 4.8 installation defaulted to GPU. The card will also need a lot of Cuda cores to speed up the render.
Although, even w/ CPU rendering only I can get clean IRay renders in less than 3 hours.
that was my original approach to this (turning off headlamp) so I set the camera settings as I would as if I was actually in the studio. and then added primitive planes to act as sofboxes for shadow depth and tried both spotlights/ pointlights, and at one point even tried the directional light to add highligh and hairlight.
at one point in time the whole scene was blown out (figured id just max settings) and render quality still showed massive grain and noise which is when I tried the sun and sky setting and still got the same results.
This is a quick partial render I was doing for something else.
The lights are all emissive; 100 Watts in the buildings; 150 Watts in the street lamps, all set at Luminous Efficacy of 15 ; Emission Temperature of 2900. Everything else is at default.
Camera settings in Tone Mapping: Shutter speed 4,0 (¼ sec); F/stop 2.8; ISO 400.
And something that hasn't been mentioned yet...you have a lot of extremely shiny surfaces.
What are some of the settings...like for the floor and the 'wall' behind the bike?
Extremely white whites (above 0.8) and very dark blacks (below 0.2) are going to add to the noise, too.
there is no wall behind the bike and the floor is a primitive plane "iray" with a pearl white shader.
if the shiny surfaces are causing noise then shouldn't it only be visible in the shiny surfaces only? the actual skin texture and even the bike seat display noise
Then what is behind the bike?
What's the rest of the scene set up...the 'environment'?
If it's just the dome, is it 'infinite' or 'finite'...
i have it set up as scene only, just the bike set on a plane primitive
If it's scene only...and there are no physical walls, it's basically trying to render the default 'world' size. The 'trace' distance is basically kilometers. It's going take forever to resolve. Something like that works fine for 'normal' surfaces, but highly reflective (metals)/shiny are going to take a very long time to resolve. Or you need to have the dome and an HDR image (or sky) to 'define' the world.
If you are going with a finite scene, then define it. It needs some sort of boundaries.
so in theory, since I want to replicate a "studio" setting using only lights I set up I should place everything in a primitive cube and still stay with scene?
Pretty much...
hmmm, I've been at work for the past 10hrs... I'll run the whole thing again this time encasing it in a cube.
is there a way to render without the cube showing? I make a lot of my backgrounds in Photoshop so it would save me the trouble of masking out the figure and bike (which is why I was just rendering the scene to begin with)
I know others have mentioned it but I want to point out that 5 is way too low a value for lum/W (which is the value for luminous efficacy, not luminous efficiency, which is something else). For a typical tungsten lamp the correct value is 15, for a typical photo lamp it's 35, for a typical modern LED lamp it's 50-60 and for a typical fluorescent light tube it's 50-80.
In Render Environment, select Dome and Scene for lighting, Finite Sphere, and turn off Draw Dome. The dome will not render, and you will get a transparent background.
You do not need to define an environment map, but you can (and probably should). There are several "photo studio" HDRIs out there that are actually high dynamic images of photo studios. Unless you painted your studio black, the walls, ceiling, floor, even fixtures contribute to the scene. HDRIs will replicate that. If you use an actual interior scene, then you give reflections something interesting to reflect, instead of just washed-out bloom.
While Iray follows physical properties, don't expect everything in the environment to mimic the real world. The real world doesn't run on GPUs, but this one does, and there are ways to reduce the workload on them. Also, remove those mesh lights. Spots are more efficient, and you can make their emitter surface as large as you want. Select circle or rectangle, then adjust the size (the numbers are in centimeters. A value of 20cm will start to soften the shadows. An emitter a full meter or two will cast an even soft-box light. You could also stay with the point lights, in which case they will be more efficient if you use an environment dome.
As Tobor said, the dome (finite) and scene, with nothing in the dome and draw dome off will also define a much more managable area. Without anything to define the 'render area', it would eventually converge...but take a very long time to do so.
Here's some of the studio HDRIs...
http://www.mrbluesummers.com/category/downloads/downloads-textures-materials
http://3dericdesign.deviantart.com/art/Free-HDR-For-Studio-Render-157557355
http://trrazor.deviantart.com/art/Redspec-TGX-Official-HDR-Pack-01-453173341
Nice HDRI's, mjc!
Here's another good'un from Mr. Bluesommers -- includes the umbrella, which has a nice brightness. If necessary, in Photoshop you can brighten the umprella if you need a higher fill.
http://www.mrbluesummers.com/4701/downloads/free-hdri-map-photo-studio-with-umbrella
If it were me, I'd render just with this HDRI, and *maybe* one or two other controllable spots (rim, eyeline, etc.). HDRI-omly renders are pretty quick, even on a CPU-only machine.
And give really nice reflections on the cfhrome...at no additional cost in time.
You guys are awesome!
the main problem was with the 50,000 samples and 28800 for time. I also played with some of the light settings as for previously mentioned 5W was just too low.
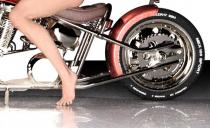
I switched to to Kcd/m2 and dialed it to 100 which made a drastic difference in how it fell on the whole scene. This "partial" render (cant show all because of nudity) was just the scene, I didnt add a dome or anything "yet" but will be playing with that soon.
attached it the results..though my finished piece will be shown later as I have changed all light positions and set up a different pose entirely
Still far from perfect but here is the final render.
Thank you all for al your help