Experimenting with ML Deformer in UE5.1
UPDATED TO PUT USEFUL RESOURCES AT THE TOP
Useful information from the devs about using the ML Deformer tools
- https://forums.unrealengine.com/t/experimenting-with-daz-characters-and-the-ml-deformer/732897/2?u=mrpdean
- https://youtu.be/OmMi6E0EkQw?t=1904
Tools that currently support using Daz character with the ML Deformer workflow
- DazToUnreal (doesn't require additional software but currently doesn't support geografts): http://davidvodhanel.com/daz-to-unreal-mldeformer-support/
- DazToHue (requires Houdini but supports geografts): https://www.daz3d.com/forums/discussion/619356/daztohue-update-0-1-released
Anyone else experimenting with the experimental Machine Learning Deformer tech in UE5.1?
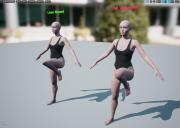
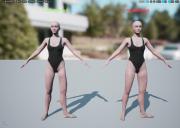
Based on my own experiments so far, it seems to do a good job at correcting the issues with linear skinning, without having to deal with all the JCM's.
Here are some screen shots of Victoria 8.1 for comparison.
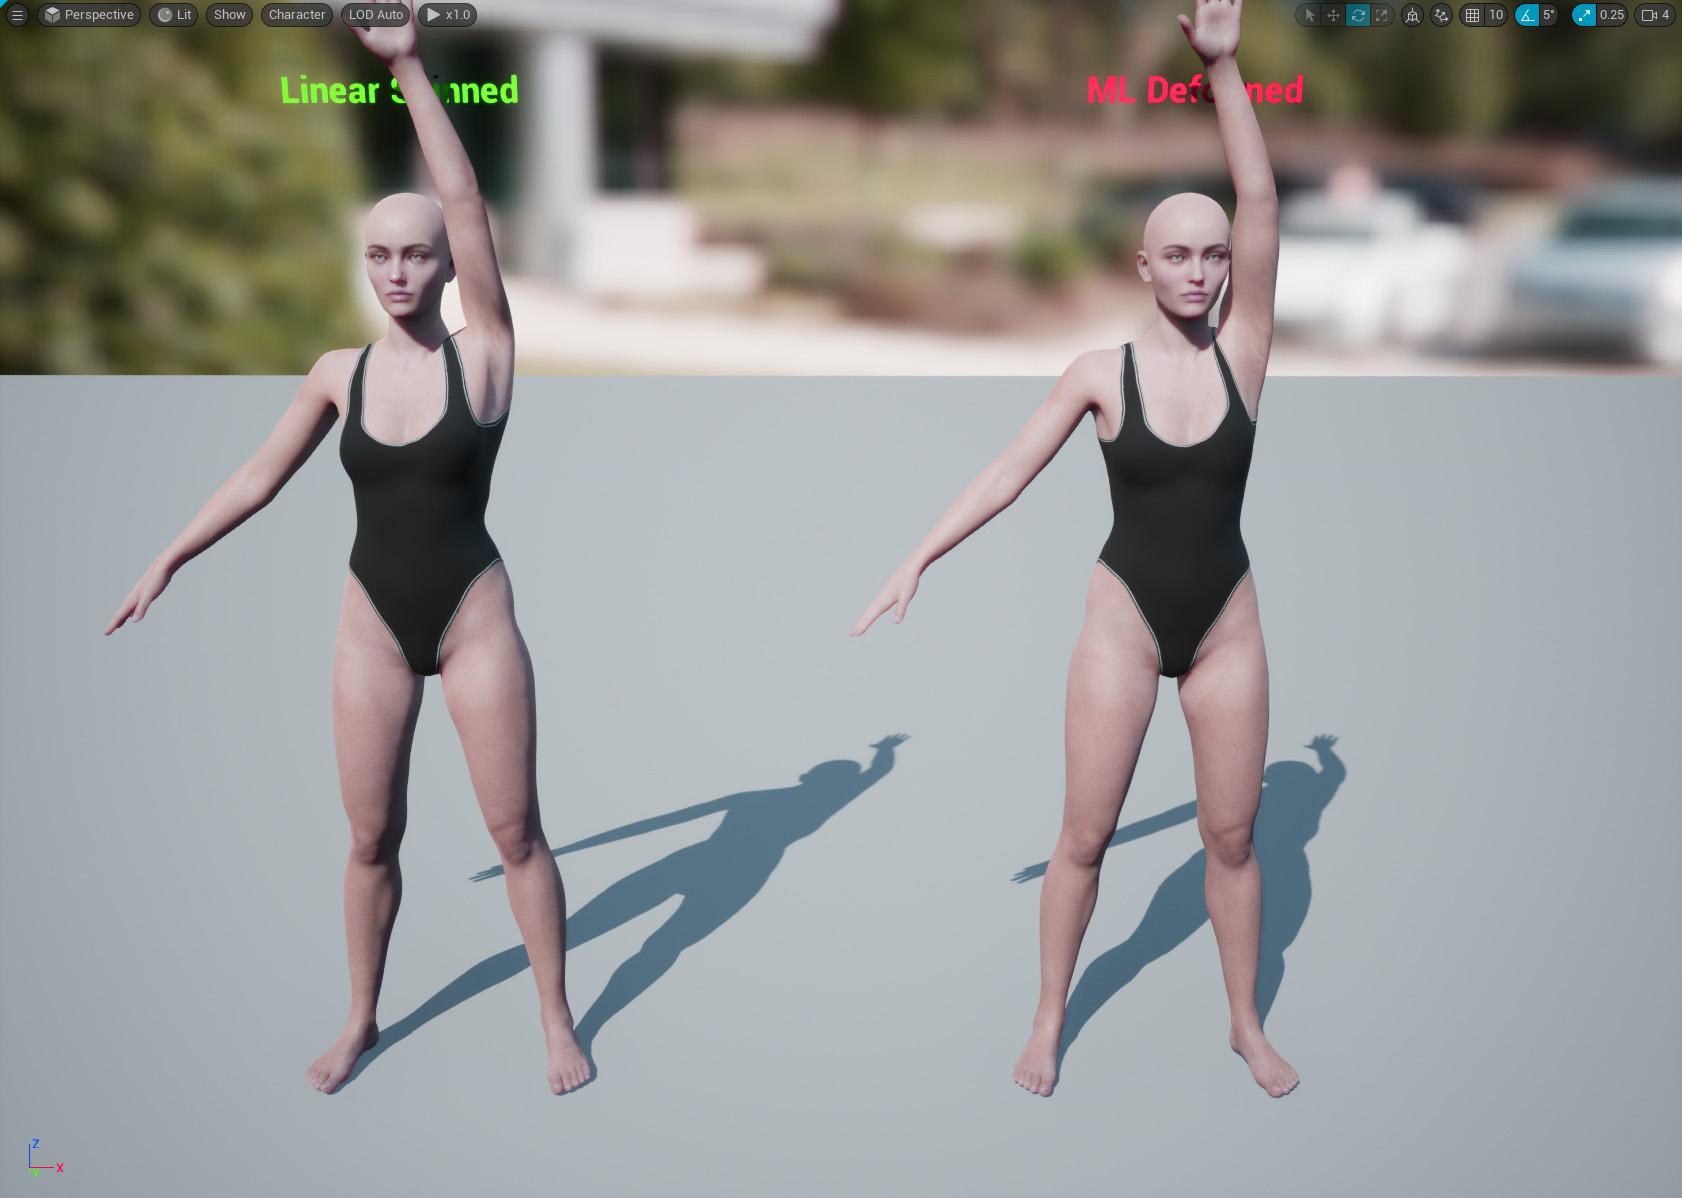

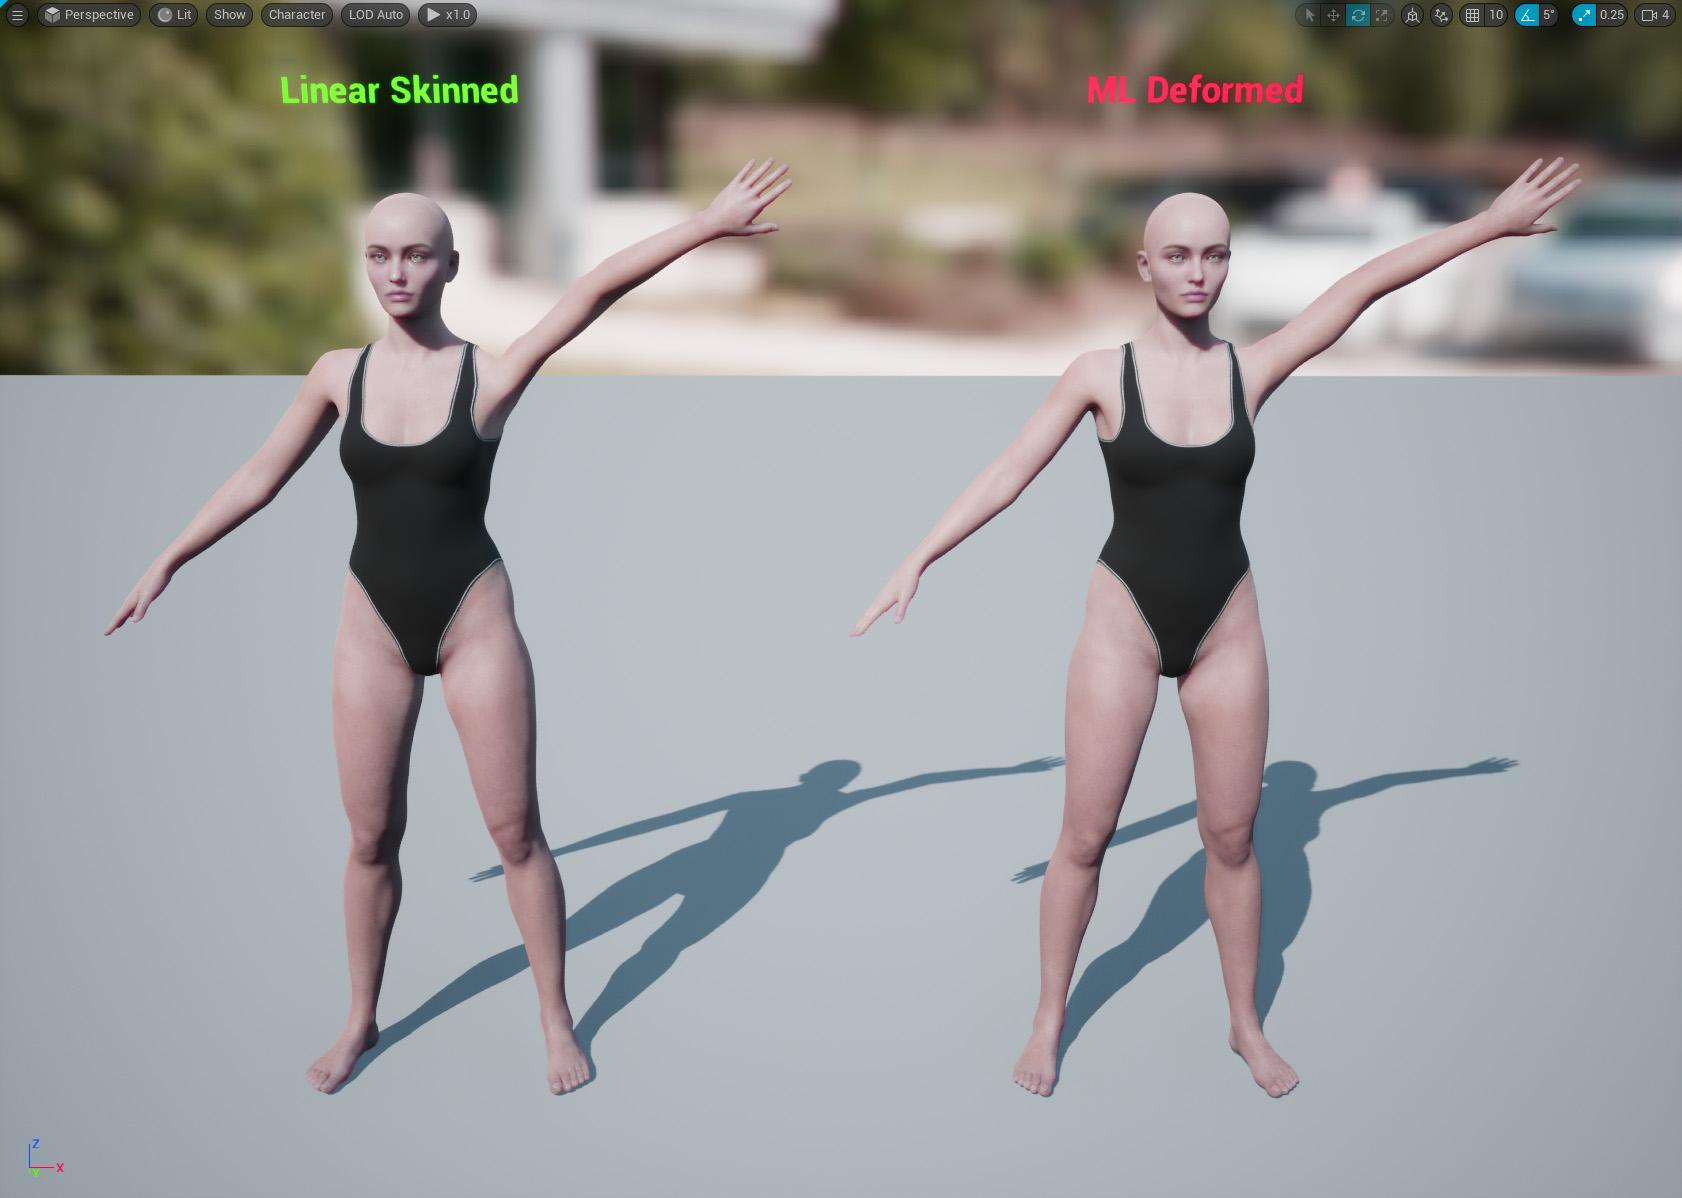
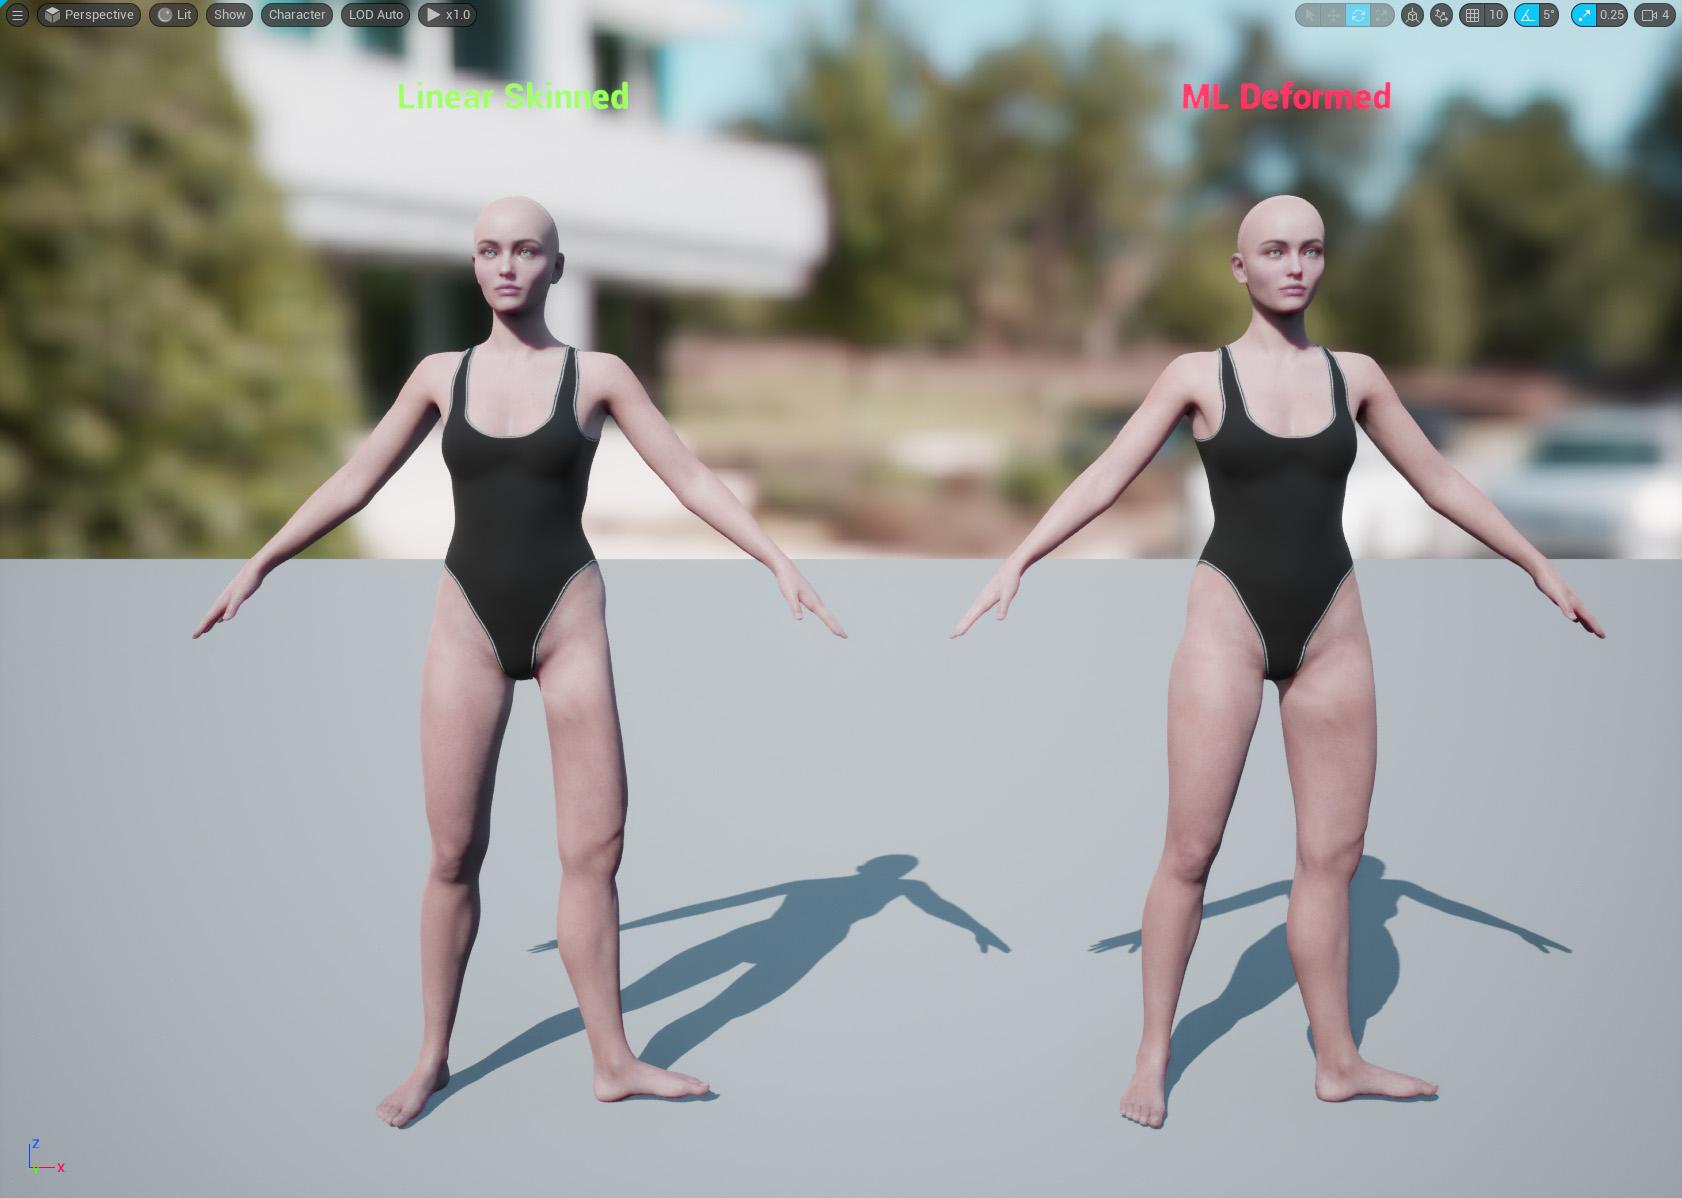
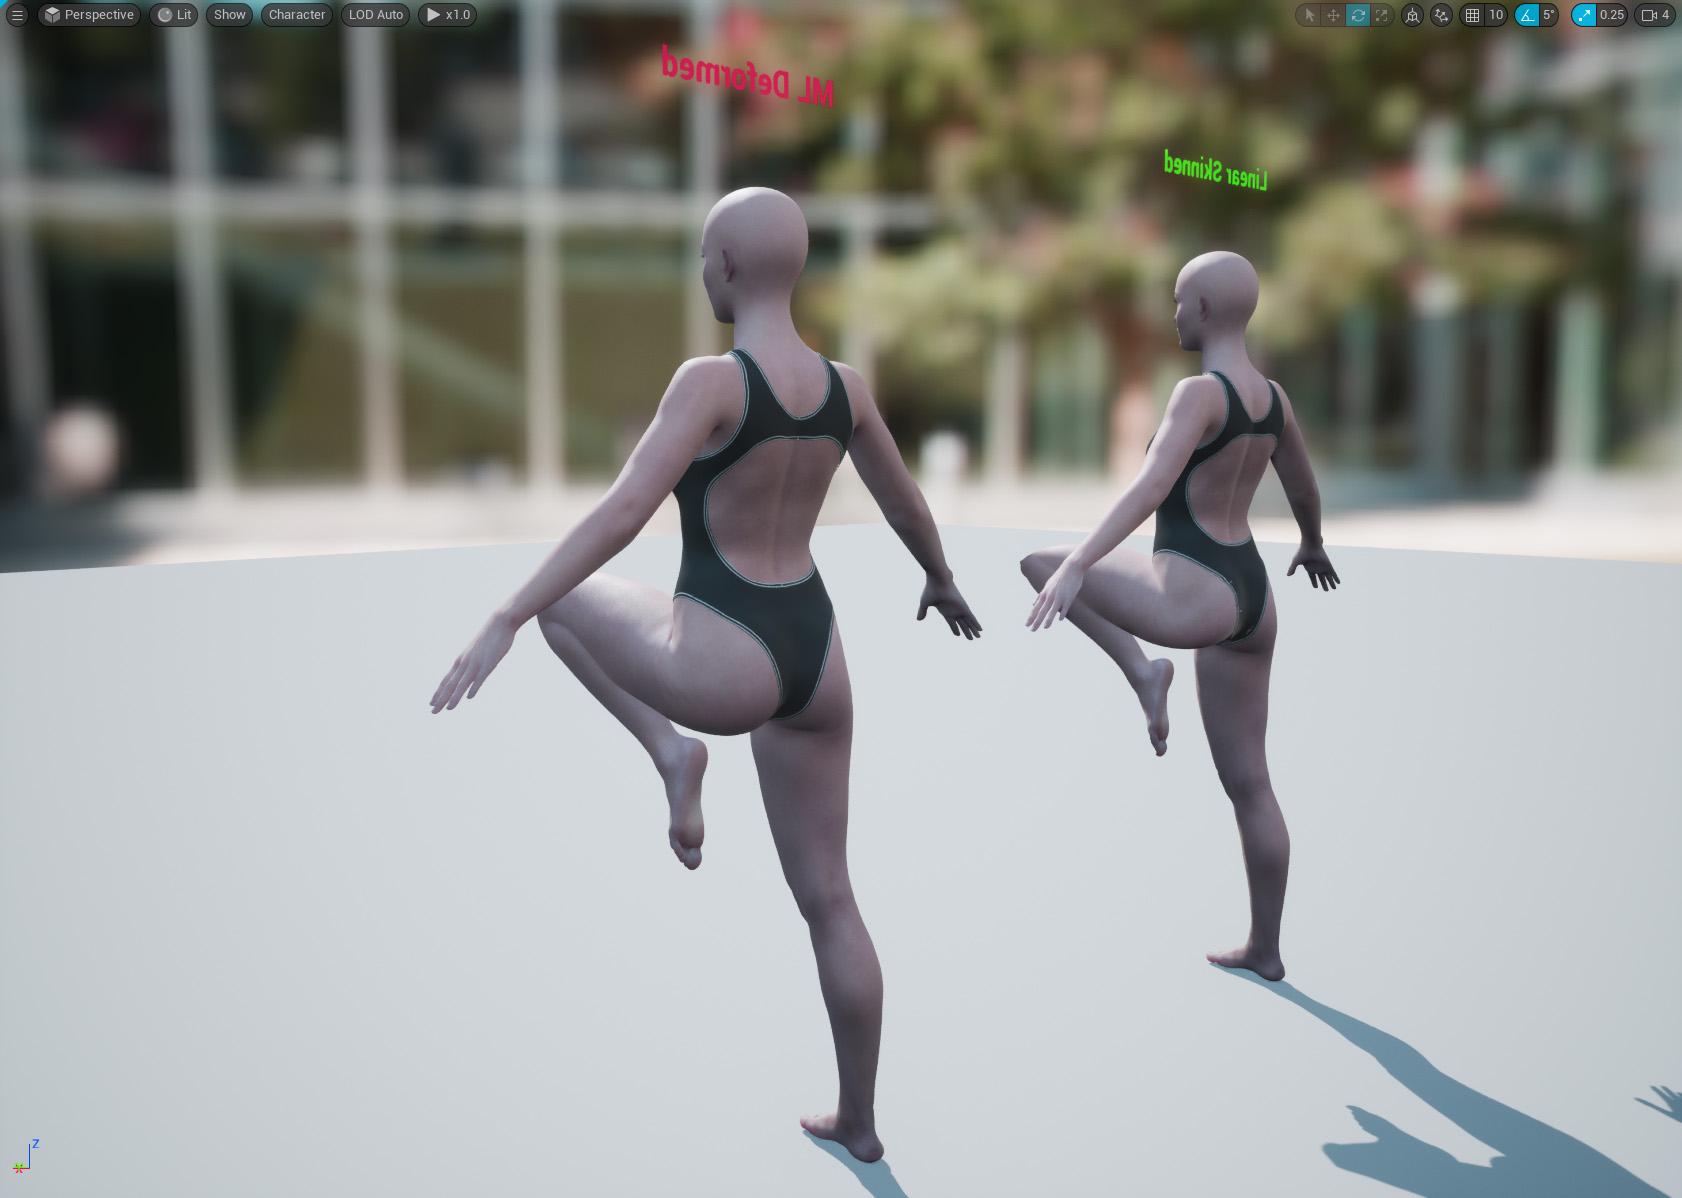
A couple of things I've noticed so far:
- It doesn't seem to capture the finer details, such as around the eyes when looking left/right etc. There are different training models with different settings (none of which are currently documented) so perhaps it's possible to caputure those finer details with different settings/models. I'm still experimenting with the different neural models and settings but it's a lot of trial and error until we get better documentation. Some JCM's might still be required for the finer details of facial animations.
- The maya plugin which EPIC released (which I'm not using) creates 50,000 poses by default however, I used less than 500 poses to train the model in the example above and still got good results. I think that's because I chose more deliberate poses to train with whereas the maya plugin just generates heaps of random poses.
If anyone else has been playing aorund with this, perhaps we can share what we've learned?


1.jpg
1682 x 1198 - 213K

2.jpg
1682 x 1198 - 216K


3.jpg
1682 x 1198 - 219K

4.jpg
1682 x 1198 - 237K


5.jpg
1682 x 1198 - 209K
Post edited by mrpdean_7efbae9610 on


Comments
A comparison with Dual Quaternion Skinning Version would be nice in order to find out what's better.
Offtopic question: What does your character's skin setup look like (esp. metalicity and specular etc....)
As far as I know UE doesn't have DQS. I know someone created a separate branch with DQS but I can't be bothered messing around with compiling from source etc.
Here are some shots comparing the ML Deformed mesh with the Ground Truth mesh, which is exactly as it appeared in DAZ.
From what I've seen so far, the results of the ML Deformer don't always match the target/ground truth exactly, but it comes pretty close. I'm only using a very small data set to train the model so perhaps with a larger data set it would achieve better results. I also haven't tried all of the different training and deformer models yet. I'm really just experimenting and waiting for some documentation to come out :)
For me, the real benefit is not having to deal with JCM's and setting up pose drivers in UE.
P.S the characters skin set up is based on this tutorial: https://www.artstation.com/marketplace/p/jr1Vr/unreal-master-material-for-skin
There is no need of manually fiddling with jcms/drivers etc., because you only need to export the body mesh with jcms+drivers once and whenever you import any "fixed" animation or pose for the corresponding character into UE from blender/daz, UE handles all the drivers automatically.
I've tried to use the UE Metahuman skin material once, but the procedural micro normals caused bad seams at the edges of the uv maps, so MetaHuman Materials are just good for the Face, but not for full characters.
Yes, so glad to see someone else experimenting with this. I'll share what I've found out, although I've taken a break from trying it (now I may have to start again).
First question is are you going from DAZ straight to unreal? If so, how did you get the alembic file exported?
I'm using Unreal to Blender with diffeomorphic. I went through the pain of putting all the joint limits in the Maya trainer and generated the 50,000 frame animation. I imported the skeletal animation into blender and got it to work fine. If anyone needs it for experimentation I'd be glad to share. It's just an FBX skeletal animation without the mesh so I don't think I'll be breaking any copyrights or anything. I can also save someone some time with the presets for Maya if anyone needs it. No sense typing in all those values if you don't have to.
I triangulated both meshes, the fbx and alembic, prior to exporting from Blender. This helped with one issue I was having. I think blender triangulates the alembic but not the fbx, or vice versa, so adding the traingulate modifier, applying it, and re-associating the shape keys helps. I have instructions on that if anyone wants.
I was able to get it working with a character at base resolution. I can't find a copy of my settings in Unreal but I remember bumping up most of the settings. I would really appreciate a copy of your settings to see what you used. I'll run another test and upload mine.
The biggest problem I ran into was bumping up the character resolution to sub 1 which is somewhere around 65,000 verts. I kept getting the results shown in the attached image. I tried many different settings but couldn't get anything to work. It would not let me increase the 'num morph targets per bone' without throwing an error after simulation (ran out of memory or something). If anyone was able to get this working, please, please, please post your settings in Unreal. I can't get this part working. So close...
That would be muchly appreciated if you would!
I use a very different workflow. I originally started with Maya but soon switched to using Houdini, where I'm attempting to build a tool to automate things as much as possible. Here is a high level overview of my workflow.
In Daz Studio:
At this stage I had the skinned subd1 character in FBX format, the training animation in FBX format, and the alembic cache of the same training animation. Theoretically this is all that's needed to use the ML Deformer but of course it was never going to be that simple.
The first problem I ran into inside UE and setting up the ML Deformer training was this error:
This led me down a path of trying to understand the internals of Alembic files as for some reason, UE was renaming the the tracks in the Alembic cache exported from Daz which meant that the tracks nolonger matched the parts of my character mesh. At least I think that's what was happening as I could find no information about this error.
The second problem I ran into was that the vertex order in the Alembic cache was different to that of my character mesh.
Also, UE was importing the Alembic cache at 24fps whereas it was importing the training animation FBX at 30fps, so I was getting a wanring about that as well.
To solve all of these things I decided to use Houdini:
The new assets, exported out of Houdini now work perfectly for me in the ML Deformer setup.
I do a few others things in Houdini as well, not necessary for the ML Deformer to work, such as optimising the materials down to 10, packing the 4x4k head, body, arm and leg textures down to a single 8k texture, fixing up the eyes to work with the Metahuman eye material setup, renaming materials etc. I'm keen to continue building on my Houdini setup to work with Genesis 9 figures, alter the skeleton to better match the UE5 skeleton, handle clothing better anda few other things.
I did run into a similar problem you are having. At least it looked visually similar. I'm assuming that the vertex orders match between your character mesh and the alembic cache? For me the issue was due to some attributes/properties that were in the Alembic cache file exported out of Daz, which I now strip out in Houdini. I'll try to reproduce the problem again and see if I can work out what the exact cause was.
I tend to just run with the default settings in UE now as bumping things up didn't seem to make much difference to the quality of the end result. I haven't had any memory warnings though so it's possible that you're running out of GPU memory?
I'm in the process of updating my workflow for Genesis 9 so it's a bit broken at the moment but once I get it runnign again I'll do some more experiments and get back to you.
Well, I tried but there were a few errors in my animation. I tried to open up Maya again so I could adjust and they changed their license and I no longer have access (I'm really starting to dislike Maya). I think the best way would be to generate the animations in DAZ to start with so we can avoid Maya. This would also allow us to use all those awesome detail morphs like skin folds and wrinkles, or custom morphs made for custom characters. I posted a message for Riversoft Art to see if he would add keyframing to his random pose generator. I think that would be a good start. Then we have to figure out how to get the vertices to match for the FBX and Alembic going into Unreal. I think I can do that in Blender and I'm sure there are some other ways. @mrpdean_7efbae9610 figured it out with Houdini, which is awesome, I just don't want to learn another piece of software right now. Overall it does work, there just isn't a smooth workflow yet.
https://www.daz3d.com/forums/discussion/443532/released-pose-randomizer-pro/p3
Yes, you either need to transfer the vertex order from the alembic cache to your character mesh, OR you can replace you character mesh with a zero'd out frame of your alembic cache and then transfer the skin weights across.
Transferring the vertex order is possible but it's fliddly because your character will almost always be made up of multiple primitives, the body, eyes, eyelashes, clothes etc. In my initial experiements at transferring the vertex order in Maya, it transferred the orders on the body correctly but not the eyes, clothing etc. So I think you'd need to split all the parts out and then transfer the vertex order of them all separately.
In contrast, transferring skin weights is fairly simple in any DCC. In most DCC's like Maya, Max, Houdini the process relies on the proximity of the vertices in 3d space, not the vertex order. So, if frame 0 of your alembic cache matches the rest pose of your FBX character exactly, which is does with the process I described above, then the vertices of both should should be positioned exactly the same in 3d space, meaning you can easily transfer the skin weights from your fbx character onto the mesh extracted from frame 0 of your alembic cache. You'll also need to transfer or recreate the materials on this new character mesh, but that's fairly easy to do in most DCC's.
I'm fairly certain my workflow can be performed in Maya and Max. I don't know about Blender but I'd be surprised if it wouldn't also be possible in blender. I might give it a try in Blender one day.
The only reason I chose Houdini is because I could automate most of the steps, so much fewer clicks required to complete the process.
Awesome, thanks for the info. I am going to try transferring the weights like you said. That should work. I'm in the process of making the individual poses in DAZ now. I'll post up the results and the workflow I used. Appreciate the help.
(I've heard great things about Houdini and I'd like to learn it someday, maybe after I get a little more comfortable with Unreal)
I updated my Houdini asset to support processing of Genesis 9 figures.
This figure is 129,728 polygons with the clothing.
Trained with the Vertex Delta Model on default settings. Took about 20 minutes for the training to complete.
On a somewhat related note, I'm not sure where Daz are going with Genesis 9. In some ways it's a step forward but in other ways it seems to be quite a few steps backwards.
For example, moving the twist bones to be leaf bones rather than inline is a good step forward, although I'm not convinced they needed two twist bones per joint. I think one would have been enough.
However, the face rig now seem to have far fewer bones, meaning they're relying on morphs a lot more to achieve good facial poses, rather than relying more on bones, with the morphs just performing minor corrections.
But the really odd thing, and someone please correct me if I'm wrong, is that the Genesis 9 figure has all these muscle flex morphs, but they don't seem to be connected to any joints. For example, when the forearm bends, the bicep flex morph doesn't trigger automatically. I looks like you have to add it manually but adjusting the slider yourself. This seems very strange to me.
This is going to make creating a training animation for Genesis 9 figures much more complicated.
Presumably it's also going to mean that the offocial Daz to Unreal bridge will need to include many more morph targets for Genesis 9 figures if they want to have realistic muscle deformations.
On the plus side, I've worked out that I can unpack the Alembic cache in Houdini, modify it and repack it without breaking things in terms of the ML training. This has some interesting implications. For example, you could import a single character with clothing into Houdini, separate the character and it's clothing out into different streams and export each separately. Which might be useful for having a character with changable clothing. That is, you can training the character mesh and the clothing separately.
Another thing that would be possible is to automatically delete the polygons on the character mesh that are obscued by the clothing, which could be a useful optimisation step.
Anyway, the next thing I'm going to look into is adding morphs for facial animations.
Just an update after some more testing.
I originally said above that the number of frames in the training animation didn't seem to make much difference, but it turns out that it does is some situations.
It's deceptive when you're just looking at the tests in the ML Deformer setup as everything looked good, but it's obvious when looking at the character with a "real" animation.
Using the knee as an example, I was originally training with just the knee straight and the knee bent, with no inbetween poses, but the inbetween poses are absolutely necessary it turns out.
Now, I'm using 30 frames inbetween each pose in the training animation and getting much better results.
Another thing I've notived is that training with the vertex delta model is generally giving me better results than training with the neural morph model, both on default settings. The Nearest Neighbour model doesn't seem to work at all but to be fair, it does warn you that's it still very experimental.
I'll post my final training model for genesis 9 once I've fixed it up a little.
Did you set up your test animation with real poses? That's actually a good idea. I did find a program that will generate random poses in Blender but I think I'll add some real life poses at the end with the interpolated frames in between.
Both, I go through all of the limb bend/twist/side poses one by one and then I go through a series of real-life poses that you might commonly see on a humanoid character, with all 30 blendframes in between each pose.
I'm close to releasing Sagan v3. It's a long story, but it'll preserve the vertex/face indices as they exist in DS, hopefully solving that problem.
It's also much faster.
Thanks so much for the plugin! I was actually going to reach out to you to see if you were still working on it. So glad to hear that you are. Not having to worry about vertex/face indices will really simplify the whole process.
That is fantastic news! Your efforts are much appreciated.
Wow this technology looks really interesting. Shame you need to generate training set with Maya and not Blender though.
@Pickle Renderer
Blender has Radial Basis Functions.
In case anyone is interested, these are the animations I'm currently using for ML Deformer training. These are for Genesis 9 figures.
It's 12453 frames in total when they're all chained together in the timeline.
Once you've added them all to the timeline, I'd recommend selecting all the keys and setting them to linear again, just to make sure.
I've been getting good results with this training set but it takes a little over 30 minutes to train on a Michael 9 figure at subd 1.
The really slow part is importing the alembic cache into Unreal, which takes a while and there's no progress indicator so you just have to wait.
Also, the resulting alembic cache is a whopping 12gb and, once it's imported into Unreal, it's over 23gb. However, you don't need to keep it once the training has been completed.
After messing about with ML Deformers in UE5.1 for a few weeks I've decided to pause this project and instead focus on a more traditional workflow using JCM's.
I will revisit the ML Deformer once there's a little more information/documentation around for it.
My final test was with the Michael 9 character, subd-1 and I noticed some issues, particularly around the shoulders.
I see some unusual deformations which look a bit like something is crawling under the characters skin, along with some spikes in vertices in various places. It's not too bad but it was noticable up close.
Here is a short video of the issues I was seeing: https://www.youtube.com/watch?v=Vt24tXQM33Q
I'm sure this could probably be resolved with different training data and/or settings.
Overall, while I think there might be a use-case for the ML Deformer on complex "hero" characters with complicated rigging, I'm not sure it's worth it for simple humanoid characters just yet.
Modular characters and/and those with changable clothing probably aren't well suited to this process either.
It's slow to iterate in that each time the character's geometry changes you have to recreate the Alembic cache and retrain the model, and on high poly characters this is can be a slow process.
Having a shared skeleton for all characters (which is what I was aiming for) is possible but a little more complicated.
I did not have much success either. I got the training model to look correct but when I added the blueprint to the character and ran an animation the character would not deform correctly. It looks promising and it would be great if it performs as well as expected, but even after lots of trials I could not get it working well. It's early though. We'll wait and see how it develops.
It looks more like a weighting issue (smaller weights get culled on import to UE?).
Try to set minweight to "const float MINWEIGHT = 0.004f;".
The glitch occurs esp. in high density skeletal meshes.
It's hidden in the following structure (source version of ue5): Engine\UE5\Source\Developer\SkeletalMeshUtilitiesCommon\Private\LODUtilities.cpp
Thanks for the tip! I will look into that as I'm seeing a similar issue with traditional JCM's on Genesis 9 figures in Unreal.
In case anyone is still interesting in playing around with the ML Deformer workflow in Unreal Engine, I did get a response from an Epic staffer which contains some useful info and tips for working with the tech: https://forums.unrealengine.com/t/experimenting-with-daz-characters-and-the-ml-deformer/732897
Great information, thank you. I've been waiting to play around with this again...
Hey ! thanks to all of that, very intersting, did you planned to make a tutorial of something like that ?
I wasn't planning to. I don't think it can be done with Daz Studio alone. I used Houdini to make it work, but I suspect most people would be wanting to use Blender, which I've never really used. I believe someone else was trying to get it to work with Blender though.
@David Vodhanel I've been working with @mrpdean_7efbae9610 and he pointed out some important fixes. If everything is working, feel free to disregard, but you may benefit from the latest version, whose source I haven't published yet. I hope you saw my PM about v3 because I've already joked that you probably threw up in your mouth a little when you saw the mess that v2 was becoming :)
And I can't help but say wow, this is how Open Source is supposed to work... just like I was thinking that I was completely not in the mood the learn about the intricacies of DAZ Materials because it was not my core interest, someone had already done it (@Thomas Larsson and @Padone), and they were conducive to making small changes to their own code to faciliate what I was doing, you were probably completely not in the mood to implement "just enough" of an Alembic exporter for your needs because it wasn't your core interest, either. The result is this that awesome tool is in people's hot hands sooner.
Seriously, "Just Saying No" (If you're old enough to remember that one) to JCMs has been a long dream of mine, and the informal network of DAZ Studio Open Source devs is really nice to work with, especially when you see Diffeo's materials and things like this tool.