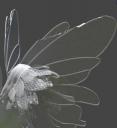
Help, my wings crunch when auto following!
 Deecey
Posts: 152
I've recently started updating some previously released products to Genesis 9 figures. And I'm puzzled as to what might be going on with my fairy wings.
- Geometries werre reshaped using Genesis 8F to 9 templates by Sickle Yield, then exported and adjusted in ZBrush.
- Cleaned up OBJ files were then loaded into DS 4.21 and rigged as normal using the Transfer utility
- When it came to the wings, custom bones were created for Upper and Lower right and left wings, and polygons assigned to each of these groups appropriately. Each group is 100% weight mapped to its respective bone.
- Smoothing modifiers and subdivision surfaces are applied.
- I've tried saving both as an attachment, and as a Wardrobe Top item. Both are exhibiting this problem.
- Everything works as expected until I apply a character preset to G9. Then I see crunching in the opper portion of the wings. This happens on "normal" proprtioned figures, and height adjusted figures.
I am wondering if there is a generic solution to fixing this issue. Otherwise the only other option I can think of is having to adjust the wings for each character and apply as a morph.
Help! 8-(


wings.jpg
631 x 688 - 68K


Comments
I don't know if it is the right way to do it, but you could set the wings as rigid, so they will adjust uniformly.
Ah thanks I will give that a try.
In my experience with wings it's best to just place them , and parent them in place. don't convert them same with hair. But i don't know what wings you are using i think in general they are mutch the same.
Use rigidity - I usually set the reference points at the bottom and the tip of each wing. You want the rigid weightmap fill at the base of the wings to be quite low, so that it deforms somewhat with the morph applied and not pull away from the figure to leave a gap, but full strength on the main part of the wings so that they don't distort.
I found two turorials and tried them both. No luck so far
First one: http://docs.daz3d.com/doku.php/public/software/dazstudio/4/userguide/creating_content/rigging/tutorials/rigidity/start
The steps here seem a little outdated. This is the part that I am not able to find:
Use the context menu to assign the selected facets to a new Rigidity Group. This will automatically assign the facets as Participants. (the facets that will be affected by the rigidity map). Choose Polygon Assignment, Create Rigidity Group from selected.
So then I found this tutorial on youtube
In this one you create a prop for each node. In my case I would need four (top and bottom left wing, top and bottom right wing). I thought I followed it correctly but the wings still crinkled.
Are there any other tutorials available that might help me make more sense of this? Thanks in advance. 8-)
This might help :) Its for glasses but it shows all the steps and how to add a weightmap, plus experiment with the best spots for the references
edited to add : rigid follow nodes and rigidity are two completely different things - rigid follow nodes is best for items like buttons or pendants that is going to follow a specific polygon in a mesh.
Thank you very much Mada, that tutorial did the trick. Took 3 tries but I finally got it 8-)
Awesome! Glad you got it working :)
Aha. There is a part 2 to this question. 8-)
The wings work perfectly for G9. Every morph that I dialed in shows the wings deforming cleanly and symmetrically.
But I also have a G8F version of this set that I will need to update. I tried to reproduce the rigidity maps and wasn't able to get exactly the same thing. The character fits are hit or miss. Some of them morph perfectly, but with others there is distortion on (most often) the left wings.
So I am wondering if there is a reliable way to convert the G9 wings to G8F (while retaining the custom wing bones), or perhaps even to save the rigidity maps so that I can apply them to the G8F version of the wings?