Does anyone have a solution for tis annoying problem?
 cobusp
Posts: 303
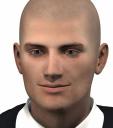
AT least M4 and V4 made it possible to change the length of their eyelashes. But, Genesis 2 has no such option. And their eyelashes cast ugly—unrealistic shadows.
Is there a way around this?


Shadow.jpg
800 x 908 - 244K


Comments
editing the alpha map maybe?
Yeah - that's the only solution that I can think of.
It would have been cool if there was an option to prevent eyelashes from casting shadows.
I find nose and neck shadows just as annoying. Not sure I remember correctly, but can you insert a lightbulb or a spotlight to point at the head only and aim it 'up'wards' then adjust its strength? I vaguely remember doing something like this as I had sort of a low light scene but unlike the rest of the full body's shadow, the upper lip and neck in particular were dark and looked dirty. But thinning out the eyelashes degraded the look I wanted around the eyes. I am thinking it might have been a G2, figure so not sure if the V/M4 will let you select the head only in the tree. Just thought to toss is out there in case. Apologies if it doesn't work.
oh I often drag a bulb onto my camera and set it to 20% no shadows and set ambient light to zero
Agreed. I think that, in this particular example (the rendered example image) it's just a lighting issue. Position the lights like any photographer would have to in order to achieve a more pleasing result.
This has a morph for "Eyelashes Length"
https://www.daz3d.com/genesis-2-male-head-shapes
I thought I had that control, but I haven't used Genesis 2 for my main characters that would get me using something like that. Thanks!
yes I thought there was one but assumed cobusp didn't have it
I just select M4's eyelashes in the model room via select shader, shrink them and yank them inside his head, not sure about Genesis stuff
or fix it in post with a healing brush
Ouch... just bloody OUCH!

 Silene
What does he do with his nasal hair ?
Probably apply a multi-shader to it! LOL
Thanks for pointing that out. I checked, and although I purchased and installed the head morphs - they are definitely not included in the figure. I loaded the Gen 2 Male from scratch from the Smart Content folder, but no -- no additional morphs!
The eyelash morphs are not in the "head" tab on the tree. They are in the "actor" tab.
Eureka! Thanks, I should have thought about it.
ha ha to be honest I do it slowly just to enjoy it
I have this revolving spring thing I bought from the two doll;ar shop. you insert it one side of the nose at a time. it's foot pedal driven so it makes me tired after a few hours...
You know that's it's worked because your ear hairs start shrinking ...
Laughing so freaking hard I almost fell off my chair!!! Thanks for that! :)
hehmy pleasure :) , that's why I always sit on the floor ;) I am waiting for my next patient to arrive - life is short - press hard!
You get patients at 1AM?!!!
Only the desperate ones :)
For Genesis and Genesis 2, it is relatively straightforward to create your own morphs.
Example.
- load default genesis 2 male in Carrara
- select the 'actor' level of the figure in the properties tray
- click the wrench to go to the modeling room
- make sure the box for smoothing is unchecked
- use the modeling tools to shape the eyelashes how you want. If preferred, as Headwax suggests, can move the eyelash meshes inside the head so out of the way. Or, just select the outer loops with smoothing and make smaller
- return to assemble room. Export the G2M (remember, no smoothing!) as an OBJ. Choose the preset for Daz Studio (morph target) from the drop down menu.
- Start that free plugin called Daz Studio. Load default Genesis 2 Male. (Optional - in parameters pane, I set resolution to Base).
- With G2M selected, choose Edit : Object : Morph Loader Pro
- See the menu for Units near top of menu (third line or so). There is a preset for Carrara! How easy is that? If you save the OBJ out of Carrara using the Daz Studio Morph preset, you can use the Carrara preset in Morph Loader Pro
- Use the menu to browse to and load your morph obj. Your morph file name should appear in the big box with an arrow next to it
- Use the little arrow next to the morph name to expand the box menu
- I change the 'make unique' option to 'Deltas Only'. You can also change where your morph will appear in the figure menu if you don't want it in the default morphs/morph loader group. You could select the 'head' for example.
- Double check the morph - find your new morph in the parameters pane (can use search box for name). Will be at 0. Dial it from 0 to 100%. In this case, the right eyelashes change shape.
----
Now follow more general procedure for saving morphs for general use.
.
Then share the morph with us. Well, maybe. Here is a morph sharing tutorial by the awesome Jay.
Nice workflow !!!
+1!!! Very Nice Diomede!
It's also easy to create one's own transparency maps too! ;)
Shorten 'em up a bit, make them less dense... I make my own custom maps from those I buy All the Freaking Time! :)