Smooth Out Bump
in New Users
Hi.
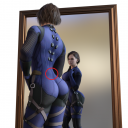
I've been working on a render that I'm copying which is a Jill Valentine render. I've found an error on her lower back and I don't know what to do to flatten it without distorting the rest of her back curve? I'm not sure if it's the body or the clothing. I've tried using the sliders in Parameters with the lower back selected but it warps everything else.


Jill BSuit Rear Mirror 1st Bump.png
874 x 874 - 811K


Jill_Remake_Bodysuit_02.jpg
1243 x 2047 - 186K


Comments
If you hide the clothing, is it then visible on her body?
If not then it must be the clothing. It could be caused by a slightly incorrect weigth map.
The easiest solution would be to take it to a modeller, and sculpt it away and import as a morph (with reverse defomations). Or you could use mesh grabber to push it in a bit. If you wait for an updated/new mesh grabber it includes a smooth function, but it is unknown when it comes.
For a single image I would probably fix it with the existing mesh grabber.
Another option is to use the Mesh Grabber from ManFriday it's great for quick in-scene mesh tweaks and adjustments!
Mesh Grabber Bundle for Windows
Mesh Grabber Bundle for MAC
@felis @Elliandra Can Hexagon or Blender be used and have a mesh grabber function?
blender can, and Hexagon can as well ( I only have blender).
They don't have a mesh grabber function; they have full geometry modeling toolsets.
@Gordig Can use these for my issue or I have to get the Mesh Grabber?
I mean that the modeling functionality of Hexagon and Blender is far beyond what Mesh Grabber can do. Mesh Grabber is fine for moving around a few polygons, but if you want more than that, you'll need a proper modeler.
@Gordig
Will a vid like this help in reshaping or push in the bump to make it curve better? https://youtu.be/mC7kKWR6Nws
@felis
I've uploaded some pics and it looks like the suit is sticking out further.
Yes, it looks like the spline is lifted.
Does it look ok in base pose?
If it looks ok in base pose, it seems to be the rigging. Then you could try to use transfer rigging (Edit > Object), with the character as source and the suit as target, and then I would assume it solves it.
If the suit is bulging in base pose, it looks like the suit has an issue with the modelling, and then you must correct it with mesh grabber or dFormer inside Daz Studio, or in a modelling program. For a single shot I would correct it with mesh grabber. For a generic fix I would use a modelling application.
@felis
In T-pose it's lifted. In Hexagon you can see it's lifted in that area from the character body.
I don't know what I'm doing in Hexagon. I have been selecting the suit, ticking soft selection, reducing the radius, select ring but i'm not sure How to "push in" the buldge so it looks uniform?
I don't know Hexagon.
But looking at your picture, you have the gizmo in the middle, and if you move that a bit in the Z direction, the bumb should get smaller.
@felis
I tried with Hexagon but no go. It's not importing the morph back correctly. Do you have a link for mesh grabber?
Are you working on the suit from a base model, and with resolution set to base?
I don't know it the bridge takes care of that. Else you will not be able to make a proper morph.
Although as it is the base mesh, you don't need to make a morph, you can update base mesh (Edit > Object > Geometry > Update Base Geometry)
If you got the bump leveled out, and you can try export it as an Obj, and in DS use transfer rigging as mentioned above. It will be a new object, and you need to mark all surfaces on the existing and copy surfaces, and paste to the new.
Mesh Grabber exists in different versions, e.g. https://www.daz3d.com/mesh-grabber-win
Be aware that there should hit a new version in store anytime soon. It has been in queu for 1½ months or so.
Mesh Grabber can move the geometry but has no capability to directly smooth the geometry. That bump seems to be projected from whatever the character's body morph or partial morph(s) you dialed. You can fix it with a standard function in DS, Rigidity Groups.
I don't know Hexagon either... not sure if it has any functionality of sculpting. But a recommended free way of fixing such an issue is to send it to Blender, smooth and move that area with Smooth and Grab brushes, then send back OBJ to update full body morph on the bodysuit.
@felis
Tried the text in bold and see attached pic. It was previously set to High Resolution. Doesn't work so changed it to Base and suit craps itself.
@crosswind
I'm very very very new to blender as I've only been using 3D apps (Daz) for 3-4 weeks. Any blender instruction videos or guides to perform the task you suggested I need to do with that bump, Please?
DP
When you exported the mesh, was it then from A-pose?
I simulated your case and gave it a fix in Blender then brought it back to DS... check this short video: https://mega.nz/file/qeg10B5S#YYCh1mmeKcvL4IprIt0UJAP6eJsOZUIm4MRgaw0zU2M
It's not difficult... just try it.
@felis
No. I'm using a DM Mirror Talk pose and I only performed the text in bold with no exporting. Um... I don't know how to revert back to A-pose as I've never had to. Does the suit need to be changed to Base from high resolution for exporting to work?
@crosswind
Does body need to be in A pose? If yes, see my reply to felis.
I have Daz 4.22 and latest version of Blender. I also have this issue with menu options missing. https://www.daz3d.com/forums/discussion/692756/no-item-option-after-send-to-daz-from-hexagon#latest
You don't have to reset it to A-Pose before fixing FBM on the clothing if you follow the settings in Morph Loader Pro in my video (i.e. the two options in the attached screenshot can assure you fix it in non A-Pose)... However, I still suggest you use A-Pose... It's a standard workflow that all qualified PA and content creators use, which can bring you the most accurate result when sculpting, esp. with Symmetry.
Well, as for Update Base Geometry, no matter updating vertex position or full geometry, you have to use A-Pose beforehand 'cause this function doesn't Reverse Deformations, that's why it is called Update Base Geometry....
As for Hexagon, choose Advanced in Show Options. But personally, I still strongly recommend Blender in which all the functions especially Sculpting is much much more accountable for one who frequently make / tweak morphs. The latter is more worth learning...
@crosswind
Is this sequence needed to reset the pose to A-pose?
Edit>Figure>Zero>Zero Figure Pose
Or
https://www.daz3d.com/forums/discussion/8384/resetting-genesis-into-default-pose
What would happen if I started a new file from scratch. Select the Jill character Without the Eleanora body morph by USB and applied the Suit. Would it have the bump still even before I apply the body morph?
Yep, Zero Figure Pose will do.
It's hard to tell as I don't have these characters. Normally a bodysuit product cannot provide fixed projected morphs for all characters... so probably you'll find this sort of issue. You may just try it anyway. Pls bear in mind that when using these sort of 3rd-party products, tinker things would be a routine.
@crosswind
I gave a go starting from scratch. Same issues. It's a flaw in the suit. Gonna have to send it to blender. See attachments. I also sent a dm.
Yep, I could reproduce the issue, see screenshot1. I personally think it can be acceptable to some extent... but just fix it if you don't like it.
Anyway, I quickly fixed it in Blender as well as the chest area with Eleanora body morph dialed, so as to make it look more natural.. The bodysuit is not a well-made one but could be used with some tweakings.
Check you PM, and try fixing it with the way I showed in the video ~
@crosswind
Now you know what is happening.
Can you give me guidance on what areas and settings that need to be adjusted, please?
Did you use daz or blender to make the render?
Where did you find the background and how one is setup and angles? Do I use the lighting techniques you suggested in the other thread I have - Various questions about Jill V suit?
How are morph and suit settings saved as a preset in daz?
The areas I found on the suit that need to be tweaked: 1) morph: lower back and chest. Some poke-thru happen to Belt on the thighs, need to be fixed a bit; 2) surface: darken base color, add some glossy, increase Bump a bit. (screenshot 1)
DS of course ~
Room:https://www.deviantart.com/dazwraps/art/RE3-Remake-Jill-Valentine-Apartment-Daz-Scene-926730413
Lighting pattern is up to your preferences, I used 3 spotlights and tweak the ambient lights a bit. Check your PM.
As for morphs, you just need to Save Morph Assets ( File - Save As - Support Assets - Morph Assets...) As per my observation, you don't need to save any presets as the character / suit, etc. are pretty simple. Just keeping them in your scene will be fine.
@crosswind
I'm very greatful that you fixed the issues. Wish I could give something back you for taking the time with me?
However, I haven't learned to put into practice, correcting the issues you addressed. I have to watch the video about blender more times, the one you shared about the lower back.
I'll leave the Base colour of the suit and try to change the colour of the lights....if i can... as you suggested in your replies further back.
When I go to add the Apartment, my Jill disappears. Can't figure it out, (I'm thinking I have to crerate my own scene in the AP)? I can add yours. Any links to videos for adding character to Environments, if i'm saying that terminology correctly?
How do you toggle off the square border in the viewport when wanting to load a character (pic 4)?
Man! Wish we could Teamviewer or some remote computer correspondance. Like course lessons or youtube videos.