Chuck's AI Bumping Thread
 charles
Posts: 849
Creating Consistently Realistic Characters: My Workflow
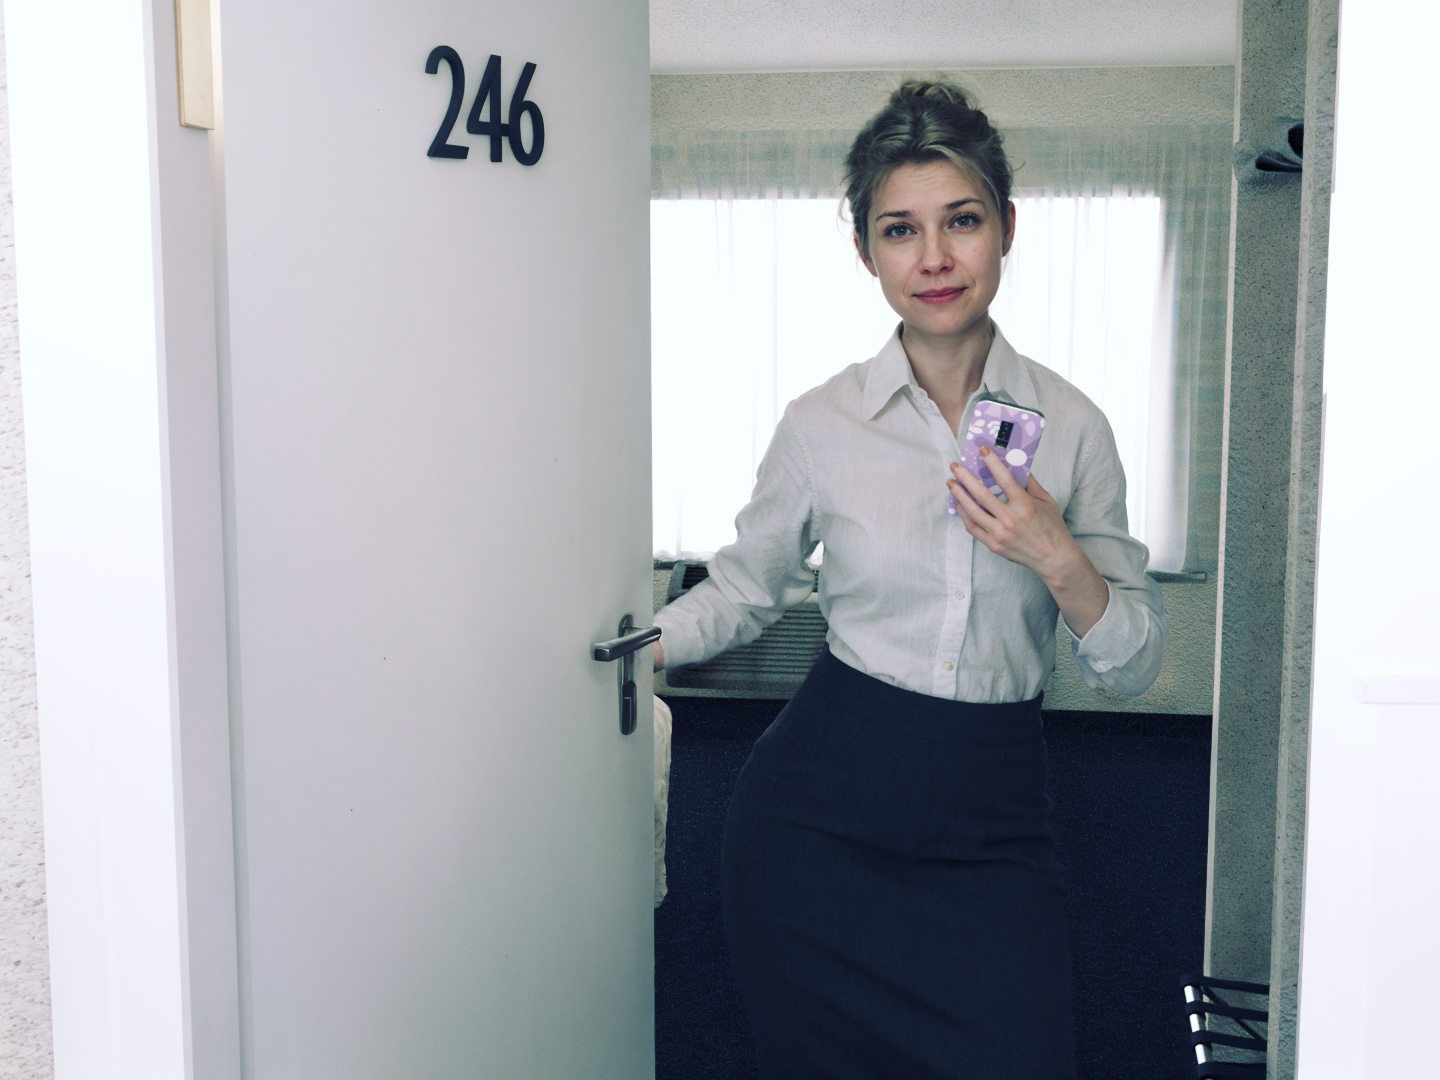
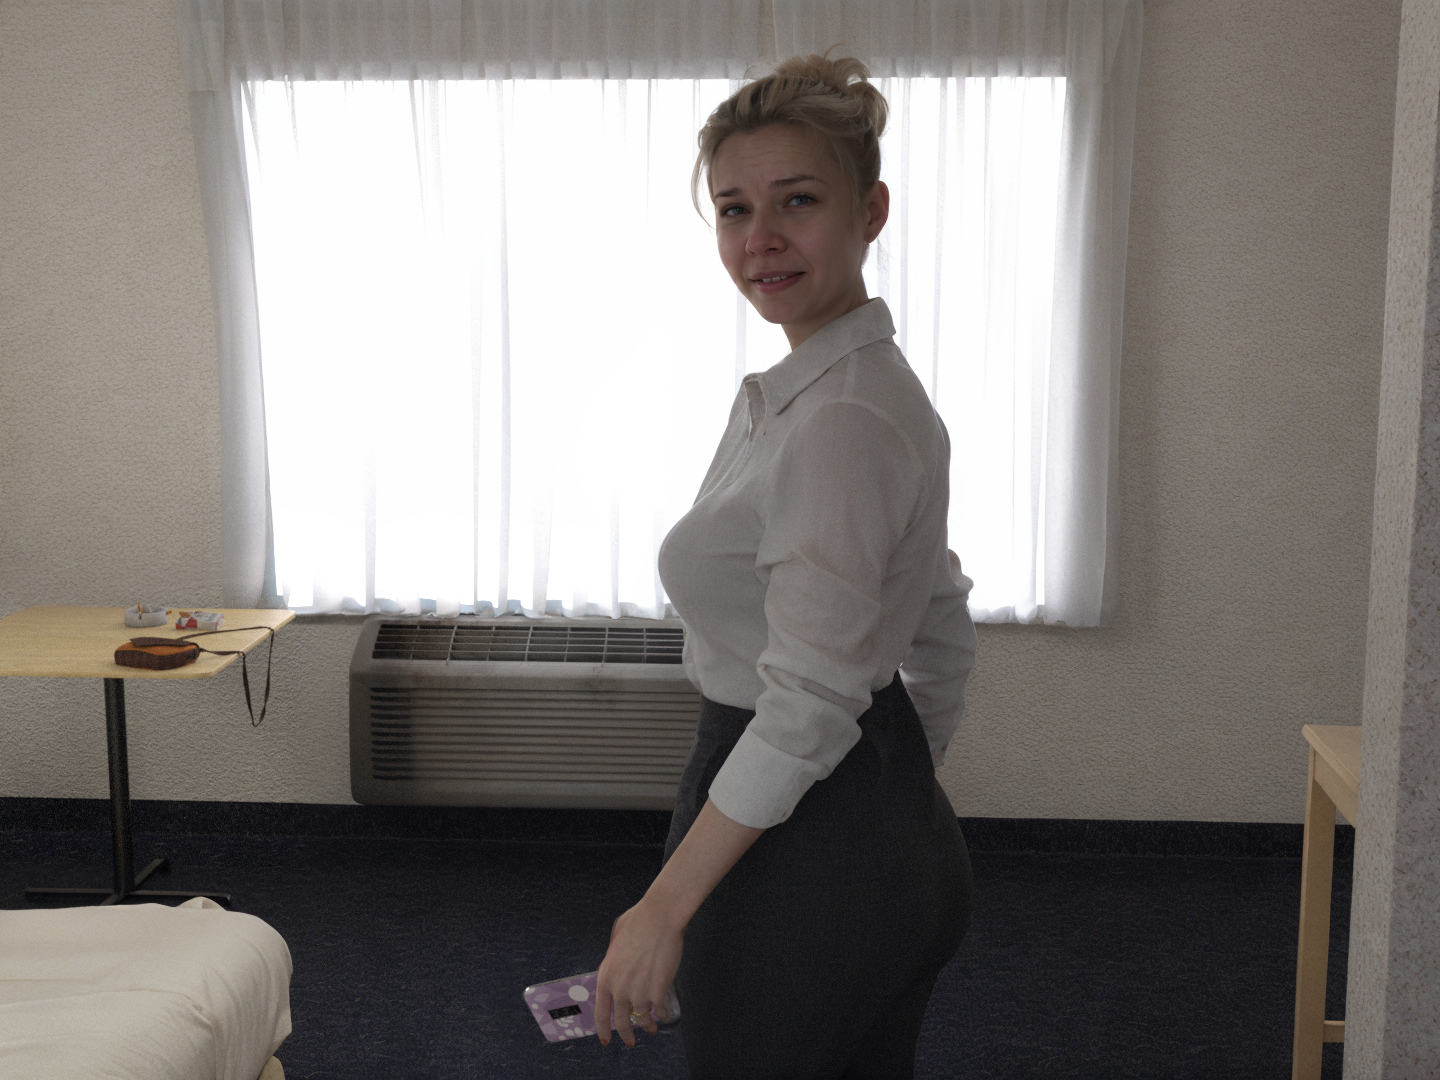
With this tutorial I'll show how I take my daz images like this:

and goto this:
If you're looking to generate consistently high-quality, realistic characters, this is the workflow I use and recommend.
Tools You'll Need
To follow my workflow, you’ll need Automatic1111’s Stable-Diffusion-WebUI. While I had hopes for other platforms like Flux and Forge, they aren’t quite ready for this level of work yet. ComfyUI has potential, but I find it a bit tedious and unstable for my needs. Plus, its inpainting tools haven’t reached the quality required for this workflow (as of my last check several months ago).
System Requirements
You’ll need a powerful GPU with at least 8GB VRAM (ideally 24GB+), but if you’re a long-time DAZ user, I’m betting you already have that covered.
Steps to Get Started
1. Install Automatic1111’s Stable-Diffusion-WebUI
You can follow this YouTube tutorial for detailed installation instructions.
2. Download and Install the Model
For the best results, I recommend using this modified version of SD1.5: EpicPhotogasm.
- At the top of the page, you’ll find different versions. I suggest using Z-Universal (not the inpainting version).
- Download it and place it in your
stable-diffusion-webui\models\Stable-diffusiondirectory.
3. Install ControlNet
Next, you’ll need ControlNet for additional control and detail in your generated images.
- Install ControlNet from this GitHub repository.
- Download some useful ControlNet models, such as:
- IP-Adapter SD1.5/SDXL
- IP-Adapter FaceID [SD1.5/SDXL]
- Other modules like Canny and OpenPose are also helpful. You can find them here:
- For SD1.5: ControlNet-v1.1
- For SDXL: xinsir ControlNet Models
- For FacePlusV2 you will also need the Lora. Download from: https://huggingface.co/h94/IP-Adapter-FaceID/blob/main/ip-adapter-faceid-plusv2_sd15_lora.safetensor
- Once download move it into: \stable-diffusion-webui\models\Lora
Note: The setup can feel a bit messy, but these modules will greatly improve your results.
4. Install Reactor (Optional)
For even more refinement, I highly recommend Reactor. It helps with reshaping faces and other fine details. You can download it from this GitHub repository.
Testing Your Setup
Once you have everything installed, here’s how to test it:
- Run your WebUI by launching
webui-user.bat. - In the top-left corner, switch the checkpoint model to the Z-Universal model you downloaded.
Image Generation with Img2Img
- Switch to the Img2Img tab.
- Upload the DAZ image you want to modify in the image input section.
- Configure the following settings:
- Sampling Method: Use Restart (my recommended method).
- Schedule Type: Use Automatic (if not available, select Karras).
- Sampling Steps: Set between 33 and 40.
- Go to the Resize tab and click the yellow triangle icon to resize your image. If your image is larger than 1440px in width or height, scale it down to that or lower.
- Set the CFG Scale between 6 and 8 (for now, you can leave it at 7).
- Denoising Strength is key — start with 0.4 and adjust based on the results.
- Set the Seed to -1 for random seed generation.
Finally, hit Generate and see what you get!

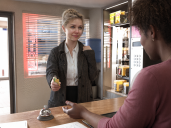

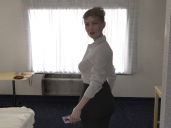

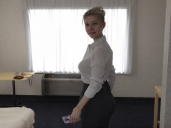

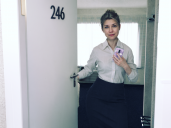


Comments
ControlNet Setup
ip-adapter-faceid-plusv2_sd15, orip-adapter-plus-face_sd15.If you only have one control image, you can upload it now. For best results, select Multi-Images if you have a profile set of different face angles. Add them if available.
(I'll go over in the next post on ways to create profile packages like this)
Click Generate to see the results.
Reactor Setup (Optional)
https://github.com/Gourieff/sd-webui-reactor
If you installed Reactor, you can further refine the face. Here's how:
Click Generate to view the results.
FacePop (Optional)
https://github.com/TheCodeSlinger/FacePop
If you installed FacePop, enable it from its accordion tab. That’s all you need to do, but if you want to explore the masks and tweaks FacePop applies, check Enable Debugging. In your output folder, you'll find a subfolder called Debugging with useful images like landmark detections, mask creations, head orientation corrections, and final overlays before processing.
Note: The final FacePop image might not appear inside the WebUI. Instead, check the folder where the images are generated. I use a timestamp-based naming system instead of the typical seed and image count naming. Also, metadata reproduction in FacePop images isn’t fully implemented yet, but that should come in version 1.3.
What’s Working Together?
Adding Prompts
Don't forget to add a prompt to describe the image and character. Start with the character’s description, then add the expression, pose, action, and setting. Example:
Prompt:
young woman with blonde hair wearing a toga (flirty smile) standing in parking lot at nightFor the Negative Prompt, it's important to list things you don’t want in the image. Example:
Negative Prompt:
cartoon, painting, illustration, (worst quality, low quality, normal quality:2), necklace, lipstickI often include necklace and lipstick because models tend to add them automatically. Adjust this based on what you find appearing in your images that you don’t want.
Key Tools Working Together
If anyone needs more detailed help, feel free to PM me for a Discord invite, and I can guide you through troubleshooting.
It should be noted that Stable Diffusion is heavily biased toward portraits, so if you plan to try this workflow on complex scenes that require characters look in any direction but the camera, you're going to quickly find it to be an exercise in futility.
SD can do a LOT more than portraits my friend, stay tuned as I continue to update these pages. It does have it's weaknesses, but I will try and show how when combined with Daz you can overcome almost all those. Eye direction is probably the most frustrating aspects, but there are prompts and tools to help correct that. As well as my FacePop tool I'm working on a new method to restore original eyes and process those seperatly (WIP still) but there is at least 4 different methods I know of fixing eye gaze. But that's something I want to address later on in this thread. As well as glasses and fingers..will go over it all eventually. There is also a further option later on for switching for detailing in SDXL that does play a bit nicer with eye gaze, but the image below is just SD and inpainting and a bit of PS.
Indeed, it can.
That was my point.
Your workflow outlines how to create consistent faces. SD is powerful, but when it comes to faces, getting character eyes to point in any direction but the camera is like trying to reposition wallpaper after the glue has dried. You might achieve some minute measure of success after a few hours of prompting, but it probably it won't look pretty, and then you'll spend another few hours trying to refine what you managed to wrangle from the model.
EDIT: Nice work on the image. Now try getting getting either of them to look at the other, or have her look down at her coffee mug.
.
Challange accepted, but it's late so something for tomorrow if I can get to it. But I am not limited to SD only, I wil weild whatever tools needed to achieve the goals. SD is the best for the base character processing IMO, that I've seen so far. Because take in account what it does for skin specular, hair and clothing. This workflow isn't a one click and done. And YES it can sometimes take a many tries to get the desired results, but the results can be amazing if one is willing to put the effert into it. as I just posted there is postwork to be done, there I may take half a dozen or more images and cake them on top of one another to tweak out the best of the best, and the process maybe more than some want to put it into it..that's up to them, I'm just going to outline what I do..If people have new ideas to add GREAT! I may learn a few things new along the way, I hope so!
I promise no looking at birds though..that thing is pretty bad.
Alas, postwork is where my skills end. I know next to nothing about that.
Character Profile Package
A character profile package is a collection of detailed images of your character that are used during the AI image generation process. This helps guide the AI more accurately. This technique is similar to face swapping or deep fakes, but with better accuracy because you'll have a more complete package of profile and angled shots of the character.
There are several ways to create such a package—whether by using images from MidJourney (which I used for the profile of the woman in the example), real photos of a person, or software like DAZ 3D.
Building a Character Package with DAZ 3D
For this example, we’ll use DAZ 3D to create a character profile package. DAZ offers great control over character positioning, cameras, and lighting, allowing you to render precise profile and angle shots. You can customize your characters using a wide variety of pre-designed characters and morphs, giving you flexibility in creating your ideal character quickly.
Here’s a quick step-by-step guide to building your character package:
1. Set Up Your Character
For this example, I'll use KOO Clyde G9 as the base character, with Qinfen Hair for Genesis 9 and Padded Armor as the outfit. Let's call this character Manuel.
2. Choose a Well-Lit Environment
I recommend using a well-lit HDRI environment, such as the “Almost White” set from Render Studio.
3. Adjust Render Settings
In the render settings:
Note: The most common camera type used by Stable Diffusion and many AI models is 50mm, but in DAZ, I suggest leaving the default camera settings. The reason is that with close-ups, the 50mm lens might distort the face, and a 35mm lens can cause too much skew. The default DAZ camera settings seem to work best for this method. However, feel free to experiment with other settings to see what works best for your character.
4. Position the Camera
5. Lighting
Disable the camera’s default headlamp as it can create unwanted lighting effects. Instead:
6. Additional Camera Angles
Create additional cameras to capture profile shots from various angles:
7. Render Your Shots
Render each shot with these cameras. Once rendered, you now have a solid character profile package.
Bringing the Images into Stable Diffusion (Automatic1111’s WebUI)
Now that we have the profile images, we can use Automatic1111’s Stable Diffusion WebUI to refine and enhance them.
1. Load the Model
Ensure the model you want to use is loaded. For this example, I'm using “epicphotogasm_zUniversal”.
2. Open the Img2Img Tab
20-year-old Spanish manNote: It's essential to include age, gender, and ethnicity to help guide the AI. Most models default to young, white, brunette women, so this added detail is crucial for accurate character generation.
Tip: You can include a name in the prompt (e.g.,
"Manuel Sanchez") to help guide the AI towards consistency. However, if the name is tied to a well-known individual in the dataset, the output might drift towards that person’s likeness, so use this tactic with caution.3. Add a Negative Prompt
In the Negative Prompt field, include the following:
cartoon, painting, illustration, (worst quality, low quality, normal quality:2), necklace, lipstickThis helps to avoid unwanted artifacts such as cartoonish effects or unnecessary accessories.
4. Adjust Settings
Once you’re satisfied with the results, copy the seed from the information below the preview image. You can also review previous renders by clicking the folder icon under the preview.
Tip: You can drag any image back into the image box and click PNG Info to retrieve its seed and settings for consistent results.
5. Apply Img2Img to Other Angles
Using the same settings, process the other profile and angle shots. You may need to adjust the denoising strength for the side or over-the-shoulder shots.
6. Fine-Tune the Details
If your character has additional features (e.g., a goatee or facial hair), make sure to mention them in your prompt. For example:
Prompt:
"20-year-old Spanish man, goatee"Add any relevant exclusions to the Negative Prompt, like:
cartoon, painting, illustration, (worst quality, low quality, normal quality:2), necklace, lipstick, beardDealing with Minor Details (Freckles, Moles, etc.)
If minor details like freckles or moles get lost in the AI’s process, it’s challenging to recover them fully at this stage. The AI often treats these as noise and ignores them. However, in a future post, I’ll discuss how to use post-processing and advanced layering to bring back these small but important details.
Conclusion
By following these steps, you’ll have a collection of 3 or more head profile images that can be used in ControlNet’s IPAdapter Multi-Input feature to guide the AI in generating consistent, high-quality characters.
Note: For your Profile Character Package, you don't want to have multiple shots of the exact (or near to) same angle, exception being a possibly a full left and ride side profile shot.
Thanks. Great info charles!
An alternative to "Building a Character Package" would be to use the images as a dataset in Kohya to train a LoRa of the character. Personally I'd find that easier to do.
You can I will get to that later, but it's not usually as flexible as this method as you can swap out faces a bit quicker and I find the IPAdapter does a bit better job and you can control the weights in ways you can't really with Lora's. There is also nothing that says you can't also combine Lora's with this technqiue either. But even with a Lora you need your profile packages for them.,,unless you are doing them someway I am unware of. I believe you will need more like 30+ profile picks of the character for good Lora training and what several hundreds Style images if I recall. Plus if I also recall Lora's work best when working in image resolutions that matches their training image resolutions. So if you train it on 512x512, and you want to use it on say an image you made in daz at 1440x1080 it won't work as good. But maybe I'm wrong, or things have changed it's been maybe almost a year since I last worked with Loras.
If you would like to write a tutorial for this thread or link it here for how you do your Lora training that would be great.
Character Profiles Packages with Still Portraits and KlingAI
Kling AI (klingai.com) is a text-to-video and image-to-video AI platform. Recently, other free alternatives like HailuoAI (hailuoai.video) have emerged, alongside tools like Runway Gen-3. While this process isn't as precise as using DAZ 3D, it can still help generate useful character profile images.
For this example, I will use an ArtBreeder image to demonstrate the process.
Preparing the Image for Use
This image has a lot of potential, but the colors are a bit off. It’s common to need to do some color correction, resizing, or other adjustments before you begin working with the image in AI tools.
[Fixing the Image]
In this case, I’m going to bring the image into Photoshop to fix the color. You can follow these steps:
Auto-Color Correction:
Resize the Image:
Outpainting for More Padding
While the image is decent, it lacks enough padding around the head, neck, and shoulders. To create a better profile package, it’s helpful to include some of the neck and shoulders with a bit of extra space around the head.
To add this padding, we’ll use a technique called Outpainting in Automatic1111’s Stable Diffusion WebUI.
Steps for Outpainting:
Img2Img Setup:
"Mature woman, bare neck and shoulders"."necklace"(to avoid adding unnecessary accessories).Adjust the Settings:
Activate Outpainting:
Troubleshooting:
It may take several tries, but I got a decent result after about six attempts.
Further Touchup with Inpainting
Now that we’ve outpainted the image, we have an issue with earrings—they don't match and it would be better if the character had none. Here’s how to remove them using Inpainting:
Inpainting Setup:
Mask the Area:
Add the Prompt:
"Mature woman ears"."earrings, jewelry".Adjust Settings:
Repeat as needed to get the desired result. If the earrings don’t disappear, increase the Denoising Strength until they are removed.
Touching Up the Background
To further clean up the image, you can use Inpainting to refine the background:
Mask the Background:
Add the Prompt:
"Mature woman in white room"."plant, flower, furniture, door, window, people, person, hands"to avoid unwanted details.Adjust Settings:
This will help simplify and clean up the overall appearance of the image.
Once You're Signed Up and Logged Into Kling (or Another Platform)
Now that the image is prepared, here’s how to create a character profile using platforms like Kling AI or HailuoAI:
Switch to Image-to-Video Mode:
Upload the ArtBreeder or processed image into the image-to-video tool.
Create Prompts for Head Movement:
Use prompts like:
"woman turning away""woman looks behind""woman turning to the side"The goal is to generate a video where the character turns their head completely or moves to the side, without blurriness.
Enhance Output Quality:
In Kling, you can upgrade to Professional Mode to generate higher-resolution videos.
Adjust Creativity and Relevance:
Adjust the Creativity/Relevance slider:
Results can vary, so you may need multiple attempts. HailuoAI is currently free with no processing limits, but you can only work with one image at a time, and the queue might be long.
Good Image Selection
When dealing with video-generated images, ensure that you select crisp, detailed images of the face. Avoid using motion-blurred images, as they won't work well for further refinement.
(example of bad image, too much pixel blur)
Capturing and Processing Screenshots
Once you have the video of the character turning, you'll want to extract still images from it to create your Character Profile Package. Here's how to do that using a paint program or the Windows Snipping Tool:
Option 1: Using a Paint Program (e.g., Photoshop)
Capture the Screenshot:
Open Photoshop:
Create a New Document:
Paste the Screenshot:
Option 2: Using the Windows Snipping Tool
Open the Snipping Tool:
Capture the Screenshot:
Save the Screenshot:
Creating a Character Profile Package
Once you've captured screenshots of the character's head in different positions (front, side, angled), follow these steps:
Use the Time Slider:
Crop the Images:
Character Profile Package
From a single frontal image from ArtBreeder we have created a detailed character package in multiple angles and full profile that look AMAZING!
UPDATE: The more I test HailuoAI, it seems to do a better job following prompt directions than KlingAI.
Character Profile Packages with MidJourney
We’ve already covered how to create character packages with DAZ 3D and Kling, but what about using generative image AI? You can use Stable Diffusion (SD), SDXL, Flux, DALL-E, or whatever platform you prefer, but for this tutorial, I’ll focus on MidJourney, because it has some unique tools that make this process smoother compared to the others.
The woman in the very first example of this thread was created using this technique in MidJourney.
For this example, I’ll create something I haven’t done before: a fantasy character.
Step-by-Step Guide
1. Connecting to MidJourney and Generating the Initial Image
Connect to MidJourney through Discord and use the following prompt:
Copy code
/imagine photo portrait shot of a 30-year-old Elven woman, detailed skin, fine details, in a white room. 50mm camera lens --no necklace, earrings, jewelry --ar 4:5[Explaining the Prompt]
After about a dozen tries, I finally found a version I liked. It’s not a perfect frontal image and is a bit too close, but that’s fine. I’ll click Zoom Out 2x in MidJourney.
2. Upscaling the Image
Once the zoomed-out images are generated, I’ll select the best option by choosing U# to upscale it. After the upscale is done, click the image, and just below the image on the left, click Open in Browser to open the full-sized image in a new tab.
Keep this tab open, then return to Discord.
3. Generating Different Angles with MidJourney
Next, I want to generate different head angles:
Copy code
/imagine photo realistic character reference, 4 angles of head including front and side profile, of Elven girl, white background, color, 50mm camera lens --cref (paste the image URL here)Before hitting return, go back to the image tab, copy the URL of the full-sized image, and paste it after --cref.
The goal is to generate a variety of head angles, including frontal and side profiles. It’s okay if not every image comes out perfect—we’ll refine it later. After a few tries, I ended up with some good results.
4. Cropping and Resizing the Images
Now I’ll crop each headshot into individual images and resize them to around 720x720 pixels. In PhotoPaint (or your preferred software), resize the largest dimension to 720 and keep the aspect ratio locked.
Some of the images might lack padding at the top of the head or around the shoulders. To fix that, we’ll use Outpainting in Stable Diffusion WebUI.
Outpainting with Stable Diffusion
Drag one of the images into Stable Diffusion WebUI, under the Img2Img tab.
Use this prompt:
<strong>Prompt:</strong> Elven girl, bare neck and shoulders, white backgroundplant, flower, furniture, door, window, people, person, handsMake sure the image dimensions are correct by clicking the yellow triangle in the Resize To box.
Set the Script dropdown to Poor Man’s Outpainting. Set Pixels to Expand to 48 and Mask Blur to around 8.
You might need to run several attempts to get decent results. Increasing Sampling Steps to around 60+ can help.
Repeat this process for any images that need padding or adjustments.
Refining the Profile Images
Our original image looked very photorealistic, but the profile shots might not match that level of realism—this is common when using --cref in MidJourney. To fix this, we’ll refine these images by using the AI Bump technique, much like we did with the DAZ example (Manuel). We’ll also use the original photorealistic image as a reference guide.
1. Prepare the Original Image
First, crop and resize the original image if it’s too large.
Set the Script dropdown to None to turn off outpainting.
2. Refining the Profile Images
Load one of the profile images into the Img2Img picture box.
Use this prompt:
<strong>Prompt:</strong> Photo realistic image of a pale-skinned Elven woman with frecklescartoon, painting, illustration, (worst quality, low quality, normal quality:2), necklaceNotice that I left lipstick out of the negative prompt this time because I want the lips to retain some color.
Adjust the settings:
Make sure no other extensions are active.
3. Using ControlNet for More Precision
Click Generate.
Tips for Fine-Tuning
If the source image looks too cartoonish, try increasing the CFG Scale to 8 and the Denoising Strength to 0.52.
To reduce glossiness, add these keywords to the prompt:
matte skin, (natural skin), (soft lighting)and these to the negative prompt:
(glossy skin), (oily skin)You can also try switching to the ip-adapter-faceid-plusv2_sd15 model for different results. If you use this model, include the matching LoRA. In the LoRA tab under the prompts section, select the ip-adapter-faceid-plusv2_sd15_lora. The prompt will automatically update to include
<lora:ip-adapter-faceid-plusv2_sd15_lora:1>.If you don’t have the LoRA, download it from this link and place it in
\stable-diffusion-webui\models\Lora. Then refresh the LoRA tab to load the new model.Final Result
In the end, you should have a good collection of head angles for IPAdapter to work with:
Note: The ears might not match the original reference exactly, but for our purposes, they are close enough.
FacePop in Depth
FacePop is an extension for Automatic1111's Stable Diffusion WebUI and ForgeUI that enhances AI img2img processing by tackling the challenges of facial inconsistency when characters appear at different distances and orientations within images. It employs advanced face detection to locate faces—even small or tilted ones—and then crops, upscales, and rotates them to an upright position.. By processing these faces separately and reintegrating them into the original image with masking to prevent double processing, FacePop attempts to accurately preserve consitancy of characters across various image compositions.
Analyzing the Example Images of Manuel
Consider three rendered images of Manuel at a resolution of 1080x810 pixels (a 4:3 ratio), each capturing him in a cocky stance with his head tilted approximately 15 degrees to his left.
Close-Up Shot:
Medium Shot:
Long Shot:
These images serve as practical examples to explore how varying face sizes and orientations impact the performance of AI models during img2img processing.
Technical Issues Illustrated by the Example Images
Let's setup Automatic1111's Stable Diffusion Webui for doing an AI Bump using IPAdapter and our Character Profile Package of Manuel.
You can see my configuration above. One thing to note is the denoising is set low for SD1.5 model of .32. The lower this is set the less the AI Bump will drift the final image from the original. Other models will handle denoising and CFG differently and .32 might be considered too high. Reference the information to whatever model you using for averages and recommended settings, as well as just experiement.
Configure ControlNet with IpAdapter PlusFace and use our Character Profile Package for Manuel for guidance.
Here is our results without FacePop
Even though we used CN and IPAdapter the results are less than amazing or consistant of Manuel.
Let's try this again with FacePop now active. We will also open and enable the Seperate Face Processing section. By activating we can override the default WebUI settings whe processing the face. We can specify Sampling Steps, CFG Scale, Denoising as well as a different Prompt and Negative Prompt (note: even when enabled if prompts are left blank they will use the default ones from above.)
By default Output Faces is enalbed, which will include the face only processed image in the output folder along with the final processed image.
Final Image
The results are probably not so obvious with the Long Shot of the AI Bumping, except to demonstrate how using these techniques without proper scaling and alignment, you will get inconsitant and poor quality results.
So let's repeat the exact same process just swapping out the Medium and Closeup shots.
Medium Final Results.
Close Up Shot
1. Impact of Face Resolution on Feature Extraction
Close-Up Shot (494x494 pixels):
Medium Shot (165x165 pixels):
Long Shot (64x64 pixels):
NOTE: Even with FacePop's upscaling of the face there is still going to be signifcant detail loss due to the abscene of information due to pixelation. The only way to really overcome this is to render the image at larger resolutions.
2. Challenges with Face Detection and Landmark Localization
Close-Up Shot:
Medium Shot:
Long Shot:
3. Effects of Head Orientation
4. Information Loss Demonstrated
Nyquist Sampling Theorem Implications:
Pixelation and Quantization Errors:
Inconsistencies Observed in AI img2img Processing
1. Variability in Generated Outputs
Close-Up Shot:
Medium Shot:
Long Shot:
2. Artistic Style Fluctuations
3. Pose and Expression Misinterpretation
4. Amplification of Artifacts
Noise Introduction:
Distortion Effects:
Technical Factors Contributing to Observed Issues
1. Convolutional Neural Network Limitations
Receptive Field Challenges:
Pooling Layer Effects:
2. Face Detection Algorithm Thresholds
Minimum Size Constraints:
Orientation Biases:
3. Generative Adversarial Network (GAN) Challenges
Discriminator Limitations:
Mode Collapse Risks:
How FacePop Works to Improve AI img2img Processing
FacePop is a specialized tool designed to tackle the challenges of AI img2img processing when characters appear at different distances and orientations within images. It enhances the quality and consistency of facial features in generated images, ensuring characters like Manuel look accurate and recognizable across all shots. Here's how FacePop achieves this:
1. Aggressive Face Detection
Comprehensive Scanning: FacePop uses an advanced face detection algorithm that aggressively scans the entire image to locate any faces, no matter how small or tilted they are.
Why This Matters: Traditional face detection might miss small or angled faces, especially in long shots. FacePop's method ensures that every face in the image is detected for processing.
2. Cropping and Upscaling the Face
Cropping the Face: Once a face is detected, FacePop crops it out of the original image.
Upscaling the Face: The cropped face is then upscaled to a default size of 720x720 pixels. Users can adjust this size based on their preferences. The aspect ratio is maintained by default to avoid stretching or squashing the face.
Adding Padding: An additional padding is included around the face—by default, this is 35% of the 720x720 size, but users can customize this. Padding ensures that the surrounding areas (like hair or parts of the neck) are included, which helps in seamless reintegration later.
Why This Matters: Upscaling increases the number of pixels representing the face, providing more detail for the AI to work with. Padding ensures context is preserved around the face.
3. Correcting Face Orientation with Mediapipe
Note: Why blue? At this stage the extension has converted the image to OpenPose module's native format of BGR which is different than the standard RGB. The image indicates the detected rotated upright position, while the red dots indicate the faceical landmark position's original non rotated location.
Using Mediapipe's Landmark Detection: FacePop employs Mediapipe, a powerful tool that detects facial landmarks such as the eyes and nose.
Rotating to Upright Position: By analyzing the positions of the eyes and nose, FacePop calculates the angle of the head tilt. It then rotates the upscaled face so that it's upright.
Why This Matters: Aligning the face to an upright position simplifies the AI's task, as most models are trained on upright faces. This improves the accuracy of facial feature processing.
4. Separate AI Processing of the Face
Isolated Processing: The upscaled and rotated face is processed separately through the generative AI model (like Stable Diffusion).
Enhanced Quality: Because the face is now larger, upright, and isolated, the AI can focus on enhancing details, correcting imperfections, and applying styles more effectively.
Why This Matters: Processing the face separately ensures that the AI has the best possible input to work with, leading to higher-quality and more consistent results.
5. Generating a Face Mask
Creating the Mask: Alongside processing the face, FacePop generates a mask—a black-and-white image that indicates where the face is located within the original image.
Alignment with Original Image: The mask is carefully aligned so that when the processed face is placed back, it fits perfectly over the original face area.
Why This Matters: The mask ensures that only the face area is updated in the final image, preventing any overlap or double processing.
6. Reintegration into the Original Image
Restoring the Face: After processing, the enhanced face is rotated back to match the original angle and scaled down to fit the original image size.
Seamless Blending: Using the mask, the processed face is overlaid onto the original image, replacing the old face without affecting the rest of the image.
Preventing Double Processing: By processing the face separately and using the mask during the final image generation, FacePop ensures that the face isn't processed twice, which could cause distortions or inconsistencies.
Why This Matters: This step ensures that the improvements made to the face are integrated smoothly, maintaining the integrity of the original image while enhancing the character's facial features.
7. Background Removal with MODNet
Using MODNet: FacePop includes MODNet (Mobile Object Detection Network) by default, which is a tool that removes the background from the face image during processing.
Focusing on the Face: By eliminating the background, the AI model concentrates solely on the facial features without interference from surrounding elements.
Why This Matters: Background elements can sometimes confuse the AI or introduce unwanted artifacts. Removing them leads to cleaner, more accurate facial enhancements.
How FacePop Addresses Previous Challenges
Improved Detail in All Shots: By upscaling the face to a larger size, even faces from long shots (previously only 64x64 pixels) become rich in detail, allowing the AI to process them effectively.
Handling Head Tilts: Rotating the face to an upright position before processing eliminates issues caused by angled faces, ensuring consistent results regardless of the original orientation.
Consistent Character Appearance: Processing the face separately and reintegrating it carefully ensures that Manuel's facial features remain consistent across close-up, medium, and long shots.
Enhanced AI Performance: With better input data (larger, upright faces without background distractions), the AI model can perform at its best, leading to higher-quality outputs.
Postwork..next (placeholder)
Overlays and Advanced Techniques...final (placeholder)
sorry haven't updated as quickly as I had hoped, but should have postwork section done by the end of this week.
Shouldn't this be in the AI forum rather than cluttering up the Commons.
It might have gone in Art Studio too, but we do try to keep the AI stuff in the AI forum so I have moved this.
Really, so this forum is for all AI and not just DAZ AI?
Yes-ish
Ruh-roh... :: mischievous, knowing smirk ::
Just stopped by to say hi and this isn't dead, just had other projects needing attention and needed to do research on how to improve low pixelated faces the father they apear in the scene.
Oh and for eye direciton, see: https://www.reshot.ai/tools/ai-eyes-editor