Thread to discuss/collect tips, tricks, tutorials, etc. for Mec4d's PBS shaders (all volumes)
 greymouser69
Posts: 501
greymouser69
Posts: 501
These shaders are so amazing but it can be very time consuming to dig through numerous threads to understand how to best use them plus the countless little tips & tricks so I decided to create a central thread in what I hope is the best place to collect them. I'll try to copy/paste what I can find from various other threads as I can.
Lets go folks and share our understandings!
Collection of related threads so far:
https://www.daz3d.com/forums/discussion/76602/mec4d-pbs-pure-metals-merchant-resource-commercial
http://www.daz3d.com/forums/discussion/72523/mec4d-pbs-shaders-vol-2-released-commercial
Daz 3D is part of 
Connect
DAZ Productions, Inc.
7533 S Center View Ct #4664
West Jordan, UT 84084
Licensing Agreement | Terms of Service | Privacy Policy | EULA
© 2025 Daz Productions Inc. All Rights Reserved.
Comments
A beginning
Another one from Mec4d:
TIP leather and skin love to have some slightly light source behind on the side it bring out the texture and normal even better and make it more dimensional thanks to fresnel , sometimes just white object on the side that is not visible to the camera can reflect the light back from the side especially if you render just with sky-sun or scene without much elements in , try it out next time
Thank you for starting this topic, Greymouser. I've favorited the thread!
With so much to learn already, with only two volumes out, it is a great idea to keep the tips and tutorials in one place. I'll probably mostly lurk, looking for answers, but I'll be here.
Another Mech tip on Fabric shaders:
(example here was a cloth sail)
TIP ...How to replace the fabric shader with original textures , Apply the white cotton , then load the original Sails color textures under Base color and under Translucent color and leave everything else as it is and you should have it all perfect you want with the original textures, you can use also the original Sails normal or bump maps no problem it will not affect the result
Fantastic resource! thanks for starting this!
Uhhhmm where is the little favorite star thingy? Its not showing for me....Never mind i refreshed and now its there.
I will contribute more to it once I am done with my projects here , very good idea @greymouser69
I recently bought the two volumes and I started using them immediately (I was having trouble with some fingernails, for example, so I used one of the presets and it solved my problem—once I'd sorted the tiling out!), but I definitely feel I'm only scratching the surface of them so this will be a very useful thread. Thanks for starting it.
Ok I think I am starting to get an idea of the whole scale thing. As Cath said you really have to "eyeball" each surface because I've had a surface that needed scaled down and others that needed scaled up to look appropriate.
That is correct depends of the UV's one part can be need to be scaled up or down, especially with overlapped UV's were the same scale dont count ', or your plane ground is bigger so you need to tile the materials with higher volumes , I included couple of the Scale Tools as references for fast checking what you need in the scale or better say Tilling value , higher values smaller details, lower values bigger details of the shader
usually everything in the scene that is bigger than 20 inches need to be Tilled up and smaller than 20 inches down
Scale up = Tilling Down the shader - bigger details on the texture
Scale down = Tilling Up the shader - smaller details on the texture
Not yet complete but shows some nice details on the brick. I may need to scale up the concrete on the floor, not sure. Forum distorts it, full size looks a lot better.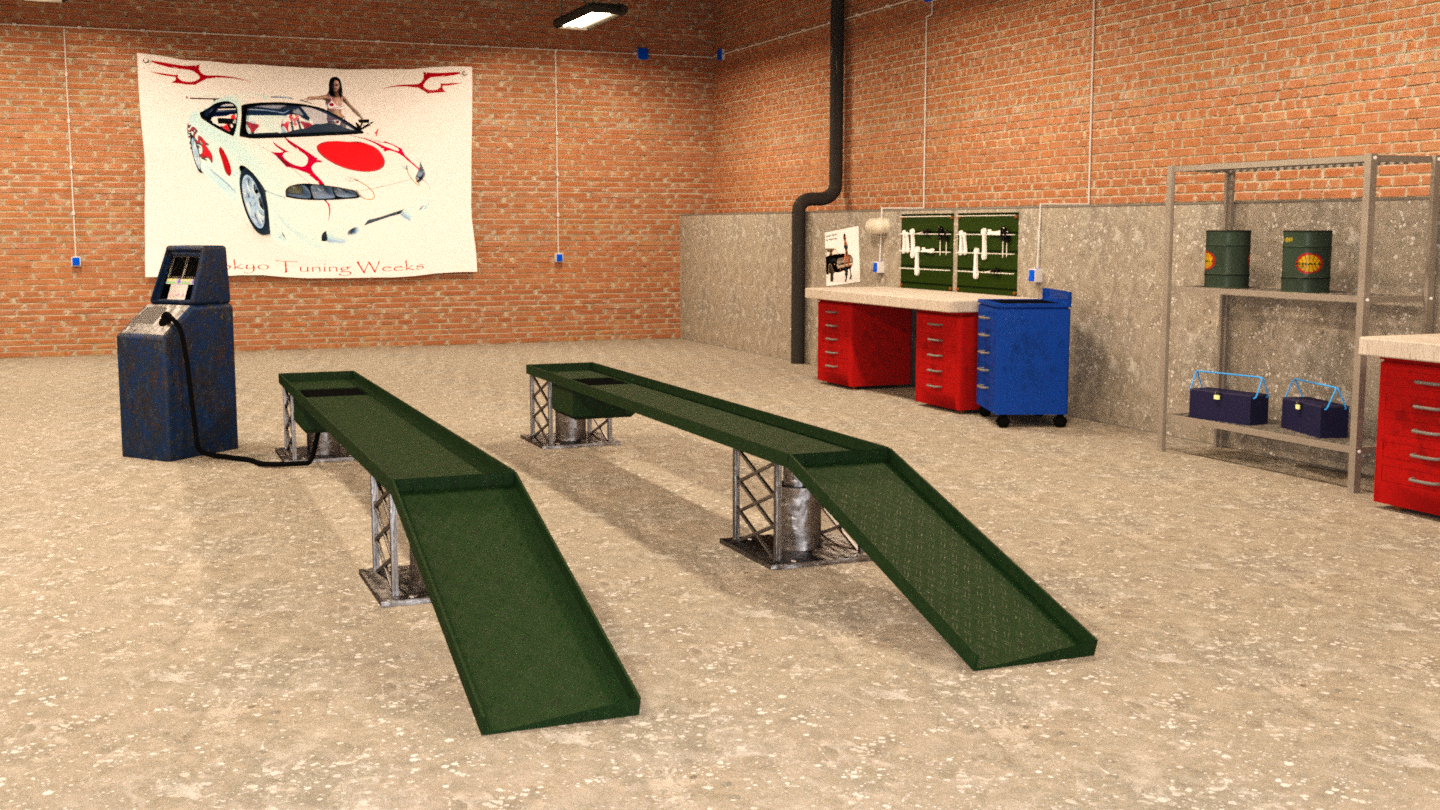
Mod edit to fix your image
Very well done , I would tile down the value of concrete just slightly for bigger details , the breaks looks really great and very physical appearance I see shadows under each break
if you want in the future get the break another look you can change the Base white color to little darker but never go below 186 for more smoky older effect and the same to other materials they will look less new .
Thanks for the tip, I will give that a try. One thing I was kind of wondering how to do would be to dirty it up some since it is a garage where they work on vehicles so it shouldn't be quite so clean. Dirt & oil spots maybe?
yes you can try on Decals over it , and set the cut opacity little lower for the semi-transparent dirt effect and change the white color under maps for little more gray it will give the less new effect , also try to play with the light , make one lamp in the back less bright for more uneven dramatic effect . it will create more depth to the full scene , also blacks under the tone mapping will add some drama to the scene creating more contrast usually I use at 64 value
Ok, adjusted some more. Reduced the lights from 120 watt fluorescent to 85 watt fluorescents, scaled up the concrete floor and darkened the diffuse on both floor and wall maybe a bit too much on floor... Adjusted crush blacks in tone mapping to 0.64 as well. Still in progress but I am getting somewhere. Interestingly the reduced lights and maybe crush blacks actually made it render a lot quicker than the previous settings.
Yes it starting to look more regular indoor and less like light in super market more atmospheric now
Thanks Cath! I'm completely new to Iray since I was away from DS & 3d for about 3 years and just came back this year. Lots of new things to learn!
I thought I saw you say somewhere that it was possible to use multiple different of these shaders on the same surface but never saw you explain. Or am I just mistaken?
Nice little video tutorial about rendering glass from Cath.
https://www.youtube.com/watch?v=WV7PVNj8mIQ
I was about to post it here haha , Thanks!
Here is a tip how to use Matte object in Daz Studio for masking and composing figures into 2D not really my shader related but very useful
you can use Matte objects to hide figure parts, as shadow catcher or light or reflection catcher
here mini-tutor about using matte to hide partial models to match 2D backdrop or HDR
Here is another tip about using Matte function objects in Daz Studio , this time Shadow Catcher , cast shadow on 2D backplate or HDRI walls etc..
Here one more tip of using Matte Object to hide your 3D figure behind 2D object in 2D backplate or HDRI
Excellent thread greymouser. Thanks
When tiling with high values and/or tiny sized textures beware of the pattern that will appear unless it is what you really want (chainmail for example). In this picture and the previous one you can see a pattern forming on the concrete wall. It is quite obvious between the blue toolbox and the shelves.
Great thread! I think I have read through most of the ones I could find. I missed out on some neat freebies with getting too busy, but I am learning a lot. :)