Tutorials with David and Horo
 LordHardDriven
Posts: 937
It's my intention to take advantage of all the wonderful tutorials David Brinnen and Horo Werneli have provided the Bryce Community both the free ones and the ones on their Bryce Mentoring DVD Product. Based on that I figured it would be a good idea to have a thread specifically for the purpose of posting the results of the tutorials and recieving feedback from David and Horo. Then I got to thinking why make it just for me? So I propose this thread be for anyone who wants to also share the results of following David's and Horo's tutorials and get feed back.
To start off here is the first one I did. I've already shared this one elsewhere though and gotten feedback so this is more just to set the tone of the thread. Anyway here is the tutorial it's based on:
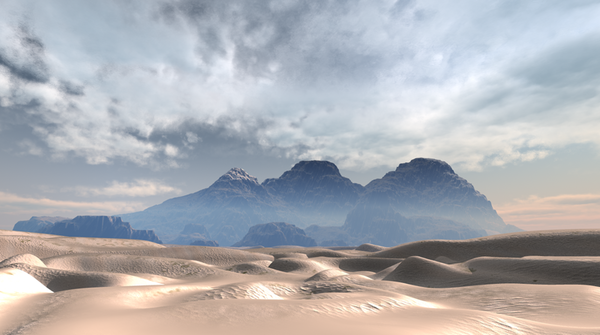
Bryce desert landscape - part 1 - a 15 minute tutorial in two parts by David Brinnen
Bryce desert landscape - part 2 - a 15 minute tutorial in two parts by David Brinnen
And below here, is my result.


Comments
Okay here is another result of completing a tutorial, in this case the tutorial followed was:
Bryce lake in a landscape - a 15 minute tutorial by David Brinnen
Now this one I have also already shown to David for review in a different thread. This one however I was unable to use the exact same HDRI as I didn't own the approriate set at the time. There was however a reduce resolution version of the same HDRI that came with Bryce. The first image below is the one made with that reduced resolution version. Because the resolution was reduced I sought to offset that somewhat by turning up the quality setting for the HDRI to 256. Now however I have since bought the necessary pack containing the proper HDRI and so I decided to do it again with the Hi Resolution version used in the video and since I was doing that I turned the quality back down to 16. The result is the second picture. Now that I'm able to compare the two the increased quality settings seemed to just make the sunlight seem brighter and so even though the quality is lower I like the second one better. Other then that though I'm not seeing much of a difference. So either the quality settings did make up for the resolution or the resolution wasn't as much of a factor in the result as I thought.
A final note, in the video you're encouraged to not try to save the file with the maximum size HDRI as it will likely cause Bryce to crash. So the advice is to switch out a lower resolution for the higher one, when you want to create an image. No warnings were given though that it would turn off the haze when you did that so at first I thought it was a resulte of the different HDRI requiring me to reposition the terrain. Fortunately before too long it dawn on me what changed was that the haze was gone. Now the video did encourage you to recheck the add to sky setting as that also gets turned off but in the future maybe it's a good idea to advise viewers to recheck all their skylab settings?
n.b. for Firefox users who are saving these tutorials with Download helper, there's an important update available ;-)
Okay here's yet another one that was already done previously but with a lower resolution HDRI then the one used in the tutorial. It too was able to be updated to the appropriate HDRI after my latest purchases. Here is the link to the tutorial it was based on:
Bryce still life project - "capsules" - a 15 minute tutorial by David Brinnen
In this case I'm less pleased with the updated version but only because when I changed the HDRI it redisabled the sun and I didn't notice it but with the sun disabled it totally killed the anisotropic effect. (this is what happens when you start a render just before going to bed) Unfortunately for me and my computer this render takes about 8 hours so all I can show right now is the original and the updated one where I forgot to turn the sun back on. Sometime later today though I should be able to post how it should look. For now though the first one is the original and the second one is the updated one with the sun accidentally left off.
Also one note for anyone interested in following this tutorial. I improvised the pill bottle on my own and as such that is not part of this tutorial. The tutorial when followed will only result in a pile of pills on a flat surface.
You are correct about the haze, it takes a fresh set of eyes sometimes to see what it right in front of us. To me it is an unhelpful automation, I'd prefer it if I could load a HDRI and not have settings changed for me. But well... I will try and remember in future to raise this point.
Your other observation is also very interesting in that it gives a good example of the difference between the image of the HDRI you see in the render and the light supplied from that image. A low or high resolution version of the same HDRI should provide a very similar sort of light but... much depends on the size of the light sources.
The quality control determines the number of simulated light sources in your scene. A procedure (algorithm) determines where these light sources appear in the sky, their colour and intensity is determined by the HDRI. So if you set the quality to 16 then 16 virtual suns appear in the sky and the algorithm should make sure they are distributed in such a way as to take account of any major light sources - like the real sun in your HDRI - for example.
Of course 16 suns to simulate a backdrop of thousands of pixels is not very many. So as you modify the quality these simulated lights shuffle around a bit to make room for one another, the intensities change accordingly and as a result the light changes. The practical upshot of which is that changing the quality setting can alter the overall brightness of the light and also, changes in HDRI resolution, even though the virtual light positions have not moved, can change the light because the pixel it is getting the information from has changed. (this effect can also be seen when rotating a HDRI backdrop and using low quality settings - the light generated from the sources varies - sometimes dramatically)
I don't think there is any averaging in the HDRI sampling to get the light information. Horo would know better. So what I suspect this means, is if a HDRI was made where alternate pixels were either as bright as the sun or fully black, then very slight changes in light position would probably cause radical changes in light output.
As a backdrop, the difference between high resolution and low resolution HDRI is obvious. As is the memory footprint. One "trick" you could do, is set up your HDRI backdrop image as you want it. Strip out everything in your scene. Spherical map the the HDRI backdrop along with or without sky effects (depends on your scene). Then light your scene with a low resolution HDRI and put in a giant sphere on which you put your captured spherical map. This will save a lot of memory.
You may not be so happy with your second pills render - but it serves as an excellent example of the difference that providing a key light source makes to the overall impression the render gives. If anything I'd say the second render looked more realistic in terms of overall lighting, all be it a little dull - that could be corrected, just as a photographer would do using some software.
I'll keep the sperical mapping option in mind for the future, I don't think memory usage was much of an issue in this scene. Besides I'm not sure if I'm ready to tackle the spherical mapper just yet. :) I guess the free HDRI's Horo included with Bryce aren't all that low of a resolution since I'm not seeing much difference between it and the 8260 version. I'm thinking the one Horo included is actually more of a mid range resolution like maybe 2560?
Well it's funny in a way, I was fine with the second render until I compared it with the first. I mean I knew it was a bit darker but I didn't even notice the Anisotropic effect was gone, just that something seemed different. I guess I just haven't trained my eye as well as yours must be by now? :)
You notice the difference between the resolution of the HDRI backdrop when you try narrower field of views. For the lake landscape scene I used a very wide FOV. When you start using your camera like a telephoto lens (at least in Bryce we don't invade people privacy with our optics) you will soon discover what impact the HDRI resolution has. Also, depending on the render size - obviously. The second render, even at this small size displayed in the forum is noticeably crisper.
And you talk about training your eye and this will come, as you make more renders you will notice more and more, and in the end the result will be you can see the differences and you will think other people do not - but... and this is what I have learned, people do see the differences they just can't say exactly what they are, and it is all these small differences that add up.
Well darn, I guess I won't be doing any renders of Princess Kate any time soon then? :)
@Mark - from a technical point of view, the HDRI is transformed to a spherical projection for the lights. They are sampled using the median cut algorithm. The image map is divided into rectangles and each rectangle gets a point light source. Each light source created has the same intensity but varies in colour. An area in the HDRI that is bright gets a lot of small rectangles with a light in its centre, for less bright parts, the rectangles holding one light source is larger. the rectangles are not square.
At quality 16, there ought to be 16 light sources distributed in the picture. It appears, however, that there are 8 more. The higher the quality the more light sources there are in the picture. Because the algorithm divides the rectangles by two each time more light sources are added, the quality goes by the power of two. The resolution of the HDRI (diameter 600 pixels or 6000 pixels) has no influence on the light generated. The light map is probably rather small.
Resolution only matters for the backdrop. And the larger the document size and the smaller the camera FOV, the larger HDRI needed. So if the document width is to be 1000 pixels and the camera AOV 60° (AOF = FOV * 1.25; therefore FOV 75° at Scale 100 gives an angle of view of 60°). There are 6 parts in a full circle of 360° if the AOF is 60°. The resolution for the HDRI to be depicted well focused needs to be 6000 pixels wide. The 3840 diameter probes are based on a 8000+ pixel wide photograph and is therefore sufficient for this example.
You can either use a smaller document size or increase AOF for a lower resolution HDRI. Because Bryce cannot swallow really high resolution HDRIs because of the memory limitation, we have a separate DOF added for the HDRI backdrop.
If you use an HDRI as backdrop that is not directly visible in the render but only as reflection on an object, you can use quite low resolution variants. The object that reflects the backdrop is probably only 100 pixels wide.
Thanks although I'll likely forget most of that by later today. That's what I marvel at with you guys, you can keep such a large amount of technical data in your head. I guess though that's why you need to email remind yourself to check that postage though? You got so much technical stuff up there, there's not much room for less technical things. :)
There are things more interesting than others. If I need food, I get a reminder by getting hungry. So I don't have to bother about that and can concentrate on what interests me more. ;)
There are things more interesting than others. If I need food, I get a reminder by getting hungry. So I don't have to bother about that and can concentrate on what interests me more. ;)
I know, but still can't one marvel at how you and David have so much Bryce related knowledge at your fingertips? The way you guys are constantly learning new things about Bryce in a sense giving it new abilities nobody knew existed, and then making ways to put those features to good use? I mean isn't it fair to say in terms of Bryce you guys are on the cutting edge? Even folks who have been doing this Bryce stuff for a long time and are well respected in their own rights are acknowledging the work you gys are doing as being innovative and impressive.
I hope in doing enough of your's and David's tutorials and others too, that one day I can be half as good as you and David are at understanding Bryce and knowing how to make it give you what you visualize. See I got the creative mind to visualize things, I just lack the necessary skill to accurately reproduce it in Bryce.
Okay now that enough time has passed I have finally in my posession a properly lit copy of the capsules scene using the highest resolution of the HDRI recommended in the tutorial so we can now compare the lo res HDRI to the Hi res. The first one is the lower resolution one the second obviously is the higher resolution one. I see virtually no difference so my conclusion is that in this scene the resolution of the HDRI made no real difference.
Agreed but not surprising. A reflective surface would have to be very large to show up the weaknesses in a lower resolution HDRI. If for example, the ground plane were made reflective, then because it is flat, that would show the difference at once. Two reasons why I avoided this, the first being that still life use narrower FOV than landscapes so then even a high resolution HDRI would be at the limit of displayability and second, mixing reflection and TA ramps the render time up quite a bit.
@Mark: Hi res, low res, it's still a very good render. About the only thing I can sense is a very slight color difference in the lettering of the two. And I do mean slight. Still, I'm going to have to try that pill tutorial and see if I can't become a pill. However...
Besides trying to learn more about the DTE, thanks to the Bryce 7 Artist Guide, and information Horo provided, both sent and through a link in the Bryce Open Source thread, I've been going through the information at this site, http://www.robinwood.com/Catalog/Technical/BryceTuts/BrycePages/Bryce1Start.html . And when real life tasks were taken care of I've been trying to glue together the child's pull toy. It isn't really involved, but it's a learning project for me all the same.
It is still a work in progress, but I've gotten this far off and on. It still has to have a few more items placed in the bed, a rope of some kind, lighting, and a few other things I'm going to try. But here it is in it present condition.
And I would suggest going to the Bryce Open Source thread and find Horo's post with the DTE document link. It's a mountain of information.