How do you get rid of bright white noise on hair in IRAY?
 Malandar
Posts: 776
Malandar
Posts: 776
in The Commons
Title says it all, I have a render I am working on and most of it renders fine, no noise at all... BUT in certain places on her hair there is bright white noise, and I have no idea how to get it to go away... This is not normal noise. Does anyone know what is causing this? (It is the white noise in her hair close to the floor and right next to her head.)
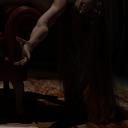
What is going on.jpg
1353 x 1358 - 1M
Daz 3D is part of 
Connect
DAZ Productions, Inc.
7533 S Center View Ct #4664
West Jordan, UT 84084
Licensing Agreement | Terms of Service | Privacy Policy | EULA
© 2025 Daz Productions Inc. All Rights Reserved.
Comments
Select the hair. In the Surfaces tab, select all material zones. In the Geometry section, reduce opacity to 0.99 or so from 1.0. That normally takes care of the problem.
It's an issue with Nvidia Iray. We're waiting for a fix.
I will try it now, thanks. (I'll let you know if it works or if I can get it to work anyway lol)
Okay, I tried it and set it to .99 and it did reduce it but not all of it. So I reduced it to .98 that took more away from it, but when I tried to drop it to .97 it hard set everything back to 1.00 and no matter what i do i can't change the value again. I shut DS off and am reloading it to see if that helps. Also there is no opacity setting that said just opacity and nothing else the only opacity setting on this particular hair is cutout opacity. Is that the same or do you know?
And I just now notice that someone deleted my image... REally? there was NOTHING wrong with that image.
Don't worry. The image is still there. Sometimes they don't show up.
You may have typed in 97 instead 0.97. That's happened to me.
Yeah I just saw that it is still there...
Okaay, now that I have had time to mess with it, it is just not working for me with the cutout opacity setting (the only opacity setting on this particular hair product) I have gone down to .6 opacity and the white noise is STILL there...
I have had the issue with white noise in hair as well. To fix it, I don't change the cut out opacity, but I increase the glossy roughness, and if needed, the top coat roughness. This should fix the problem.
This particular hair only has glossy roughness and it is set at 1.0 already with no room to go up so i changed the perameters for it to 20 and even at 20 it is still there.
Maybe change the glossy or top coat color to a more reddish brown? Then the highlights won't be so white. Conceivably. What hair is this, maybe someone else has it and can help test?
Judging by the shadow, you're using a point light. Don't use point lights. Change the geometry to a disk or a sphere, even a small one of 5-10 centimeters. Hot pixels like those are caused by very concentrated light; you want to give the light more surface area to spread around in. If you need a very hard spotlight, then adjust the angle and beam exponent rather than make it a point light.
Related to that, try rendering with Spectral Rendering set to Natural. As I understand it, that will massively expand the color space Daz operates in, making it much harder to create these hot pixels where the light is clipped. You may need to multiply your light value by 1,000 (not exaggerating). It'll also make your UV seams very, very noticable, but you may be able to get away with that here.
classic long haior Dforce
Actually, it is a spotlight directly above her.
I have Classic Long Hair, and I am pretty sure I got white dots with that hair as well. Not all the time, it depended on the lighting. If you are using the default Iray shaders with that hair, then the dual lobe specular weight is set very high (1.0). Try increasing the Dual Lobe Specular 1 and/or 2 roughness. Alternatively set the Dual Lobe specular weight to 0, that should get rid of the white spots.
by default, the light geometry of a spot light is a 'point', you can change that to a 'sphere' or a disk' and increase the width and height from 10 to 75
Yes, this.
Not only will you spread the light out and reduce fireflies, you'll soften that incredibly fake-looking shadow.
Although changing the height does nothing for a sphere or disk. Only the width does anything.
Spotlights are points when you create them. You have to change their geometry in the parameters tab to get them to be a disc or sphere. I set mine to anywhere between 50 by 50 to 100 by 100.
Maladar did you not see this post. Havos has that same hair and has that same problem and told you what they do to fix it.
That did it, thanks. I set it to 0 and all went away, I'll play with the settings and see if I can get them to go away without having to set it to 0.
Thank you for pointing this out, I started my last post before yours before they had posted that i think and then I got distracted because I had to take my wife to work I might have missed it otherwise.
EDIT: Edited to clarify.
Thank you very much everyone. Your help is GREATLY appreciated. I am still learning all the settings for the IRAY renderer. Is there a threrad on here or maybe a youtube video that explains what some of the various sliders do or how to fix common issues?
And Render complete, unfortunately, I can't post it here... Sucks because I really like how it turned out.
Did you get rid of the artifacts? Personally on a render problem like this I'd just postwork out those little white bits. The "renders I can't post here" are often my best ones too.
These are the ones that I use/know what they do:
Render Mode: "Photoreal" is the Iray default. "Interactive" will cut down on things like SSS to make it more like a video game engine. Basically a predecessor to Filament.
Progressive Render: Use Max Samples and Max Time to determine how long your render will run for. Render Quality will use an algorithm to determine when it's "finished", but I always turn it off.
Optimization -> Caustic Sampler: Cuts down on fireflies when rendering glass or water.
Optimization -> Instance Optimization: Determines whether instances are enabled ("Memory") or disabled ("Speed"). However, for some baffling reason, it also fixes an Iray bug where your character's skin turns orange and their eyes turn black if they're too far from 0,0,0.
Filtering -> Bloom Filter: Creates a halo around light sources, covering the pixelated edges of the emission geometry. Some people recommend doing this in Gimp/Photoshop, however.
Filtering -> Pixel Filter: How much the rendered image is blurred to hide it's "digtalness". People recommend "Mitchell" at 1.0 is the best. Going lower will sharpen the image, going higher will soften it.
Spectral Rendering: Determines which color space Iray renders in. Using "Natural" will massively expand the dynamic range, so it's much, much harder to get fireflies. You will have to jack your lights up to crazy values to compensate.
Tone Mapper: If you're too lazy to bring it into Gimp/Photoshop, you can fiddle with the brightness and color here.
Environment: Whether you're using an HDRI or just scene lights.
Yeah the solution Havos described worked and got rid of all the noise or hotspots or whatever you want to call it, leaving me a nice clear render.
Cool, that helps quite a bit, just having a description of what they do. I knew what a few of them do, but several I didn't have a clue, thanks for this.
Wow! I learned a ton about the lighting and fireflies here. Thanks to all the forum members for their advice!
I finally got the render posted on my deviantart page... dasquid is the name (In case anyone is curious. NSFW but nothing terrible, just side view of an elf in her birthday suit.
On hair, if it's trans-mapped "ribbon" hair check in the surface settings if the Thin Walled setting is set to OFF. If it is, try to turn it on. Apparently an update on Iray at some point made a difference on how the Thin Walled setting is read so that's why we get this new type of artifacts sometimes. If I understand correctly, it's meant to be off only for volume surfaces.