Awesome Iray Skin Shader Settings by FlorentMoon
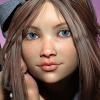
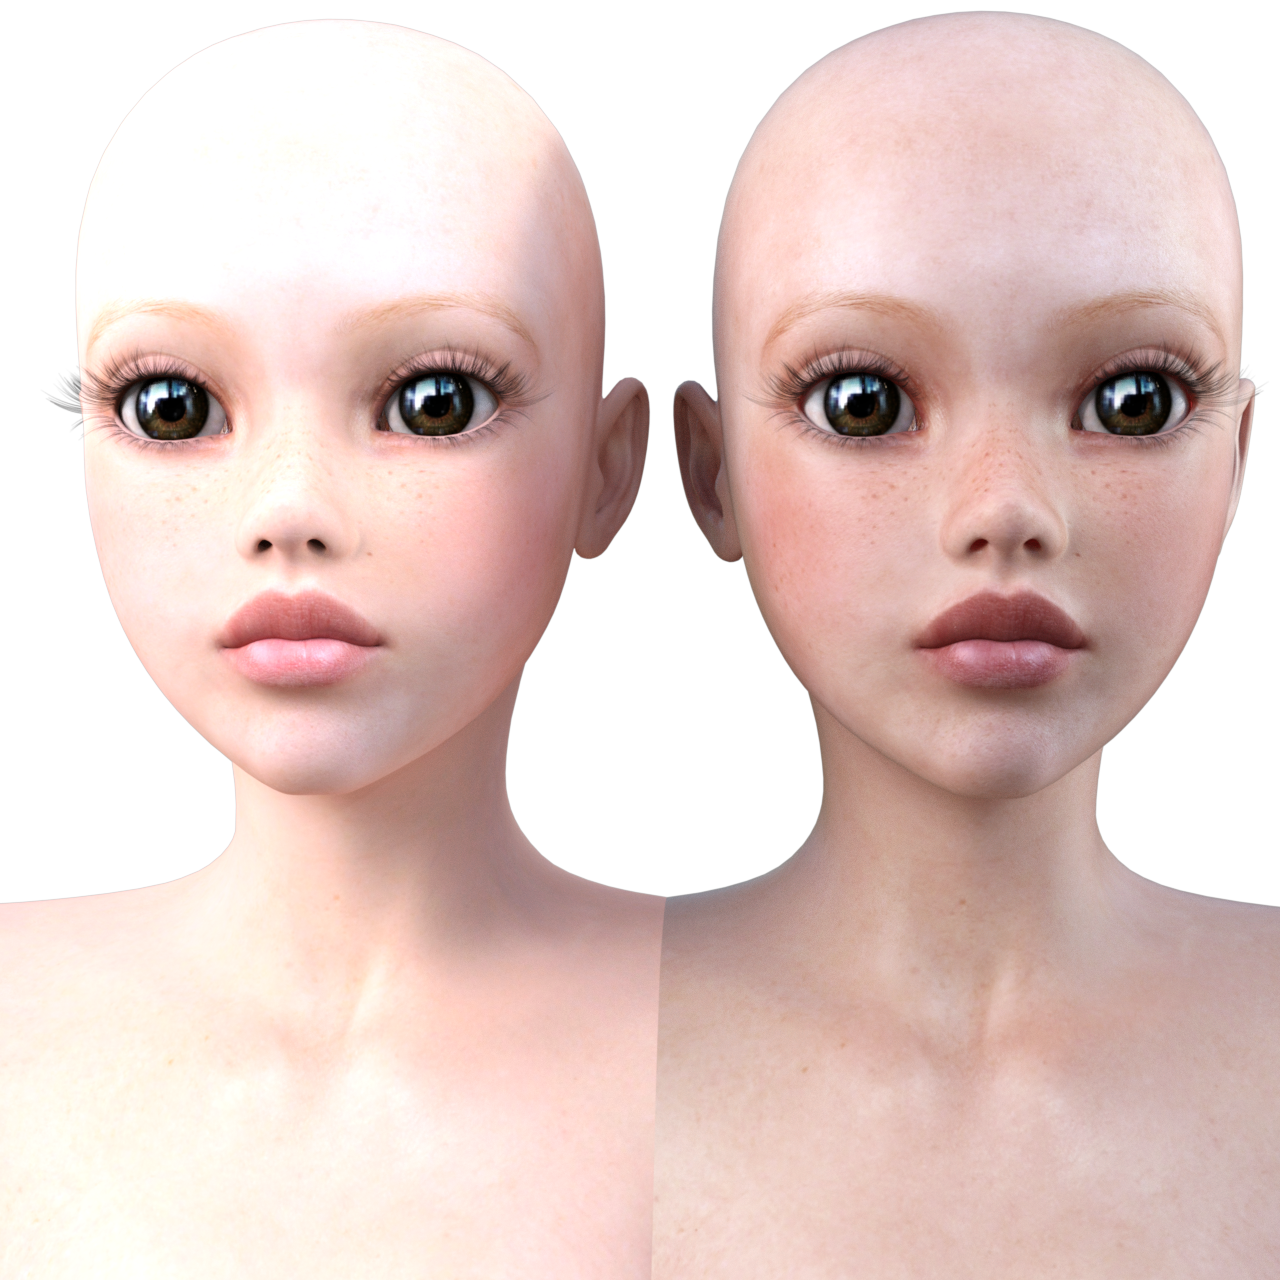
I found a great post by FlorentMoon on DeviantArt in which he shares his Iray skin shader settings with us.They are only screen shots of his settings, but it's worth the effort of manually imputing the settings, IMO. Once you put them in you can save them as a material preset for future use. Here are a couple before and afters to show you the difference the shader settings make (this is vs the default settings):
Once you've manually entered the settings in you can save it as a "Materials" setting. Then select any character you want to apply the settings to, then hold down Control and double click on the new material preset you saved (it should be under My Library >> Presets >> Materials) and tell it to "Ignore" materials. This keeps all your base materials/texture maps the same but changes the iray settings.
I hope you all find his settings as helpful as I have! :)
Daz 3D is part of 
Connect
DAZ Productions, Inc.
7533 S Center View Ct #4664
West Jordan, UT 84084
Licensing Agreement | Terms of Service | Privacy Policy | EULA
© 2025 Daz Productions Inc. All Rights Reserved.
Comments
what skins are you using here ?
The first one is Scotlyn for V4 (she's adorable and my favorite character so far). And the second one is Riley for Stephanie 5 (which is in the Stephanie 5 bundle and it's free right now). Grab it fast though, as it will only be free for a couple more days I think.
Look at Stephanies eyebrows. This technique has turned them reddish.
I don't really mind, that's an easy fix in Photoshop. The skin looks much better though, so that's worth a little eyebrow tweak later.
this link is not working for me and I am certainly very interested in these settings ! Any help would be appreciated.
Try This One.
If that still doesn't work then find Florentmoon on DeviantArt and go to his freebie folder in his gallery.
Thanks Diva !
thanks!!!
Well, I tried it...definitly something happening, but not sure what, nor how to even the colors out so it doesn't look like she's sunburned.
(I didn't have all the maps so i faked it a bit to get a basic try out).
(3DL mat on the left, receipe on the right)
The skin definitely looks better in the second one, imo. I noticed the settings do give a red tint to the skin. I usually just do a color adjust in post work. However if you don't want to do that in post work you might try changing the "translucency color" to black or dark gray. See if that helps. :)
The "patchiness on her face" doesn't look weird?
Sadly, it seems like there's no way to make this presets, unless you manually set for each makeup :( Maybe a script?
I don't know what you mean by "patchiness". If you mean tone variation - that's how natural skin looks. If you look at photos of people that haven't been photoshoped to death (something that's hard to find in this day and age), then you'll notice there are natural tone, hue, and value variations in the skin:
(Mod -Please remember to limit the width of images to 800 pixels.)
Just change the settings on one part, say the face. Then make sure you have the entire face and all it's sub categories selected. (To do that, make sure that you're in the surfaces tab, select the face - or whatevery body part you added the settings to - and right click and tell it to expand all. Then Shift+Click on all the face settings and all the face sub categories in the surfaces tab. Make sure you're only selecting the face categories, not any of the other body parts. Once you have the entire face and it's sub categories selected, right click again on the selection and tell it to "copy selected surfaces".
Once you have that copied you can then select the entire body and it's sub categories. To do that just do what you did to select the face and all it's sub categories but this time select all of the body parts and their sub categories. Then right click and select "paste to selected surfaces". This will copy all the changed settings you made to the face and transfer them to every part of the body.
This changes the settings but it also changes the maps - giving all the body parts the face maps. So then you'll have to go in and change the maps for each body part back to their proper maps.
It's a pain in the bottom to do, but once you do that one time you don't have to do it again because you can then save it as a "materials" setting and can use it on any character and any skin.
If you do make a materials setting from it be sure and hold down Control then double click the new materials setting when you go to apply it to a new character. Control+double click will make a window pop up - be sure and select "ignore" materials in that window and hit Accept. That way it lets you keep the original maps and materials on each character and have it just change the surface settings.
hmmm..doing a close up it's more the upper cheeks area, but guess that's just how it is.
I generated normal maps from the bump maps (and used the bump for spec) for this one.. clearly the normals aren't great.. the face has it at 33%..the neck is at the 1, and you can see how pitted it is.
I figure it actually wouldn't be too hard to mass this... set up the base mats with the settings, then either mannual add the different make ups to the diffuse channel, or just run thru and make presets for them.
You're getting there I think, thought the bump maps or normals need to be set lower for sure. What generation figure are you working with? I find that the figure generation, the base skin, and the lighting make a pretty big difference in the outcome.
Using v4 converted to G2F. I switched models to one that has spec maps and hit closer I think...
Looking much better! The skin texture is looking very nice! The color is quite red still though. Did you ever try adjusting the translucency color, or does that not help?
BTW The beach scene is very cool! Where did you get that beach and ocean scene?
Reminder to image posters. Please limit width on images to 800 pixels.
Ah, I don't know that. Thanks for the heads up. I wonder why they don't just script it to either restrict images larger than 800 px or auto resize or something. When you add an image it doesn't even tell you.
The problem is that people use all different sorts of devices to browse the forums, and image sizes that look good on some devices will squidge widthwise on others when the auto resize is used.
You can make your image as large as you want (within the allowed range), just restrict it on the width using the tools when you post it.
If you click on the tab that says Link, once you have posted the location iin the first box you can set the image to open in a new window at full size by posting the link again and using the drop down box to say how it should display
Ah ok. I have a really bad memory so you might have to remind me again but I'll try my best to remember. :)
The beach is from http://www.daz3d.com/daz-studio-iray-hdr-outdoor-environments ; That's the lighting I'm using for this.
-------------------------------------------------------------------------------------------------------------------------------------------------------------------------------------------------------------------------------
I've played with the translucency color like diva suggested and it does a lot!
This is using the settings in the recipe:
Just chaning the darkness slider, I first went lighter (I sadly moved the camera between) color @ 1 .42 .33
Which was no good, so I've tried darker (.12 .014 .014)
And Darker (.049 .0060 .0066)
Darker seems to work better, and solves the eyebrown problem.
Edit (I'm having trouble with uploading right now..gonna reboot and see if it clears up)
Oh wow! Much better! Her skin is quite a bit darker now but it clears up the red. I'm going to keep experementing with his settings and see if I can tweak them a bit more. Once I get happy with them I'll be sharing them here. :) If you come up with any more tweaks that look good, feel free to share them! I'd love to see! Thanks @Scavenger !
PS - Those outdoor environments look great! They are definitely added to my wish list! :)
The darkness is more a function of the lighting, I think. I tired it on a Silver character with much lighter skin, and more direct studio lights..
You're right, that makes a big difference. I think each type of skin (light, medium, and dark) might need different settings, unfortunitely. Or maybe just different lighting. I find the lighting can make a HUGE difference in how the skin looks.
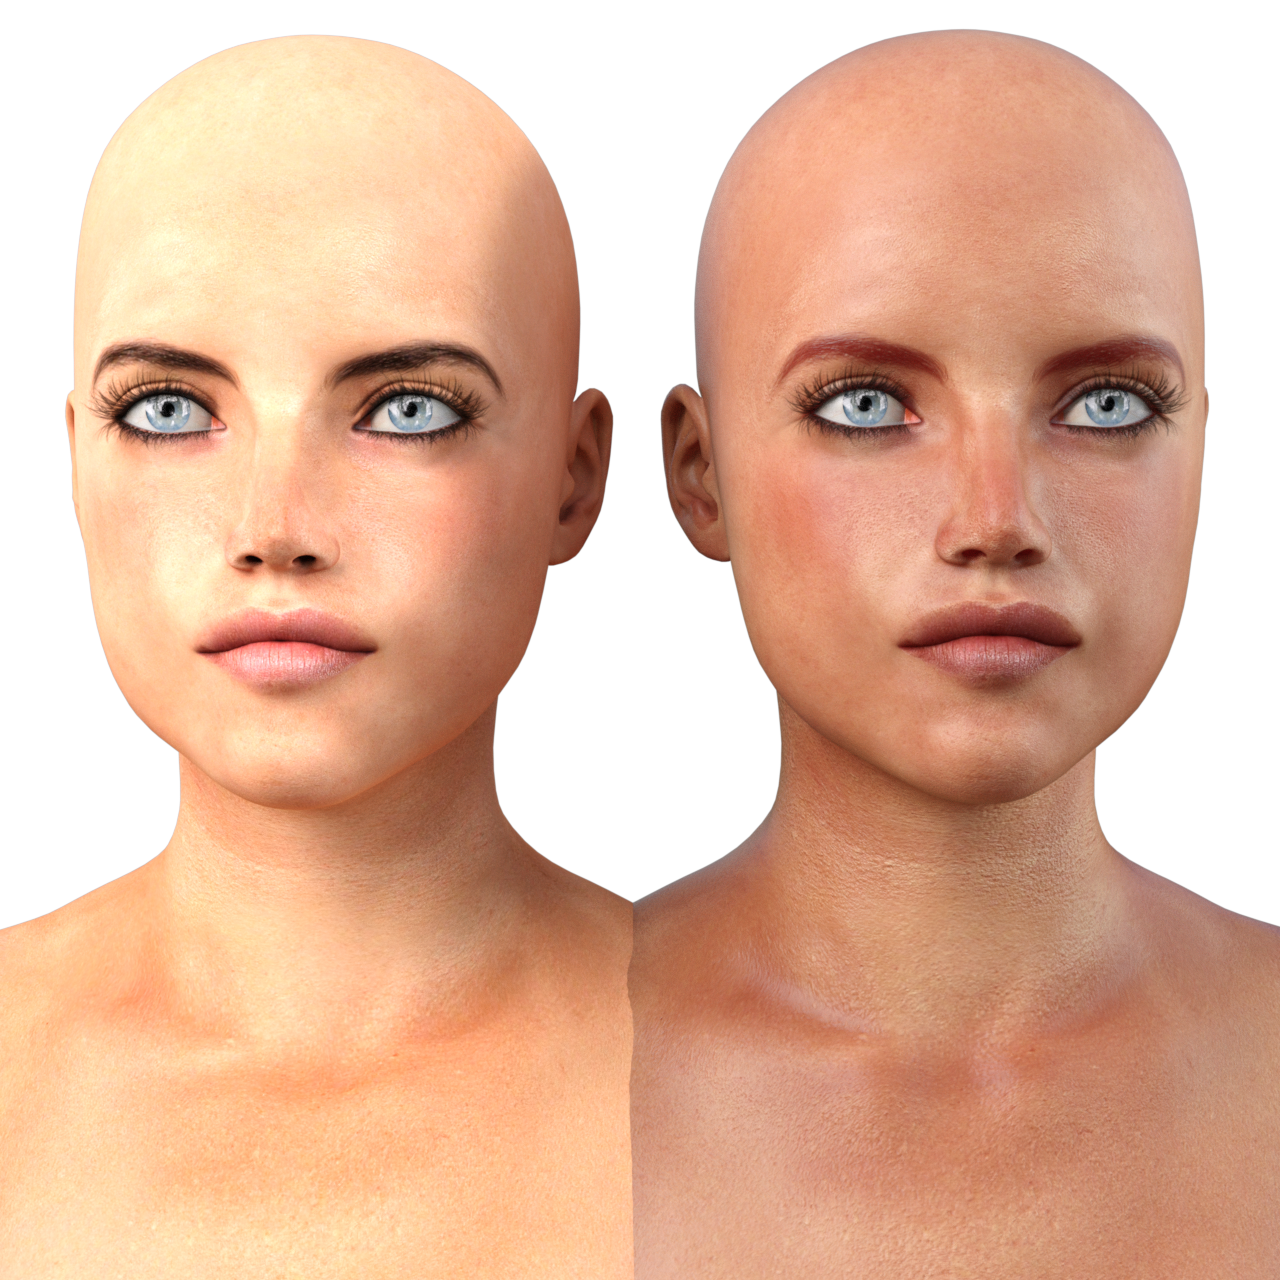
I'm working on skin shaders based on FlorenMoon's settings. I'm not quite there and it still needs work but I think I'm getting close to being happier with the skin.
The first and third are the default settings with the uber iray shader applied. The second and last one have the uber iray shader applied AND some of my own settings that I'm working on based on his settings. I think the default skin settings are just a tad too pink or orangy for my taste. I think my shaders are starting to make the skin look a little more realistic - at least IMO. :) Again, it's not "there" yet, but I think I'm getting closer to being happy with it.
Yeah.. I def see the orange...It's not really something I notice til it's really looked at it with a comparison. (I have a real bad eye for this kind of thing)
Ah I don't think you have a bad eye for it. It looks like your settings are improving a lot! The last one is much better IMO! :)
I think I might be just a bit picker than many people when it comes to skin tones - as a comic book colorist I focus a lot on colors and it makes me a little more picky about trying to get more real looking colors, I think.
See, I didn't notice a redish problem with the first bikini pic til you mentioned it :) I definitely see what looks better when looking at them, but don't necesarily know I need it :)
Artistically speaking, Colour Zones of the Face is a useful guide.
http://gurneyjourney.blogspot.co.uk/2008/05/color-zones-of-face.html